How to Delete Temp Files on Windows 7 [Manually & Automatically]
Whether you know or you don’t, your Windows 7 has collected a lot of temp files on it. The following guide shows how to delete temp files on your Windows 7 PC to free-up your memory space. Read on to find all the available methods to do the task.
Windows PC Clean Tips
Fix Computer is Slow
Windows Cleanup Tips
When you install an application on your Windows based PC, the app creates various kinds of temporary files on your machine. These files are used by the app to provide you with various features. Over the time, you will find that the temp folder on your computer has become too large and mostly contains useless files.
If that is the case, the first thing you will want to do is find and remove all the unwanted temp files from your computer. Deleting temp files usually does no harm to any of your apps as your apps can create them whenever they want. In the following guide, you will learn a few ways to clear temp files in Windows 7.
How to Delete Temp Files on Windows 7 Manually
If you are a user who loves using the built-in Windows tools to get your tasks done, you are in luck. The temp files on your PC can be manually removed using a simple and easy to follow procedure that requires no third-party apps.
All that you need to do to delete Windows temp files is to launch a folder and remove all the files residing there. The following is how you do it.
Step 1 Open the Run dialog box on your PC by pressing the Windows + R key combination. When it opens, type in the following text and press Enter.
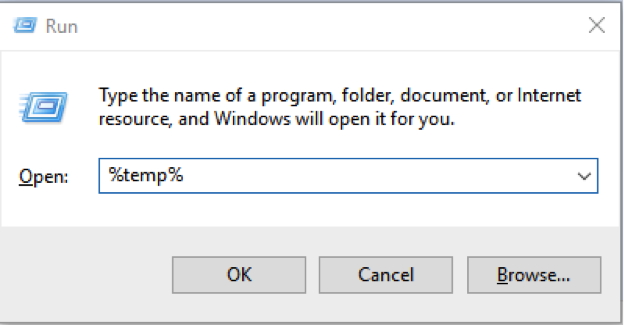
Delete Temp Files on Windows 7 Manually – Step 1
Step 2 The folder that keeps your temporary files will open. Press the Ctrl + A keys to select all the files in the folder. Then, right-click on any of the file and select Delete and hit Yes in the prompt to delete all the temp files from your machine.
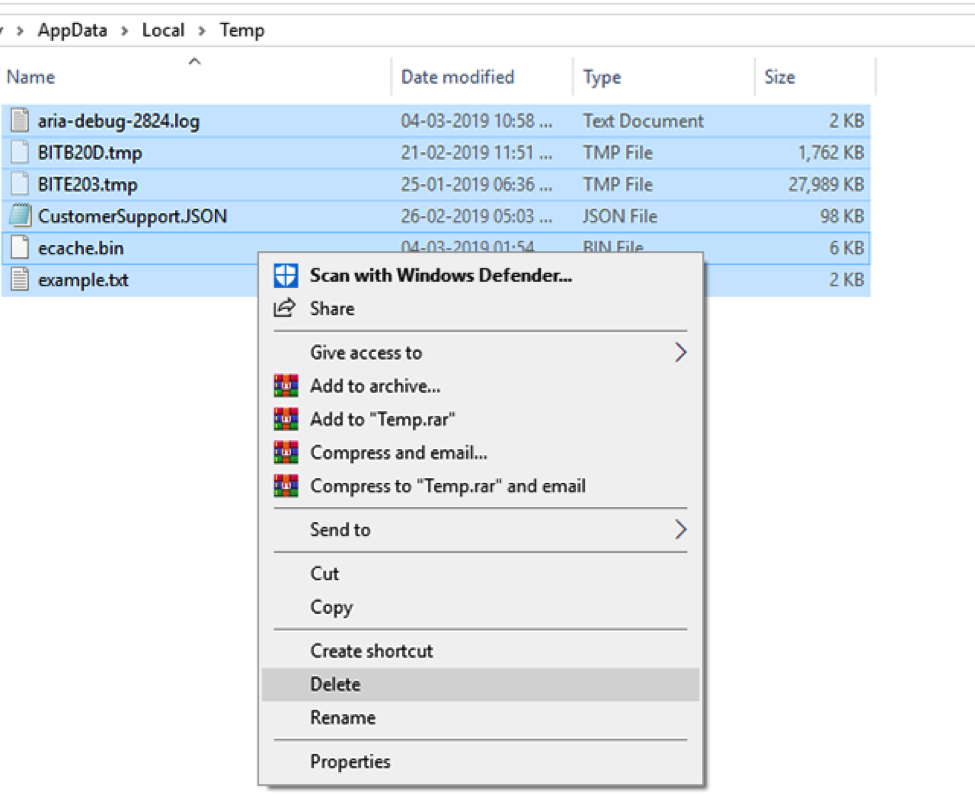
Delete Temp Files on Windows 7 Manually – Step 2
When the file deletion process has finished, you will have gotten rid of all the temp files stored on your Windows 7 computer. You will find you now have more memory space available on your PC.
How to Delete Temp Files on Windows 7 Automatically
Although the task of manually finding and deleting temp files from your Windows PC is easy, some users prefer using a dedicated app to do the task as it does it professionally and even finds temp files sitting in other folders to delete them.
In the above method, you have removed temp files but only from the temp folder. There may be other folders having temporary files in them and it is practically impossible for you to manually find and delete those folders.
Fortunately, you have Ashampoo WinOptimizer at your rescue. The app allows you to automatically find and delete all the temp files from your computer. The following are some of the features of the app for you.
- Remove Internet files
- Delete cache files
- Delete temp files
- One-click optimization of your entire PC
- Easy to use and fully automatic
If you would like to use the aforesaid app to get rid of temp files from your Windows 7 PC, the following is how you do it.
Step 1 Download and install the Ashampoo WinOptimizer tool on your computer.
* 100% Clean & Safe
Step 2 Launch the app, select Maintain system from the left hand side menu, and choose Drive Cleaner from the main panel given in the right hand side.
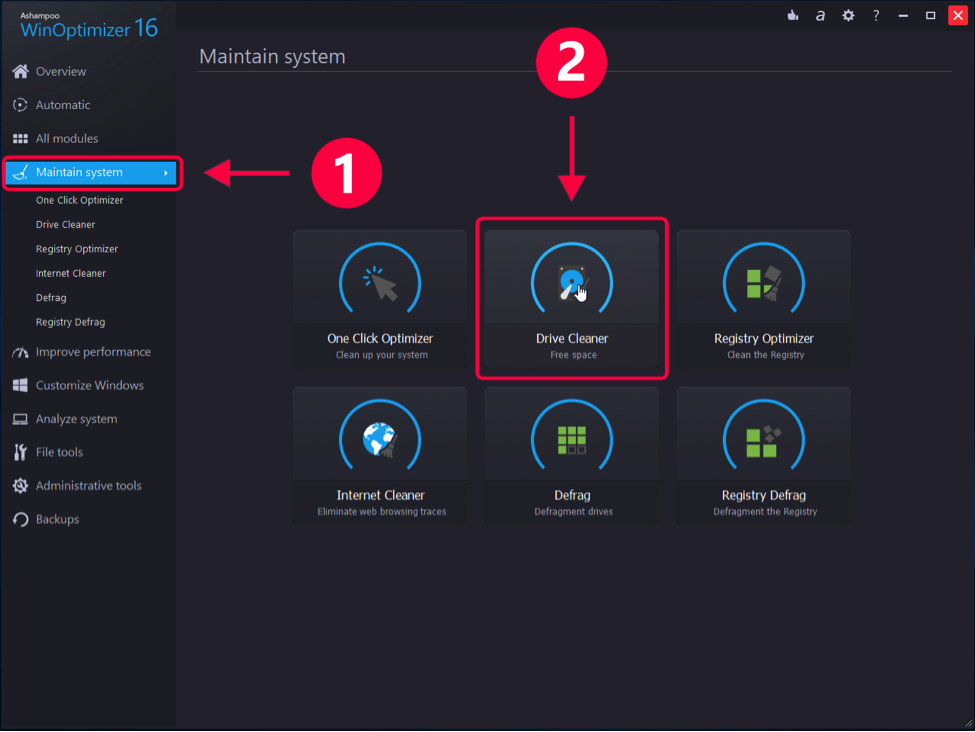
How to Delete Temp Files on Windows 7 – Step 2
Step 3 On the following screen, Drive Cleaner will let you know the file types it is going to delete from your computer. Review the details and click on the Delete now button to start deleting files.
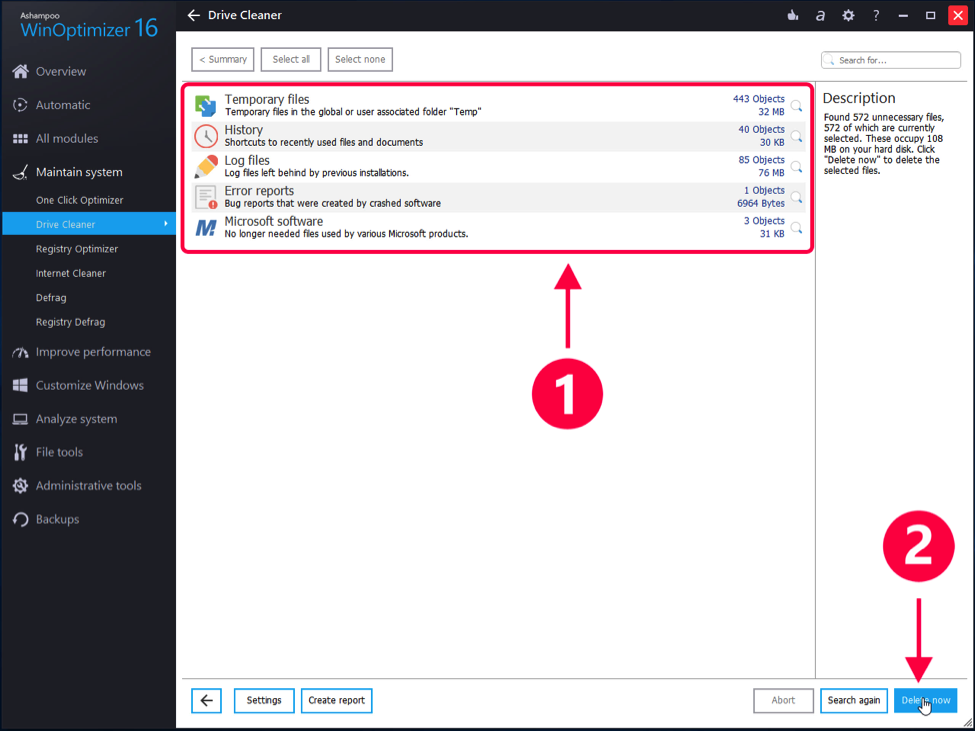
How to Delete Temp Files on Windows 7 – Step 3
Step 4 Soon as the app has finished cleaning temp files on your PC, you will see the following message on your screen.You are all set. The app has successfully removed temp and many other junk files from your computer.
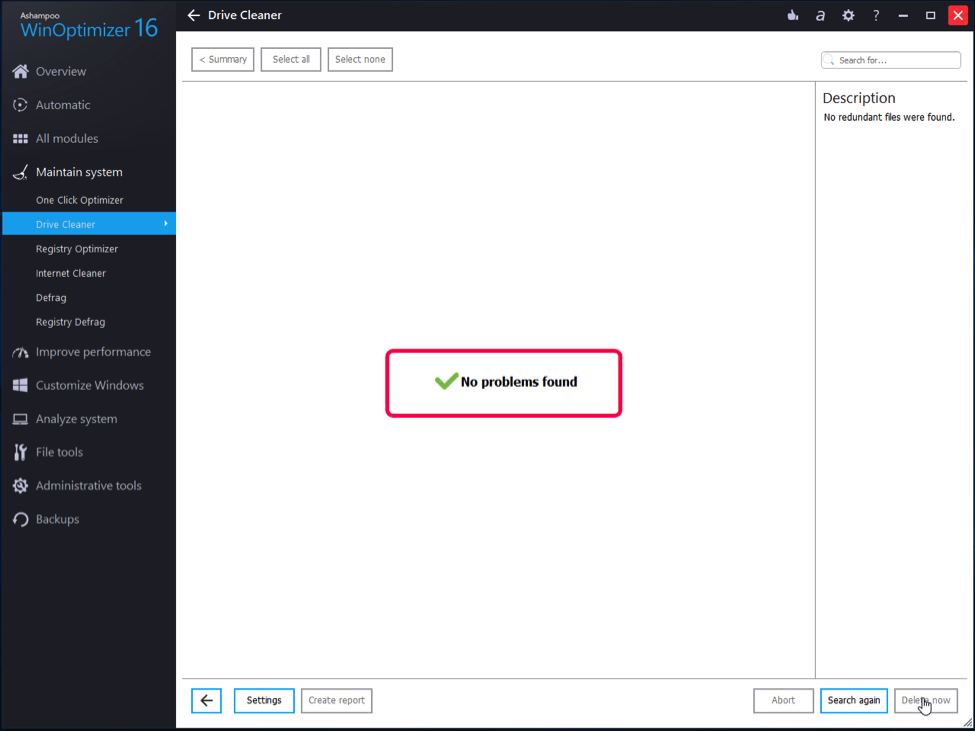
How to Delete Temp Files on Windows 7 – Step 4
The Bottom Line
If you are running out of memory space on your computer, it is a good idea to delete the temp files sitting on your Windows 7 system. It will free-up memory space and will unclutter your machine. We hope the guide helps you out.
More Related Articles

Product-related questions? Contact Our Support Team to Get Quick Solution >
