How to Turn Off Two Factor Authentication on iPhone
With our comprehensive guide on how to turn off two factor authentication on iPhone, it’s a goodbye to the online security code. Check out our post to get this done on your iPhone today!
Over the years, users’ data security and privacy has been the top priority of Apple Inc,. The company has done well integrating the two factor authentication feature (also known as 2FA) into the majority of its services including iCloud, Apple ID, iTunes, and more.
While this feature is tailored to protect users, it comes with some discomfort, as most iPhone users complain about the stress of entering 2FA code during urgent activities, 2FA not working, and more. However, regardless of what the problem may be, disabling the feature is the only option to fix it.
So in this post, we will focus on how to turn off two factor authentication on your iPhone, whether new or old model.
How Does Two Factor Authentication Work?
The two factor authentication feature on your iPhone is an extra security layer built to protect your Apple ID account each time you surf the internet with your credentials on another device. For clarity, the two factor authentication feature on iPhone is a 6-digit code sent to one of the trusted devices your Apple ID is logged on to. This code has to be entered on the new device you are trying to use your Apple ID with. The purpose of two factor authentication is to ensure that the device you are use Apple ID with is a trusted one, and the operation was carried out by you.
How to Turn On Two Factor Authentication?
Turning on the two factor authentication feature is a straightforward task, which could be completed without hassles. Find below the simple guide you need to follow to enable or turn on the two factor authentication feature on your iPhone:
Step 1: Firstly, you need to head to the Settings menu screen on your iPhone. A simple way to do that is by clicking the Settings icon on your home screen.
Step 2: Tap on your profile picture when the menu opens, so you can get the response page down here on your display screen:
Step 3: Click Password & Security to access the interface. Tap on the Turn on Two Factor Authentication icon and hit the Continue button to proceed.
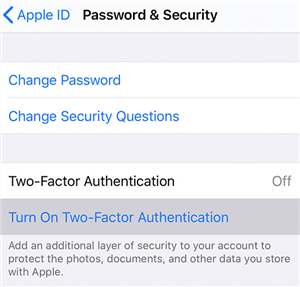
Turn on Two Factor Authentication on iPhone
Step 4: Once done, input your phone number in the space given and select a method to verify the digits you provided. Hit the Send button and move to the next step.
Step 5: Collect the verification code sent to your iPhone and enter it in the empty boxes appearing on your screen. Ensure the details are correctly entered to avoid errors. Once done, you will need 2FA code to access your Apple ID on another device.
How to Turn Off Apple Two Factor Authentication
Turning off the two factor authentication feature on an iPhone follows similar patterns for all iOS models. So whether you own the latest version of iPhone or an older generation, the approach we are about to share will help you deactivate two factor authentication. Check out the instructions below:
Step 1: Launch a browser on a computer system and visit the Apple website. When the page opens, enter your Apple ID in the empty field provided. Hit the arrow button pointing to the right to proceed.
Step 2: Next, provide the corresponding password in the next field, and hit the Enter button on your keyboard. After that, a verification code will be sent to one of your trusted devices. Enter the code in the boxes appearing on your screen.
Step 3: Now that you’ve successfully gained access to your Apple ID account, proceed to where you have Security and click the blue Edit button.
Step 4: An interface labeled Turn Off Two Factor Authentication? will show just as seen below. Kindly complete the security questions and click Continue at the lower right corner of your computer screen. Two factor authentication will immediately stop for your Apple ID.
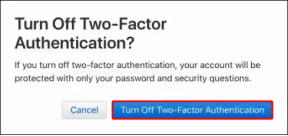
Turn Off Two Factor Authentication
Note: The approach above will only work within 1-14 days after you enabled two factor authentication features on your Apple ID. If you try disabling 2FA after 14 days of activating it, you get no result.
Forgot Apple ID Password, How to Do?
As stated in the previous article, access to your Apple ID and password is required whether you want to turn dual authentication on or off. So what if you accidentally forget your Apple ID and password? Well, at this time, the AnyUnlock iOS Unlocker is needed. With AnyUnlock, your Apple ID and password can be removed without stress.
AnyUnlock lets you delete or remove Apple ID from your iPhone without compromising the data quality. This tool also ensures the successful removal of two factor authentication during this process. It’s very easy to operate by anyone, whether amateur or advanced users.
Free Download* 100% Clean & Safe
- Whether it’s a forgotten Apple ID password or an unknown Apple ID password, they all can be removed.
- Easily manage your iOS passwords in a centralized system with this software.
- It offers the quickest unlock services on iPhone and iPad without compromising users’ data quality.
- Use the AnyUnlock software with Mac or Windows devices easily.
Step 1. Download and install AnyUnlock on your PC, and click “Unlock Apple ID” from the interface.
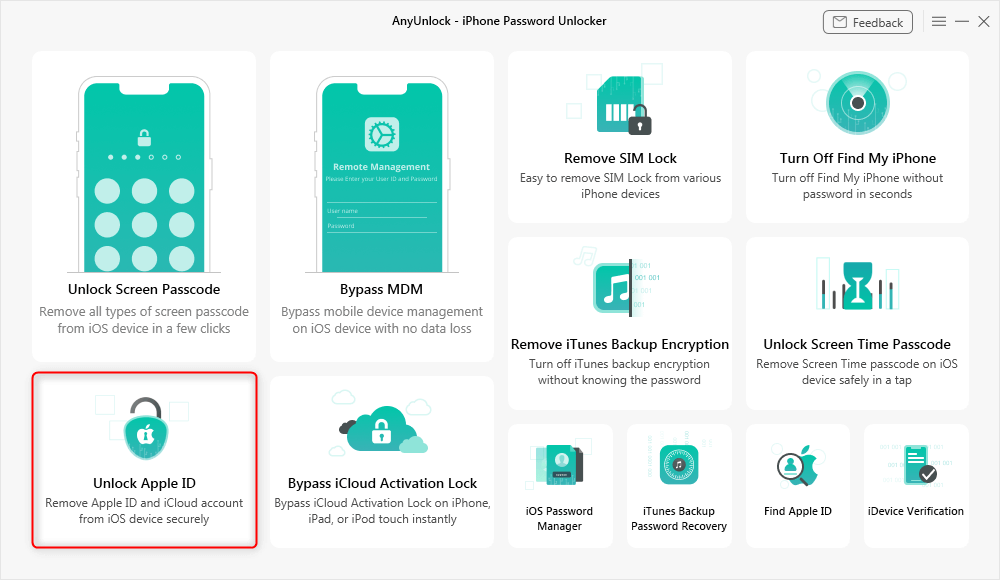
Click Unlock Apple ID from the Homepage
Step 2. Connect your iPhone to the PC using a lightning cable, and once AnyUnlock detects it, click “Unlock Now.”
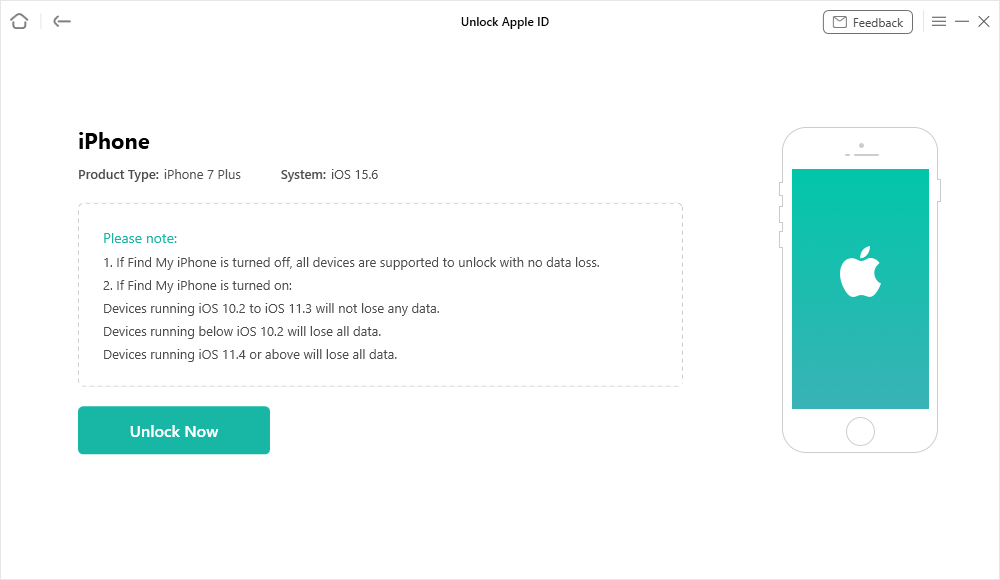
Click Unlock Now Button
Step 3. Then, AnyUnlock will start removing your Apple ID automatically. Wait a minute, you will get Apple ID removed successfully page below.
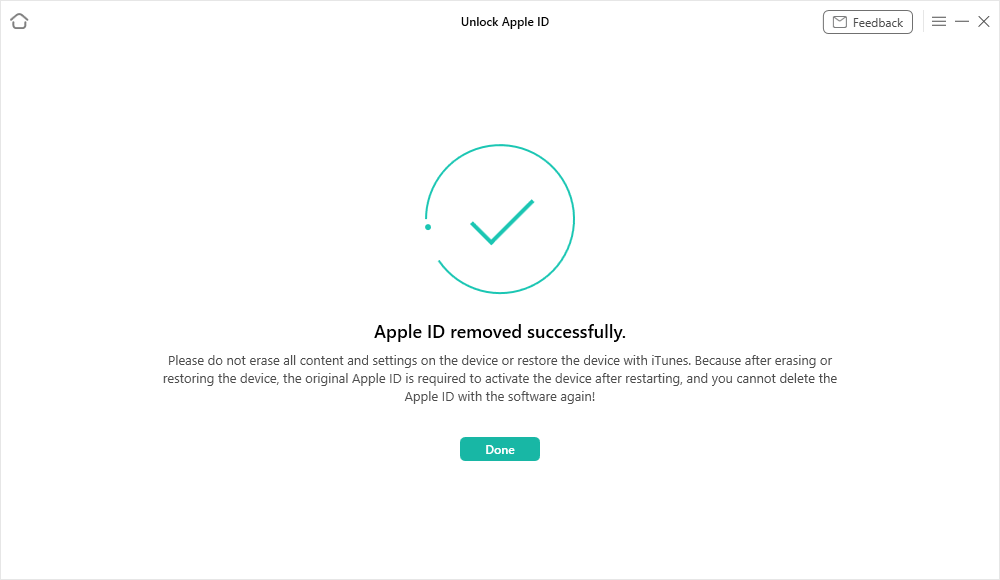
Apple ID Removed Successfully
FAQs
Gain extensive knowledge about turning off two factor authentication by reading through our popular searches queries and answers:
How can I verify my Apple ID if I can’t access the verification code?
Sometimes the corresponding verification code for an Apple ID can take time to come up on your trusted devices. When such happens, you cannot grant an unknown device permission to your Apple ID. However, there’s a way around it now.
Follow the procedure below to verify Apple ID when you cannot access the verification code:
For iPhone/iPad/iPod Touch
- Go on the Settings pane, and tap on your profile picture.
- Scroll and select Password & Security.
- Another screen should come up after completing the above. Scroll down and click Get Verification Code.
- Fetch the code and enter in the required field.
For Mac
- Head to the top right corner of your Mac screen and click on the Apple menu button.
- Select System Settings from the fly out menu that pops up.
- Now click on your Apple ID [your name] > Password & Security.
- Head down the page and click Get Verification Code.
Is it possible to turn off two factor authentication without my phone?
Yes, it’s possible! From another internet enabled device, you can turn off two factor authentication without stress. We’ve introduced the process involved in the article above. Follow the steps accordingly to get this done.
Final Words
Two factor authentication improves users’ data security and privacy online. However, it could be frustrating at times. The only way to resolve it is by turning it off, which we’ve explained the various approaches involved. Apply any of the solutions given in the article above to do that.
Mind you, of the two procedures introduced, we recommend the AnyUnlock method. It removes two factor authentication without restrictions. Your data remains intact, so you need not worry about data quality.
Product-related questions? Contact Our Support Team to Get Quick Solution >

