How to Remove Disabled Apple ID from iPhone
There are multiple proven ways that can help you get rid of Apple ID from your locked iPhone so as to make it workable again. So, let’s explore them and get rid of someone else’s or your old Apple ID from your locked iPhone.
iPhone Unlock & Password Tips
iPhone Password Tips
iPhone Unlock Tips
Apple ID Unlock Tips
- Remove Apple ID from Locked iPhone
- Forget Apple ID Email
- Cannot Update Apple ID Settings
- Unlock Apple ID Without Phone Number
- Unlock Apple ID Securely
- Completely Delete Apple ID Account
- Unlink iPhone From an Apple ID
- Apple ID Cannot Unlock iPhone
- Apple ID Locked for Security Reasons
- Top Apple ID Unlock Tools
AnyUnlock – Remove Disabled Apple ID from iPhone
Free download AnyUnlock – iPhone Password Unlocker to remove Apple ID from iPhone when it’s locked.
As an iOS user, you need a properly working Apple ID in order to do plenty of things such as downloading apps or updating apps, making purchases, etc. In other words, if you fail to use your own Apple ID, you’re locked out of numerous Apple services concerning your Apple ID accounts, such as iCloud and FaceTime. There are times that your iPhone or iPad keeps asking for someone else’s Apple ID or requires you to enter the previous Apple ID and password. It is even worse that you may be stuck in the iCloud Activation Lock screen after a factory reset and fail to make any operations.
If you are bothered by the above situations, you may wonder how to get rid of someone else’s Apple ID on your iPhone without password. To figure out how to remove Apple ID from locked iPhone, continue reading and exploring 5 ways that can help you to remove Apple ID from locked iPhone.
Why Do You Need to Remove Apple ID from Locked iPhone?
There could be several reasons why you need to remove Apple ID from Locked iPhone:
- Stuck on the iCloud Activation Lock screen.
- Enter the wrong Apple ID and passcode several times.
- No using your Apple ID for an extended period of time.
- Billing problems like unpaid iTunes/App Store orders or charge disputes on the credit card you’re using.
- Security reasons could lead Apple to believe someone hacked your Apple ID.
You can remove Apple ID from locked iPhone as long as you have tried the right method. In the following sections, we are going to reveal how to remove Apple ID from locked iPhone.
Way 1. Remove Apple ID from Locked iPhone via Simple Clicks
AnyUnlock is a powerful iPhone unlocker to help you easily remove Apple ID from a locked iPhone. With Unlock Apple ID feature, you can remove either your or someone else’s Apple ID or iCloud account on your iOS device without password. After removal, you can sign in with another account or create a new account and associate the iPhone with it. Here are the steps you can follow to remove Apple ID on locked iPhones with ease.
Free Download* 100% Clean & Safe
Step 1. Free install AnyUnlock on your computer and launch it > Select the Unlock Apple ID option on the main interface.
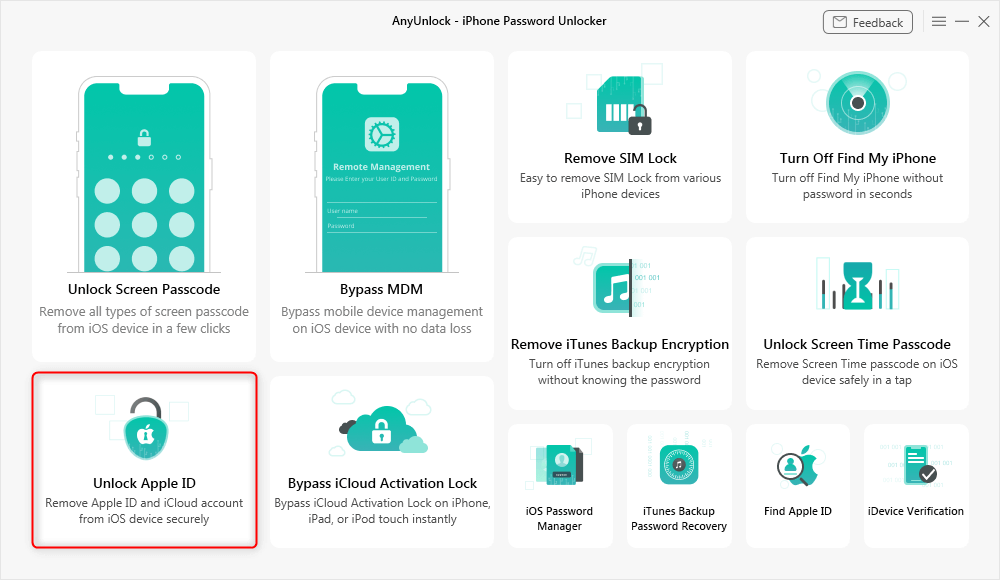
Click Unlock Apple ID from the Homepage
Step 2. And then, please connect your device. Once your phone has been recognized, please click Unlock Now to unlock.
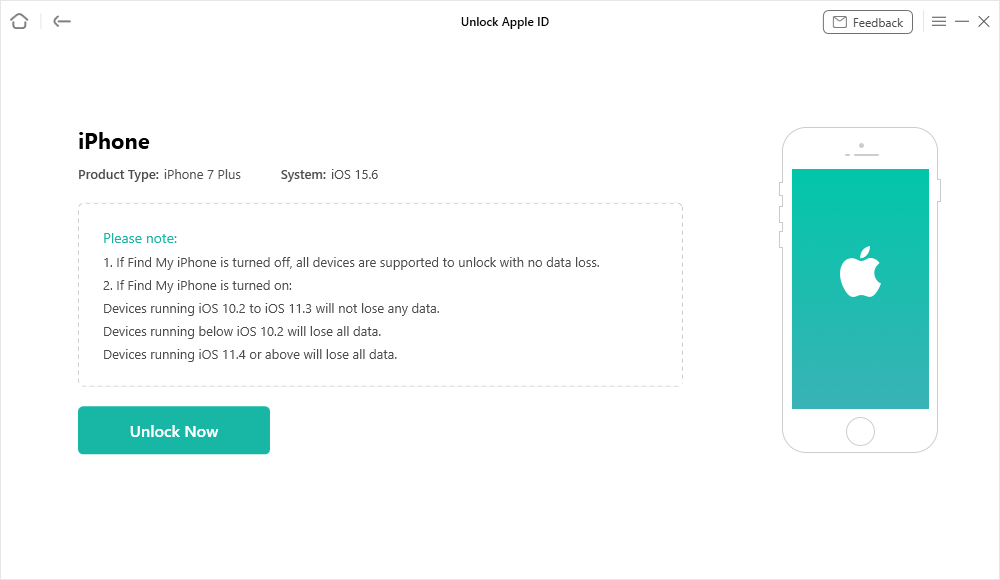
Click the Unlock Now to Start the Unlocking Process
If Find My iPhone is Disabled
Step 4. After clicking Unlock Now, AnyUnlock will automatically start removing Apple ID. Please keep a stable USB connection.
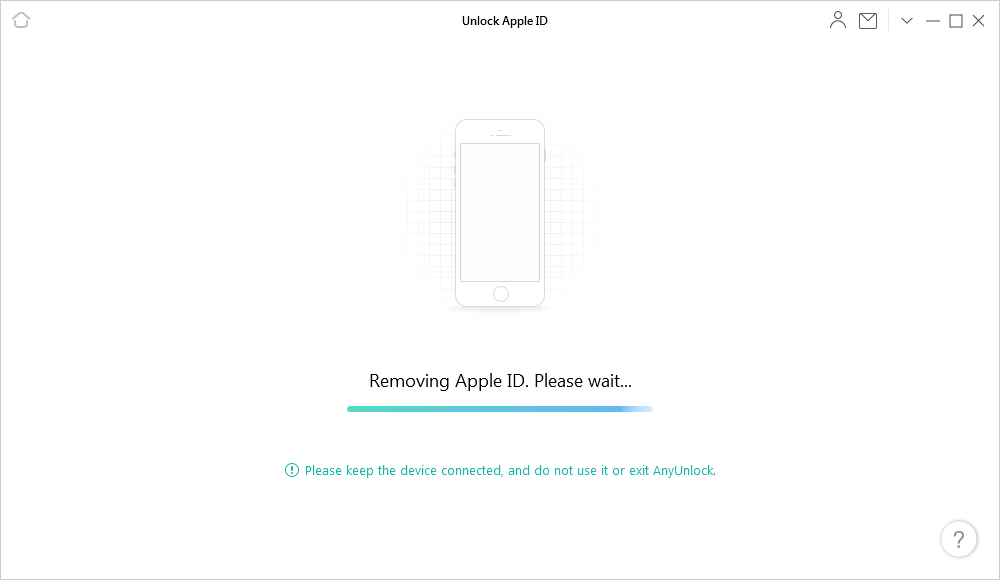
Removing Apple ID
Step 5. Minutes, later, when the unlocking process is complete, you’ll see Apple ID recomved successfully page.
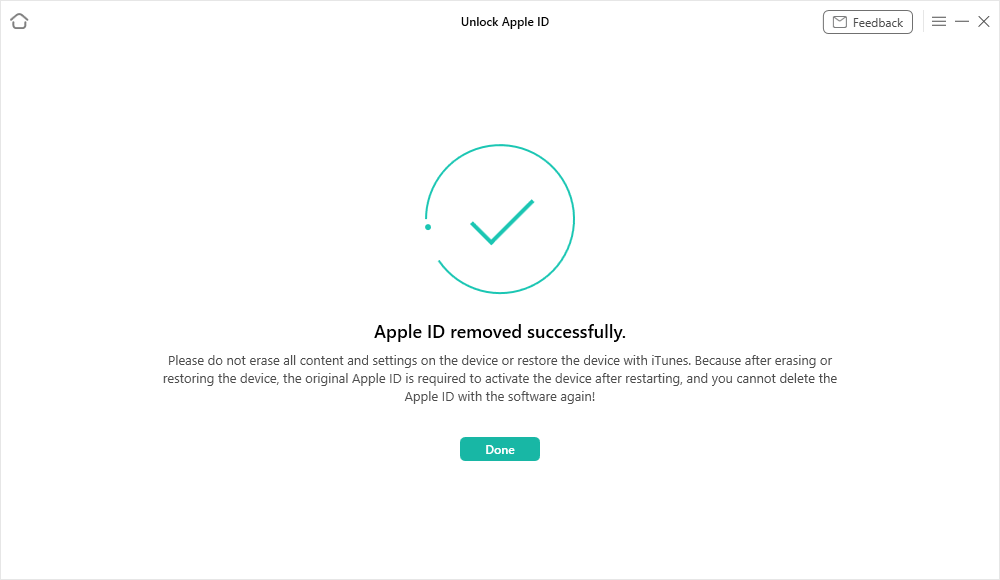
Apple ID Removed Successfully
If Find My iPhone is Open and iOS is 11.4 and Above
Step 4. After clicking Unlock Now, you need to check and confirm if your screen passcode and the two-factor authentication are turned on. If not, follow the on-screen instructions to set up the screen passcode and enable two-factor authentication. And then, click “Continue” button.
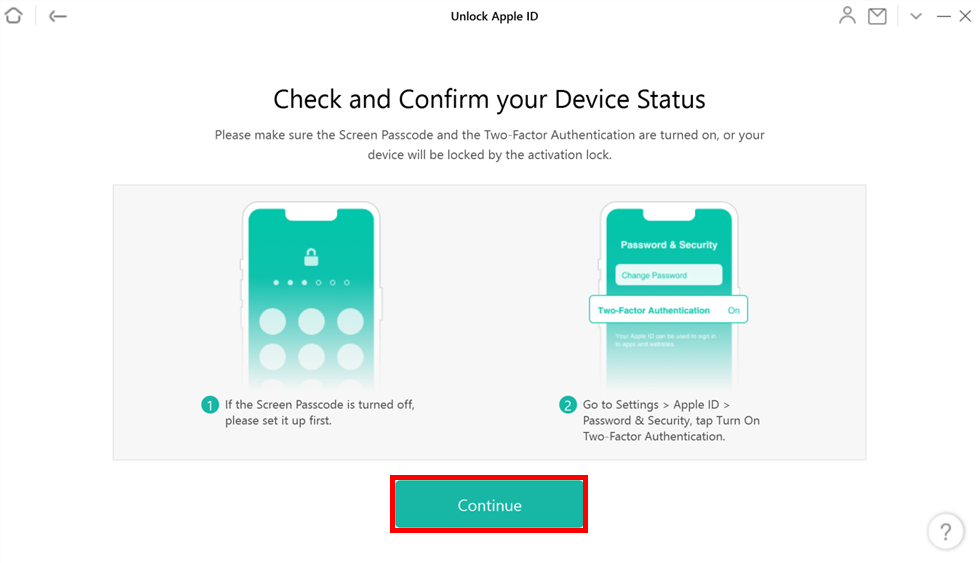
Check Device Status
Step 5. AnyUnlock will provide the firmware to match the device, please Download it. After downloading, you’ll see the Download Complete page. Please click Unlock Now to start unlocking Apple ID.
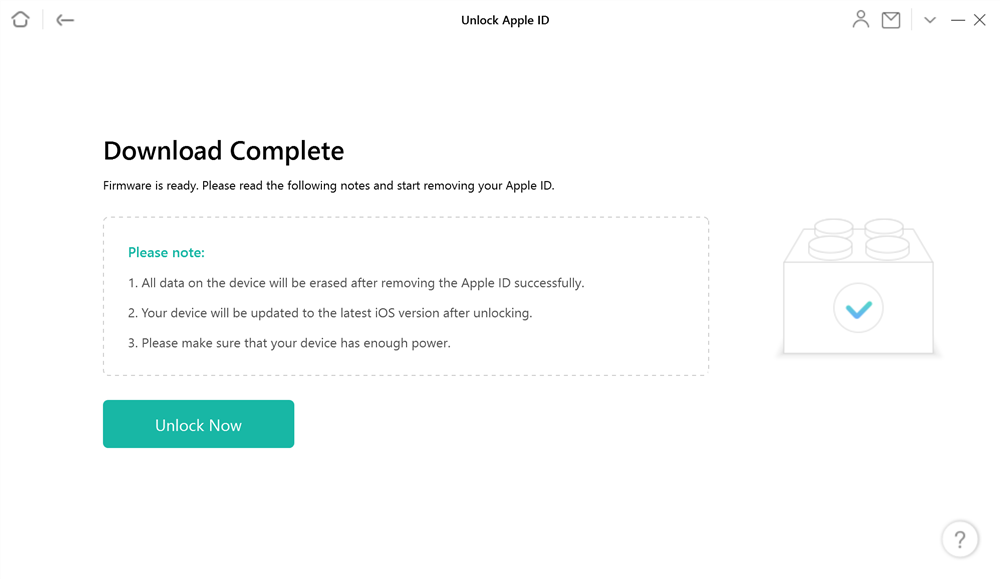
Firmware Download Complete
Step 6. When the process is completed, you will see the interface below. Please follow the instructions on the software page to set up your device to complete the unlocking process.
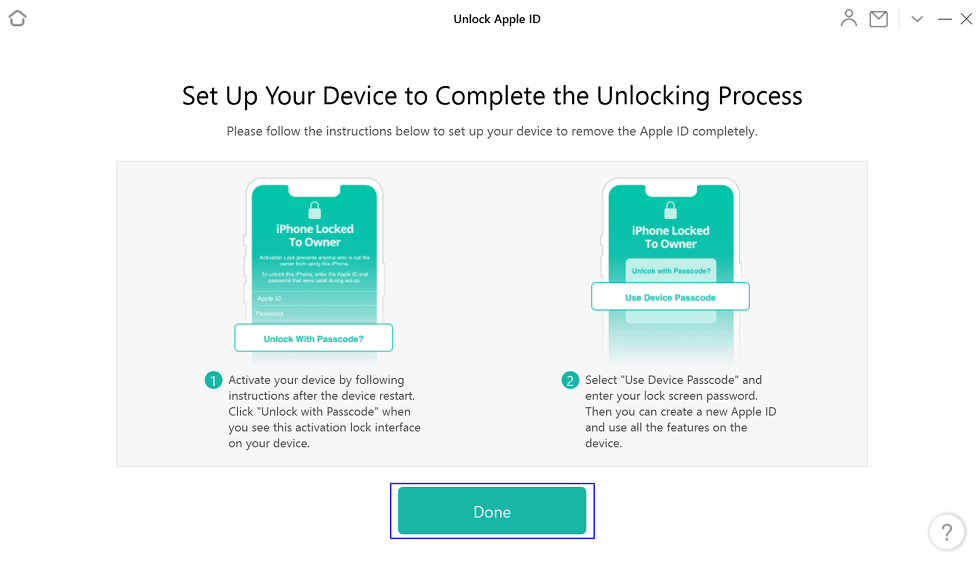
Click the Done Button
If your device is below 11.4 and has Find My iPhone turned on, you need to reset all settings. Please go to guide to know more. And after the Apple ID gets removed successfully, please DO NOT “Erase All Content and Settings” on the device or restore the device with iTunes/iCloud.
Way 2. Remove iCloud Activation Lock from Locked iPhone
If you’ve been stuck on the iCloud Activation Lock, you should reach out to the previous owner and ask them to remove Apple ID from locked iPhone, or you fail to proceed to the next step. The Apple store can also help you bypass the iCloud lock screen but you should offer evidence that you are the owner of the device. In this situation, We are proud to tell you that AnyUnlock – iPhone Unlocker is a comprehensive unlocking software that can also help you bypass activation locks.
Step 1. Free install AnyUnlock and launch it on your computer. Launch AnyUnlock on your computer and choose “Bypass iCloud Activation Lock” mode directly.
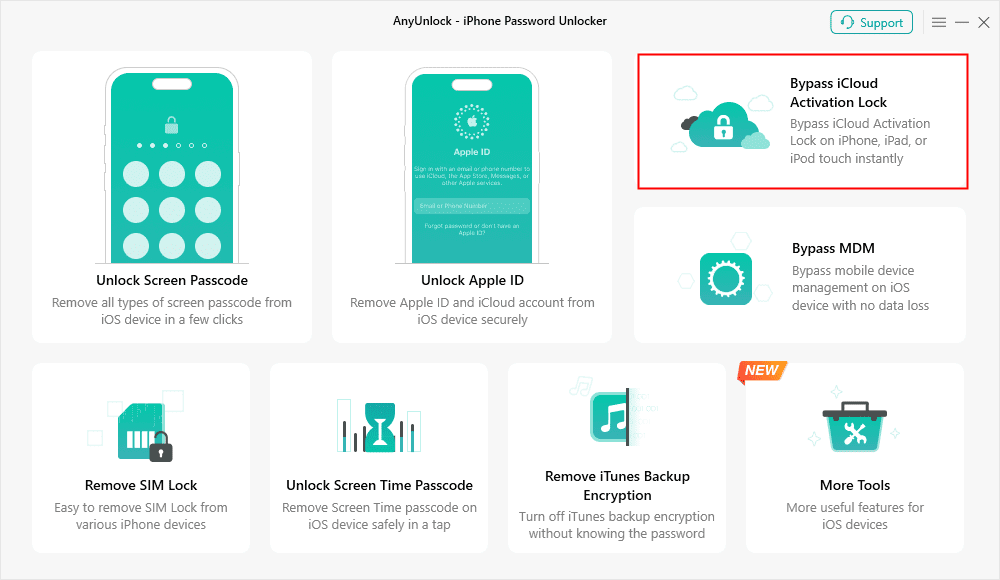
Click on Start Now to Bypass iCloud Activation Lock
Step 2. Check the iPhone information read the notes on the screen. Then you need to click on the Start Now button to initiate the procedure.
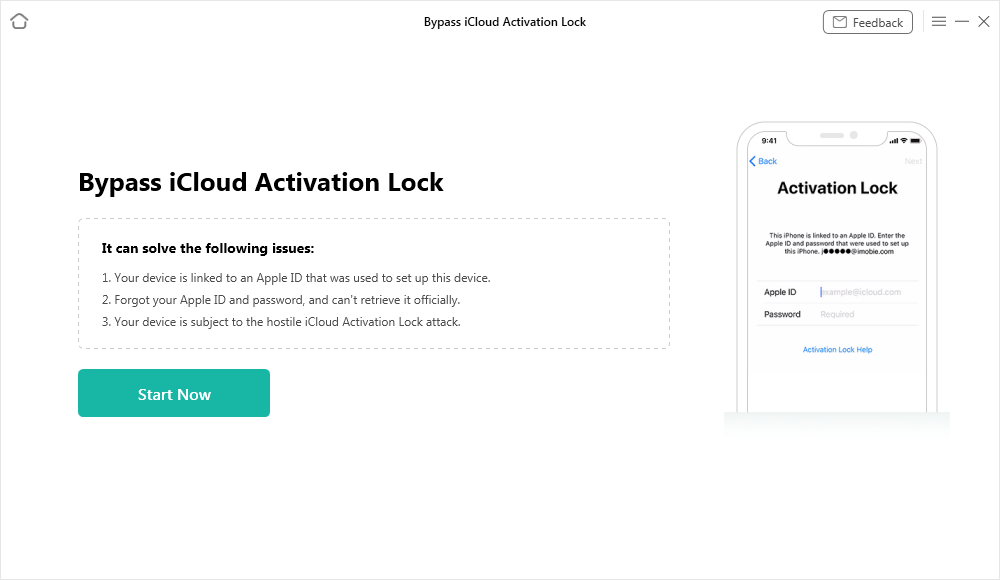
Connect Your iOS Device to the Computer
Step 3. Jailbreak is needed before bypassing iCloud Activation Lock. Read the notes on the screen and watch the video tutorial to jailbreak your iOS device on your own.
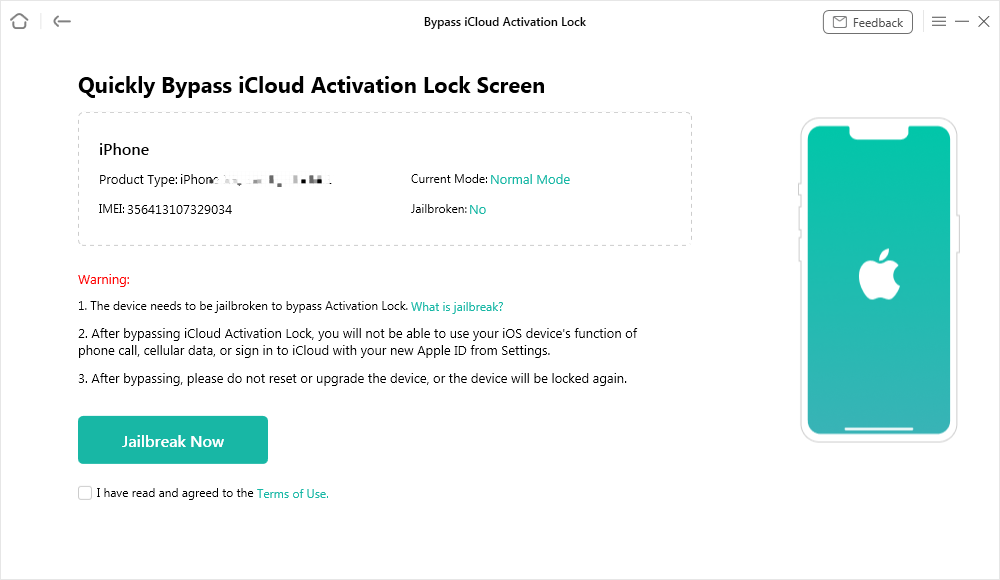
Jailbreak Your Device
Step 4. When the jailbreaking process completes, you should go back to click on the Next button. Then you can start the bypassing process.
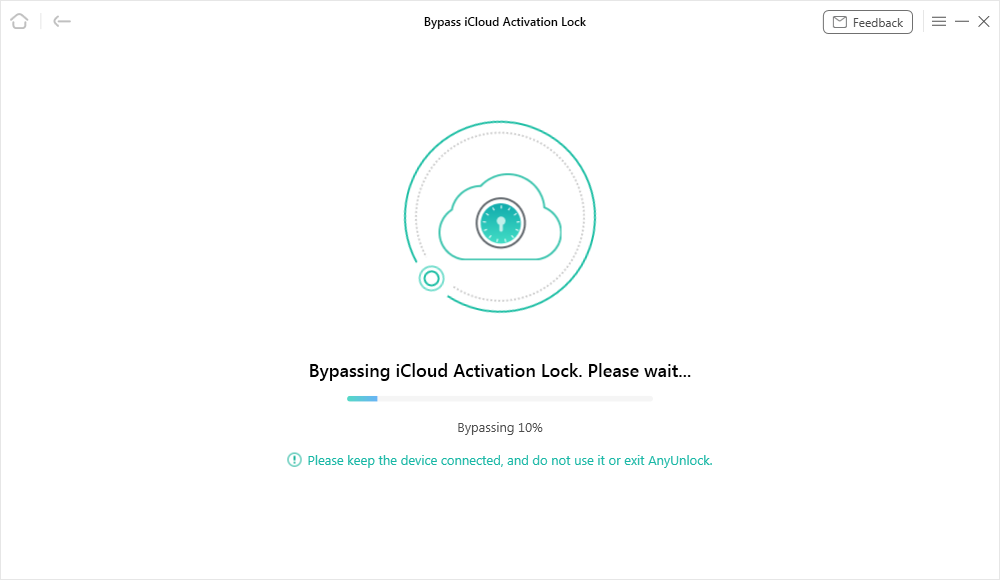
Bypassing iCloud Activation Lock
Step 5. Wait for a few minutes until you see the iCloud Activation Lock is bypassed successfully page.
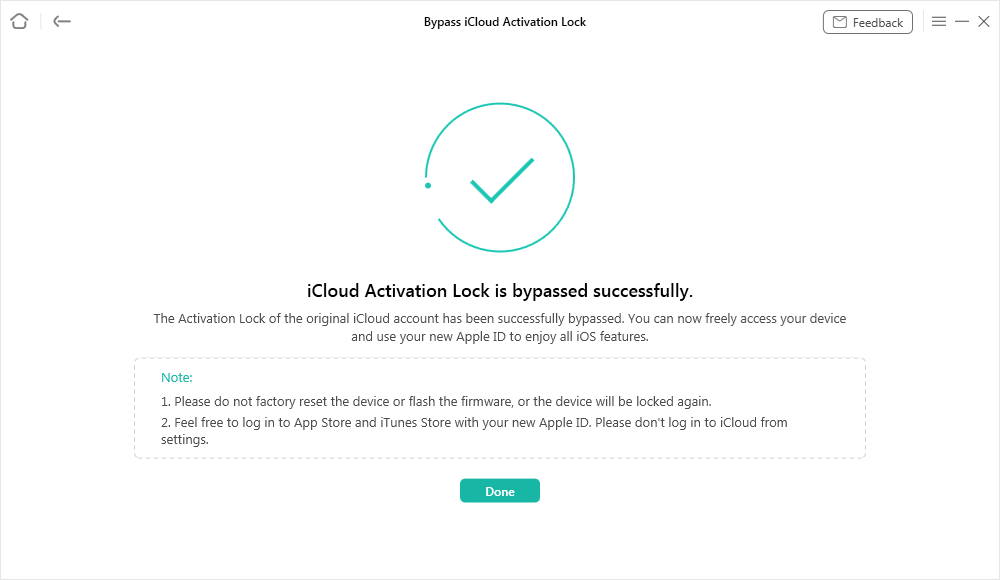
iCloud Activation Lock Is Bypassed Successfully
Way 3. Remove Apple ID from Locked iPhone via Settings or Mac
If you can access your iPhone screen, you can also try resetting the password for your Apple ID. Just follow the below steps to reset your password from any trusted iOS devices or Mac.
If you’re using an iOS device, then follow the below steps:
Step 1: Open Settings.
Step 2: Click on the “[Your Name]”> “Password & Security”> “Change Password”.
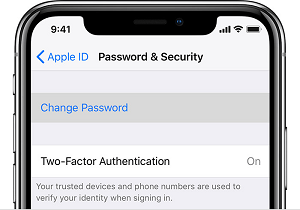
Reset Your Password
Step 3: If you’re logged into iCloud and have turned on passcode, then you will be asked to enter the password for your device.
Step 4: Follow the on-screen instructions to reset your password.
If you’re using Mac, then follow the below steps:
Step 1: Tap “Apple Menu”> “System Preferences”.
Step 2: If you’re using macOS Catalina, then click “Apple ID”> “Password & Security”. If you’re using macOS Mojave, click on the “iCloud”> “Account Details”.
Step 3: If you’re requested to enter your Apple ID passcode, then click on the “Forget Apple ID or password” and then follow the onscreen instructions to reset your password.
Step 4: Or, click on the “Change Password”.
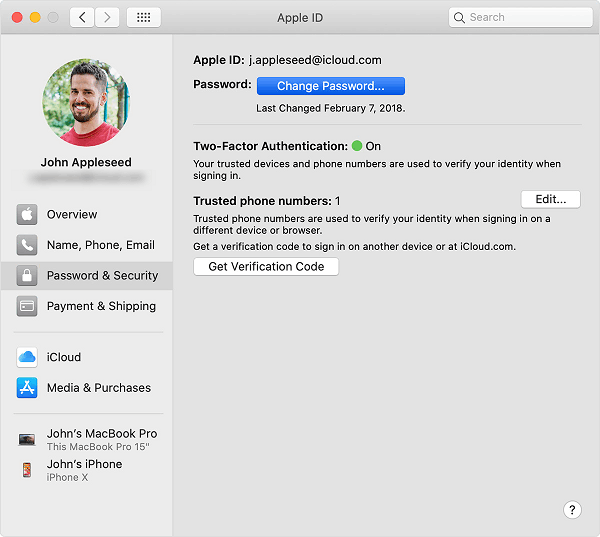
Reset Password on Mac
Way 4. Find Apple ID from Locked iPhone via iCloud Website
The first thing we highly recommend you to do is to recover your account. In order to do that, follow the below step-by-step guide carefully:
Step 1. To begin with the process, navigate to iCloud.
Step 2. Enter your disabled or locked Apple ID and then hit “Continue”.
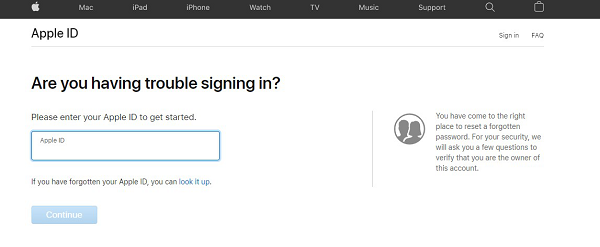
Find Apple ID on iCloud Website
Step 3. Now, you will be asked a few questions. There’s no need to worry about them, as they are part of the verification procedure. It’s Apple’s way of making sure that the Apple ID you have entered is indeed yours. You may need to enter your mobile number, email, etc.
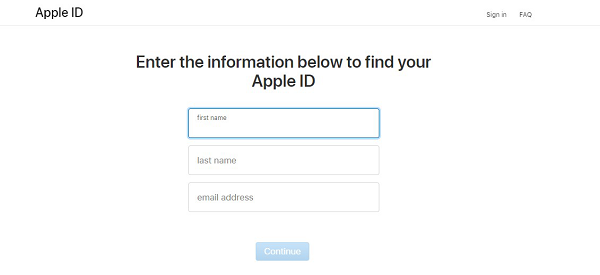
Enter Some Information to Find Apple ID
Step 4. Just follow onscreen instructions and that’s it.
No worries if this method doesn’t work for you!! Read on the post to try other ways that may help you unlock your Apple ID.
Way 5. Remove Apple ID from Locked iPhone via iCloud Website
If you’re wondering how to remove Apple ID from locked iPhone, then you can do so through the iCloud website. No worries, below is the step-by-step guide to help you learn how to get the job done:
Step 1: Open a browser on your system and navigate to the iCloud website. Then, enter your Apple ID for sign-in (in this scenario, have the previous owner login to their account).
Step 2: Upon the successful sign-in, choose the “Find iPhone” option.
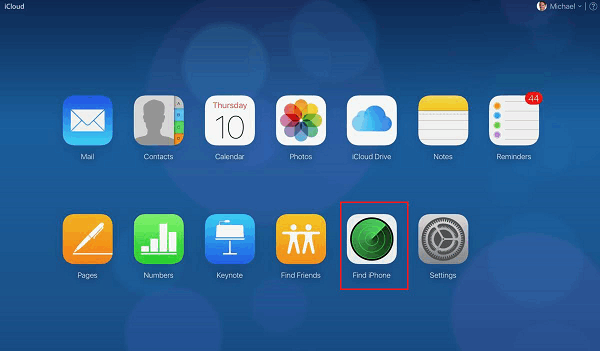
Click Find iPhone Option
Step 3: Under the “My Devices” tab, find and tap on the iPhone that you need to unlock.
Step 4: You’ll find four options, select “Remove from Account to delete Apple ID from your iPhone”.
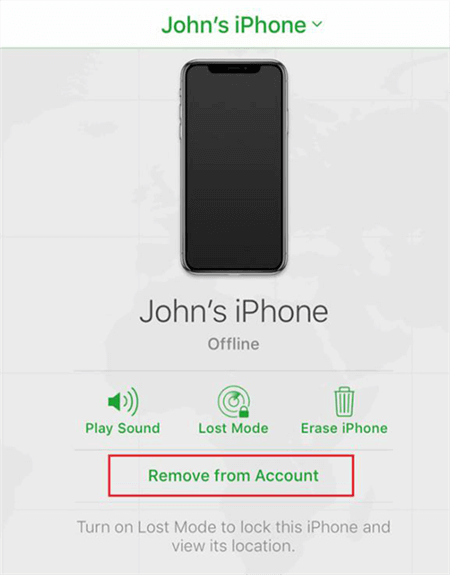
Click Remove from Account
That’s how you can delete Apple ID from iPhone through the iCloud website.
Way 6. Remove Apple ID from Locked iPhone via Apple Support
We hope that the tips mentioned above have helped you to remove or unlock your Apple ID. Considering that, the exact procedure varies depending on the security settings of your account.
However, what if the above methods are of no help for you or your Apple ID is still locked or disabled? Then, it’s time to contact Apple Support directly in order to have one-to-one assistance unlocking it. Needless to say, you will have to verify your identity with Apple and it might require providing answers to the security questions or getting verification codes.
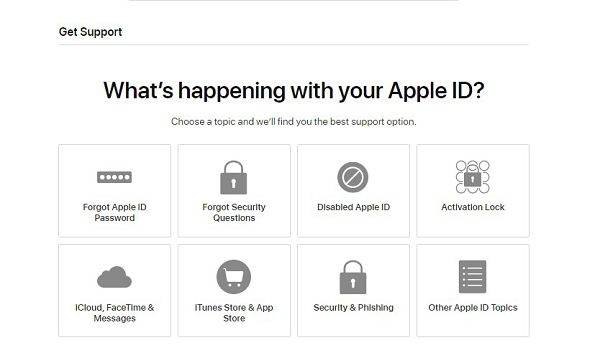
Contact Apple Support to Remove Apple ID
The Bottom Line
Hopefully, you got the solutions to remove Apple ID from locked iPhone. In this post, we have covered every plausible way to help you fix the locked Apple ID issue. We know that it’s frustrating to be stuck on the lock screen, but trying AnyUnlock – iPhone Password Unlocker can help you get rid of the problem. Many users found this tool helpful and workable for them, so you should also give it a shot at least once. However, if you have any more doubts, please feel free to ask us in the below comment section.
Free Download * 100% Clean & Safe
More Related Articles
Product-related questions? Contact Our Support Team to Get Quick Solution >

