Everything You Need to Know About IPA Files
In this post, you will find out what is an IPA file and how to install IPA files on iPhone. Also, how to run IPA on your computer is also answered in it. Go on and check out all the stuff about IPA files.
Common iPhone Tips
Fix Disabled/Locked iPhone
What Is An IPA File?
.IPA files contain bits of data that are used by different apps on the iOS device you are using. Chances are that you are going to come across a file with the IPA extension sooner or later.
Perhaps the best way to understand what IPA files are is to compare them to ZIP files, as they both serve as data containers. However, the process of building an IPA file is much more complicated than creating a ZIP archive.
The structure of these files is always the same, regardless of the app for which they are used, as they contain a JPEG or PNG image that serves as an icon for the file, and the Payload folder in which the data is stored. It is also worth pointing out that these files are designed specifically for iOS and they can’t be used on macOS(Intel), Windows, or other operating systems. Let’s take a look at what you need to do in order to start using IPA files.
How to Install IPA on iPhone?
All IPA files have coding that is created specifically for iPhones, iPods, or iPads, and they enable you to develop a broad range of programs that can run on these devices. Consequently, a video game or a weather app can be using these files to store the data they need to function normally. Moreover, these files contain iTunes metadata if they are designed to be distributed through the App Store.
# 1. Install IPA file on iPhone iPad iPod Using iTunes
The simplest way to get an IPA file to your iPhone is through iTunes. Versions of iTunes that are compatible with Windows and macOS are available, which means that you can use either PC or Mac to install an IPA file on an iPhone.
However, you must make sure that you have 12.7 or some of the earlier versions of iTunes. Since more recent versions of iTunes, there is no Apps tab in the Device option which means it won’t allow users to move IPA files to an iPhone.
So if you have a version of iTunes that can perform this task you should follow these steps.
Step 1 – Installing iTunes on your Mac or PC, you should make sure that your iPhone is connected to it.
Sure, you can go on downloading the IPA file to your computer and head to step 2.
Step 2 – Locate the IPA file you want to install on your iPhone and open it with iTunes.
You can do this by right-clicking on its icon and choosing iTunes from the menu. The app will then be displayed in the iTunes’ App menu. Click on the Install button next to the IPS file’s name and then click on the Done button to initiate the installation process. The app should become available on your iPhone as soon as the installation process is completed.
# 2. A Great iTunes Alternative Would Make Install IPA Files on iPhone Easier
In case you have a version of iTunes that no longer supports the installation of the IPA file, you must install an iTunes alternative to help complete installing IPA files to iPhone. Here we highly recommend AnyTrans, a professional iPhone iPad iPod data management tool, which delicate to managing data with great ease on iOS devices. AnyTrans supports transferring app files from computer to iPhone, iPhone to a computer, iPhone to iPhone, etc.
Let’s figure out how to install IPA files on iPhone using AnyTrans with detailed steps.
Step 1. Download AnyTrans on your computer. Also, make sure that your iPhone iPad iPod has connected to the computer too.
Step 2. Launch AnyTrans and choose Device Manager on the left panel. And then click on the Apps on the right up corner.
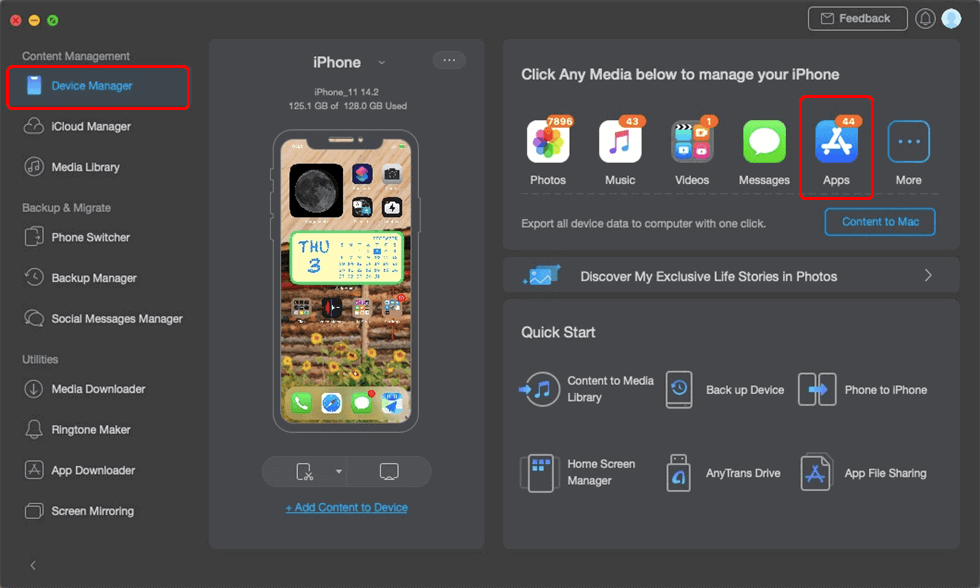
Go to Device Manager and Click App Category
Step 3. Tap the “+” button at the top-right. And then select the IPA file you want to install on your iPhone. Finally, click Open to deliver the IPA files from computer to iPhone iPad iPod.
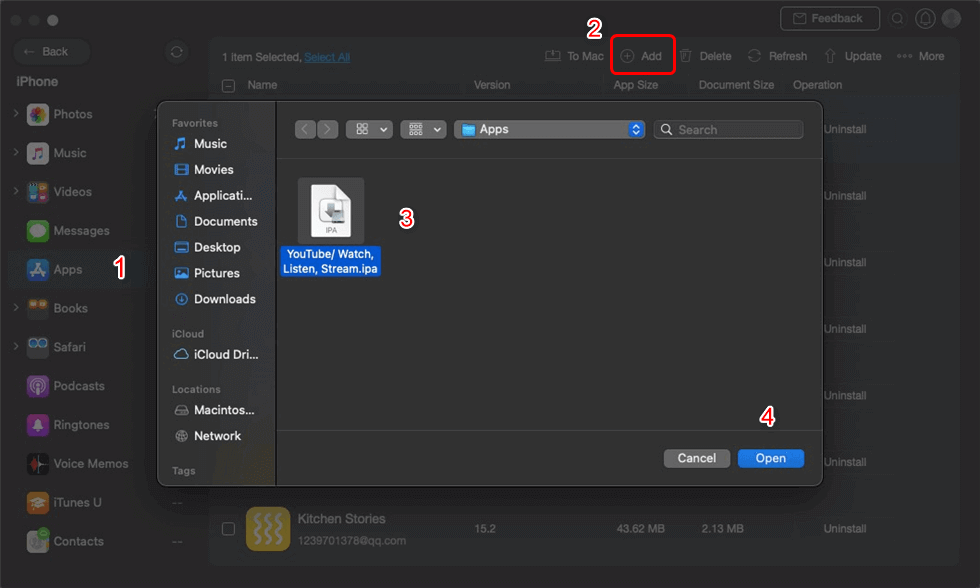
Click Add Button and Install it to iPhone
That’s it. That’s all how you install IPA files on iPhone with a computer with great ease. Also, AnyTrans can help download whatever you want from the internet. Such a powerful management tool deserves a try.
How Do I Download an IPA File to a Computer?
How to get an IPA file on your computer? This question won’t bother you anymore. You can download IPA files to a computer directly through AnyTrans just in 2 steps. All you need to do is downloading AnyTrans and install it on your computer.
Step 1. Launch AnyTrans click on the App Downloader.
Now you will see there is a searching bar. Input the app you want to download and click Search to go on searching.
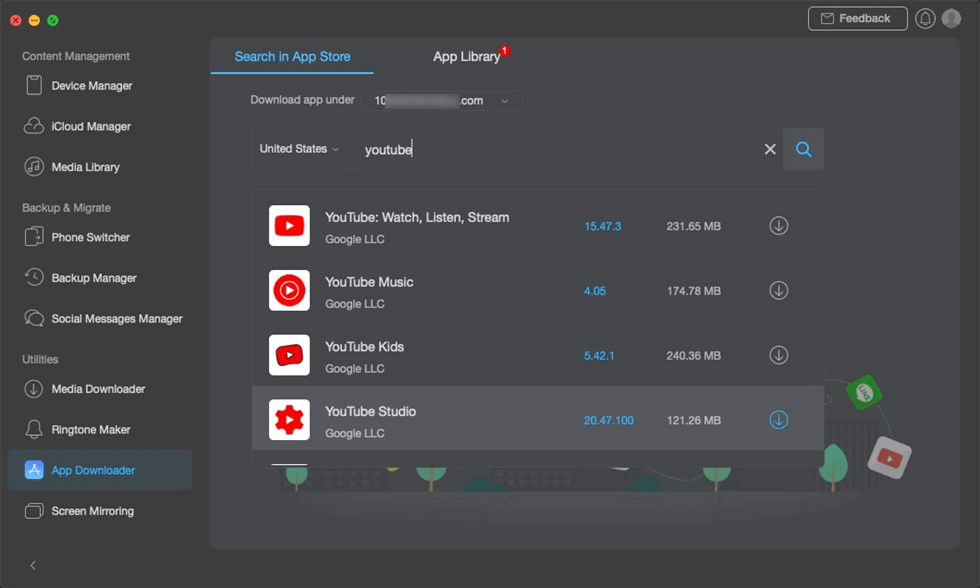
Sign into iCloud and Search the App you Need
Step 2. Transfer IPA files to the computer.
Once the app downloaded successfully, you can click on the To Mac (There is a To PC on Windows) to transfer the IPA file to the computer.
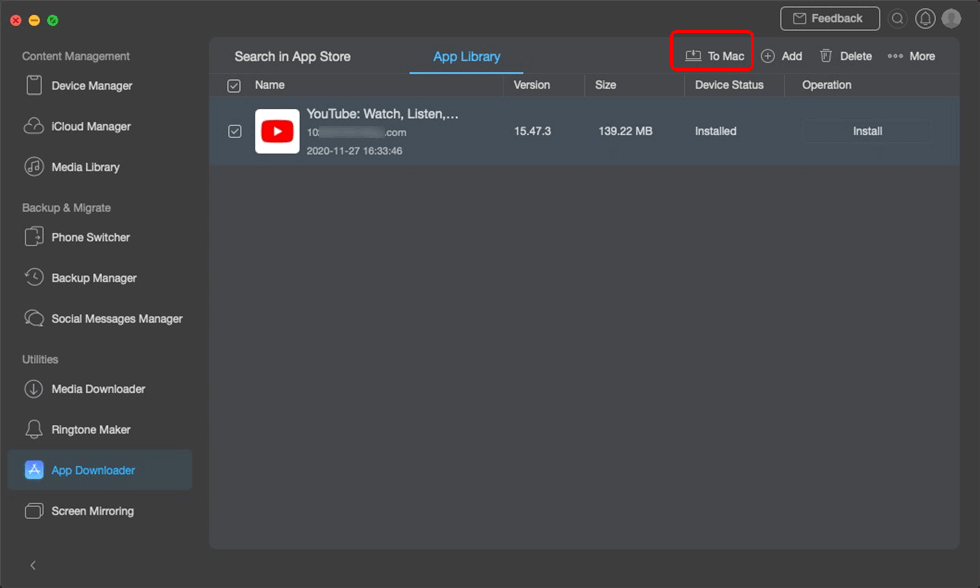
Install the App to Mac
How to Open IPA Files on a Computer?
Converting an IPA file into another file format is impossible, so for instance the media files, an IPA file contains cannot be turned into MP4, MP3, or JPEG files. Changing the file’s extension to ZIP will enable you to see the items within the IPA file, but you will not be able to use them.
Moreover, you cannot run an IPA file on a PC directly, while using these files on a macOS is only possible in certain cases.
For Mac Users – How to Open IPA files on Mac?
Back in the days that Apple still uses Intel as its Mac’s operating system, installing the iPhone Simulator on the Mac doesn’t guarantee to use the app that runs on an IPA file. But since Apple silicon – M1 released these days, IPA files are supporting to run on macOS which means you can only run the IPA files on Mac that is running in M1.
And there is a problem. M1 isn’t mature enough that most of the apps on the market may not support running in M1. How to figure out if these apps are workable on M1?
No worries now! You can use M1 Checker to figure out if the app is supporting running on M1. If not, you can download the IPA files and transfer them to the Mac. Double-Click on the IPA file which will run the APP on the Mac.
Here are the steps to check out if the app supports running on M1 Mac.
Option 1. Go to iMobie M1 App Checker, tap on the search bar, and input the app you want to check.
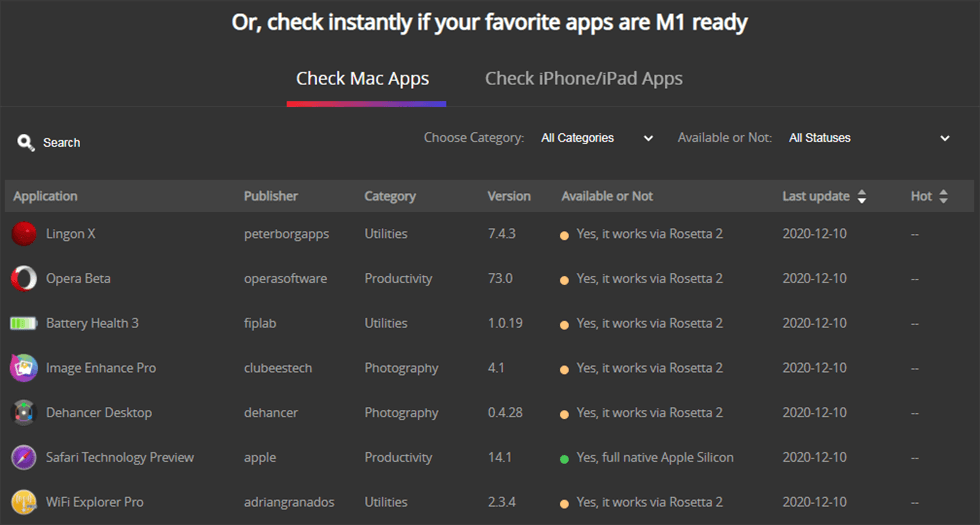
Check Mac Apps Compatibility Online
Option 2. Free download M1 Checker on your Mac and run it on the computer.
Step 1. Check the App on the M1 Checker.
M1 Checker is quite up to date which means you can get the app information exactly what it is now. If you check out that the app wasn’t contained in the app store, you can access the app via M1 App Checker (Desktop) and manually install the app to your M1 Mac.
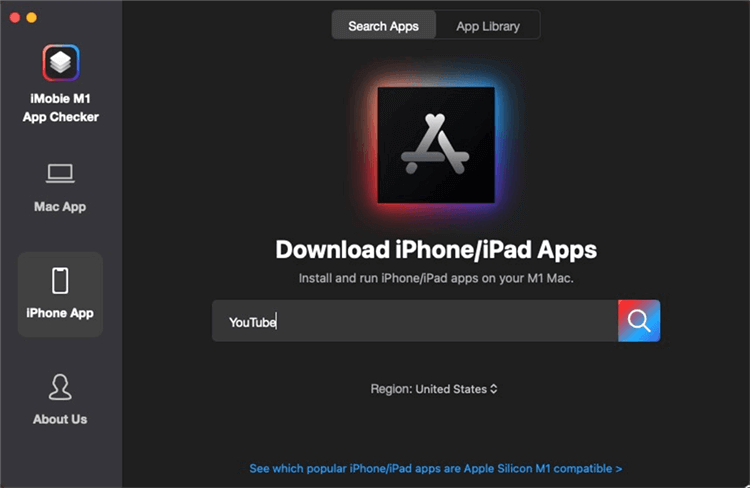
Search the App Under iMobie M1 App Checker (Desktop)
Step 2. Download the IPA File.
Click on the search button, you will see there are a group of apps related to YouTube apps. Choose the exact one and tap on the Download icon to access the .ipa file.
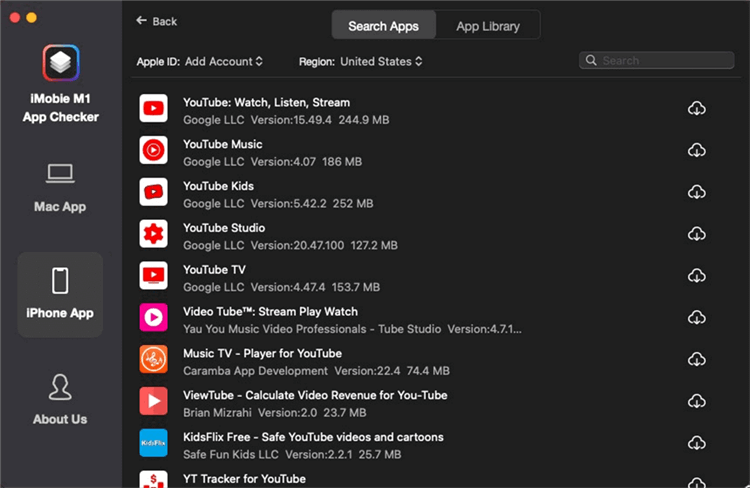
Download the YouTube Apps
Step 3. Transfer the IPA file to Mac.
Follow the instruction on the screen of the M1 Checker. After the app is downloaded successfully, it will be stored in the App Library. You have to click on the Transfer icon to store the .ipa file to your M1 Mac.
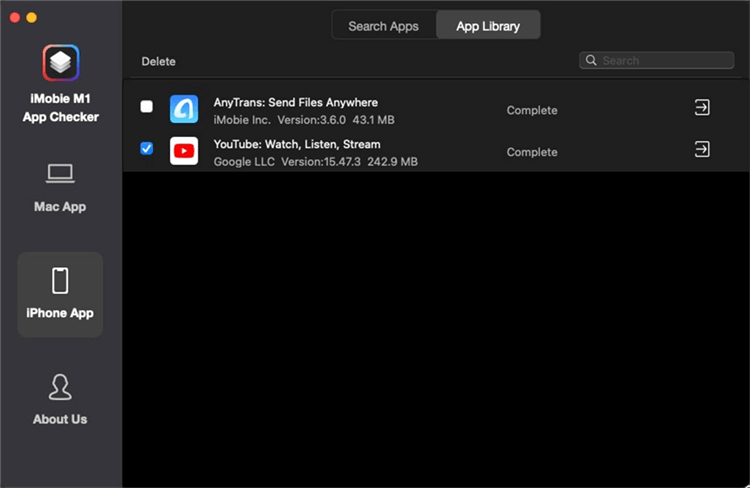
Transfer the App to the M1 Mac
For Windows Users – How to Extract IPA files on Windows?
If you have the right tools you will be able to extract an IPA file on Windows, but you must have a third-party app like the DMG Extractor. Alternatively, you can change the IPA file extension to ZIP if you want to view its contents. You should open the Control Panel on your PC and navigate to the Appearance and Personalization window.
Open the Folder Options, then choose View, and finally expand the Advanced menu. Deselect the ‘Hide extensions for known file types’ option and then change the IPA file extension to ZIP. You should then double click on that file to view its contents.
However, the data stored within the IPA file is mostly made up out of code, and you won’t gain much by viewing it. It is worth noting that this process is not going to make the IPA file usable on your PC. This means that you cannot install apps that are utilizing IPA files on your PC.
Conclusion
As iOS-specific files, IPA files can be difficult to work with. In the past, managing these files was easy, as you could install them on your iPhone by simply syncing the device with iTunes you’re using on your computer. Third-party apps are your best bet to get an IPA file to an iOS device if the version of iTunes you are using no longer supports this option.
Was this article helpful? Leave a comment and let us know.

Joy Taylor


Member of iMobie team as well as an Apple fan, love to help more users solve various types of iOS & Android related issues.
Screenify
AnyEnhancer
FocuSee
Vozard
AnyMiro
AnyMirror


