How to Transfer Photos from Camera to PC/Mac Computer
If you have a number of high-quality images stored on your camera, this guide will show you how to transfer photos from your camera to your computer so you can view, edit, and make any other changes to your captured photos. Read on to find out how to do that.
Even though there are a number of high-end phones that capture some really great quality photos, nothing can beat the quality of a DSLR or any other digital camera. The main purpose of the cameras is to let you capture photos and they have been designed in such a way that they provide you with awesome quality results for your captures.
If you already own a camera, you have probably captured a number of high-quality photos on it. These photos can further be enhanced if you transfer them to your computer and the following guide shows exactly how to transfer photos from the camera to a PC or a Mac.
Let’s find out why people transfer photos, how they do it, and if there’s a way to get these photos on your iPhone.
Part 1. Why Do People Transfer Photos from Camera to Computer?
When you capture a photo using your camera, your camera tries to give you the maximum high-quality reason. However, sometimes there is a lack of lighting or other things that make the photo look a bit lesser quality than what it should be.

Why to transfer photos from camera to computer
Therefore, after capturing the photos, people transfer the photos to their computers to then do post-processing. Post-processing usually includes editing the image, removing unwanted items from the image, increasing or decreasing brightness, and so on. All of these things are done to make sure the image looks as great as it possibly can.
On a computer, you can even change the file format of the photo so that it can be viewed even on those devices that do not support the default file format of your camera. That way you can make your photos viewable universally.
Part 2. How to Transfer Photos from Camera to Computer
Now that you know why photos are transferred from camera to computers, you may be interested in finding out how you can do it yourself. Well, there are a number of ways using which you can transfer photos from your camera to your computer and the following are a few of those ways.
Method 1. Use the Photos App to Transfer Photos from Camera to Computer (Mac)
If you happen to use a Mac, you can make use of the built-in Photos app to transfer photos from your camera over to your Mac. If you have ever managed photos on your Mac, you have probably used the Photos app and it’s pretty easy to use it to import photos from your camera. The following is how you do it.
Step 1: Connect your digital camera to your Mac using a compatible cable. Your Mac will recognize your device.
Step 2: Click on Launchpad in your Dock and search for and click on Photos to launch the Photos app on your Mac.
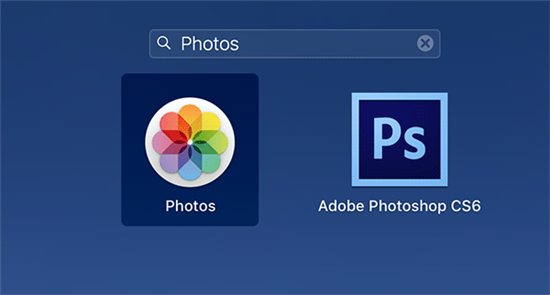
Open the Photos app on Mac
Step 3: When the Photos app launches, click on your camera in the left panel and you should be able to view all the photos stored on the camera. Select the ones you wish to transfer and the app will do it for you.
As you can see, it’s just the matter of a few clicks in the Photos app to transfer photos from a camera to a Mac.
Method 2. Use a microSD Card Reader to Transfer Photos (Windows/Mac)
Most digital cameras store the captured photos on a microSD card and if yours does the same, you are in luck. You can use that microSD card with your Windows PC or Mac and have all of your photos copied over to your computer. The following is how you do it.
Step 1: Eject the microSD card from your camera. The manual of your camera will tell you how to do it.
Step 2: Put the microSD card in a card reader and insert it into your PC or Mac.
Step 3: If you are on Windows, File Explorer will launch and let you access the photos on the card. If you are a Mac user, Finder will let you see all the photos you have got on your microSD card.
Step 4: You can select the photos you want to transfer and click on Copy to have them copied to your computer.
That’s how to transfer photos from camera to PC or Mac using a microSD card.
Method 3. Use the Software Provided by Your Camera Company (Windows/Mac)
Many camera manufacturers have their own dedicated apps that help users transfer content from your cameras over to your computers. You may want to check the website of your camera manufacturer and see if they have a tool that can help you perform the photo transfer job. These dedicated apps have more features than just letting you copy content. It’s worth checking out with your camera manufacturer to see if such a tool exists for your camera model.
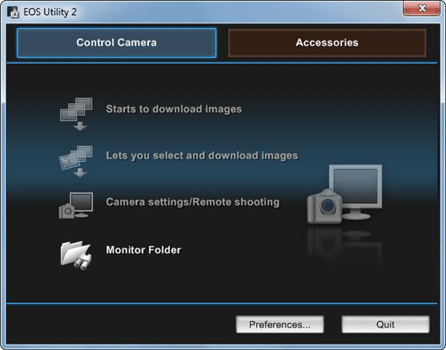
Camera manufacturer utility
Bonus Tip: How to Transfer Imported Camera Photos to iPhone
Now that your photos have been transferred to your computer, you can view them in high-quality on your computer screens. However, if you wish to view them in good quality on a handheld device, it’s best that you get these photos transferred to your iPhone.
There is a software called AnyTrans that should enable you to transfer imported photos from your computer over to your iPhone. The following is how you use the software to transfer your photos.
Step 1: Download and install the AnyTrans software on your computer. Connect your iPhone to your computer and drag photos to your iPhone in the welcome page.
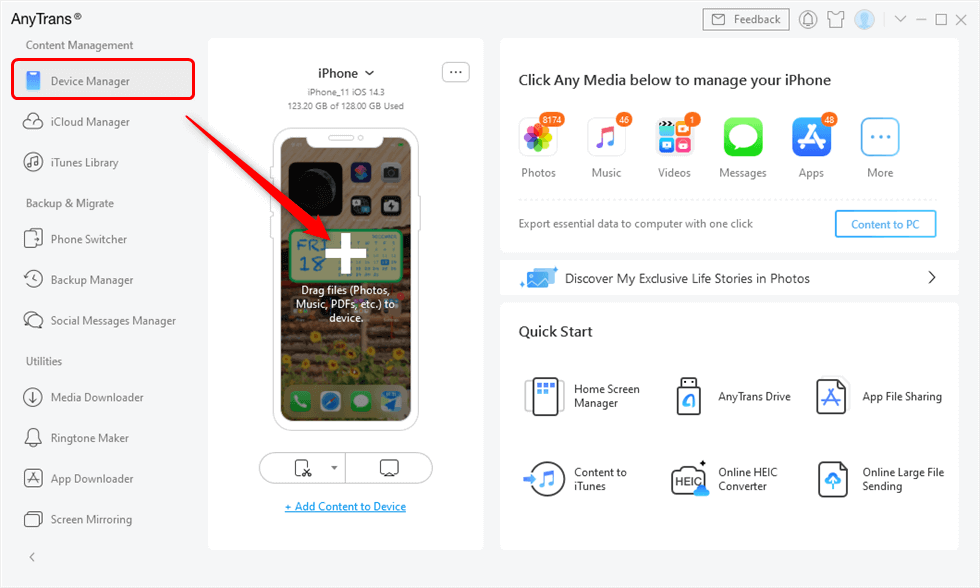
Drag Files from Computer to iPhone Directly
Step 2: Or you can navigate to the folder where your camera photos are saved, select the photos you want to transfer, and click on Open.
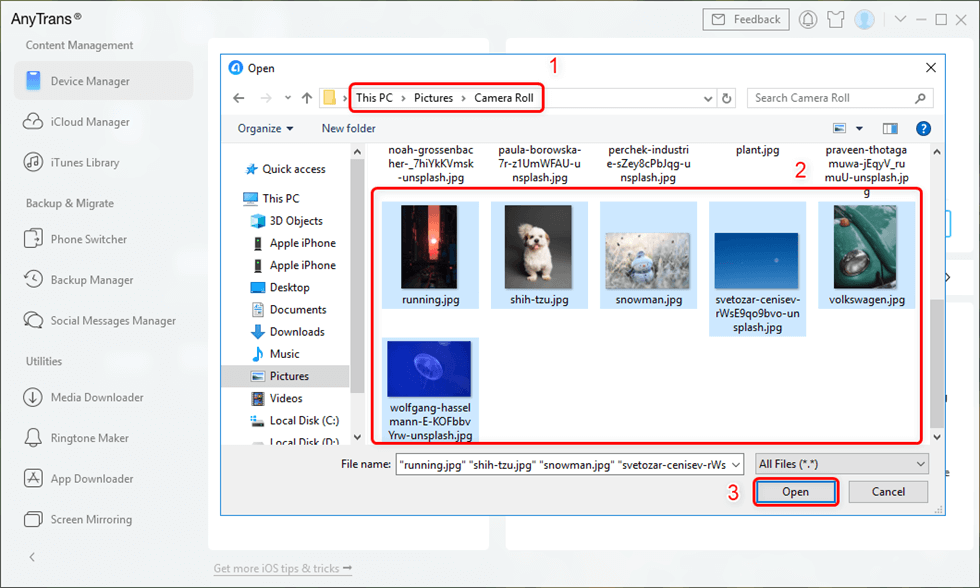
Preview the Photos and Select them to your iPad
Step 3: Once the photos have been transferred, you should be able to view them in the Photos app on your iPhone.
That’s all there is to it.
Conclusion
If your large collection of photos is ready to be edited, our guide above should teach you how you can transfer your photos from your camera to your Windows PC or Mac to do the editing work. We hope it provides you with the most efficient way to transfer photos.

Joy Taylor


Senior writer of the iMobie team as well as an Apple fan, love to help more users solve various types of iOS & Android-related issues.
Screenify
AnyEnhancer
FocuSee
Vozard
AnyMiro
AnyMirror


