How to Restore iPhone or iPad without Computer
Want to restore your iPhone iPad, but have no available computer by your side? Don’t worry. In this guide, we will show you how to restore iPhone or iPad without computer.
iPhone Recovery Tips & Issues
iPhone Data Recovery Tools
Recover Data from Broken iPhone
iPhone Recovery Problems
When your iPhone or iPad isn’t working or becomes unresponsive due to some system errors, like stuck on white Apple logo, continuous reboot loop, or black screen, restoring iPhone iPad might be just what you need to get everything back to normal.
How to Restore iPhone/iPad without Computer
When it comes to restore an iPhone iPad, iTunes can be the most common way. But it needs to be done on a computer. Then how can you restore your iPhone iPad if you have no available computer? Worry not. In the following guide, we will show you how to restore iPhone/iPad without computer.
Also Read: How to Restore iPhone without Updating >
PhoneRescue – iPhone Restore Tool
Different from iTunes and iCloud, PhoneRescue for iOS helps users restore their iPhone iPad without wiping anything. More than anything, it allows you to selectively restore the files you prefer to your device. Just give it a try to restore your iPhone or iPad now.
Free DownloadGet it now
Method 1. How to Restore iPhone/iPad without Computer via Settings
If you want to do is restore your iPhone or iPad to its factory settings, reset all settings and delete all the content, you can do it in Settings on iPhone iPad. And here are detailed steps.
Step 1. Open “Settings” on your device > Tap on “General” > Scroll down the screen and choose “Reset”.
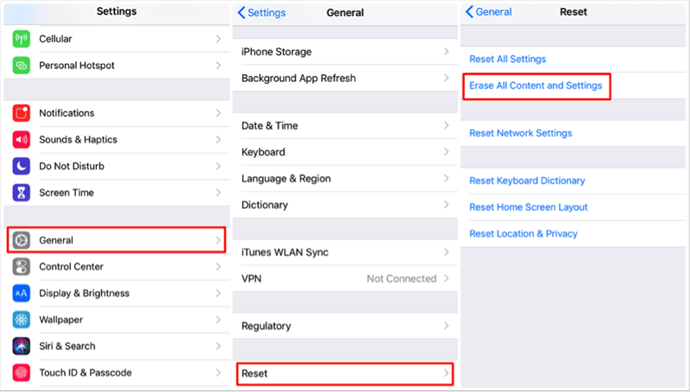
How to Restore iPhone/iPad without Computer via Settings
Step 2. Choose “Reset All Content and Settings” and enter your password > Tap on “Erase iPhone” to confirm.
Method 2. How to Restore iPhone/iPad without Computer via iCloud
If you just get a new iPhone iPad or want to restore iPhone iPad from a previous backup, then you can try iCloud to complete the job. But it only restores the backup that you made with iCloud.
Before starting, make sure that you have the latest iOS version, and have a recent backup to restore from (Go to Settings > [your name] > iCloud > Storage > Manage Storage (or Settings > iCloud > Storage > Manage Storage), then tap a device listed under Backups to see the date and size of its latest backup).
- If you can’t restore the iCloud backup, or even don’t see any backup to be there, check this guide to fix the error and try again, How to Fix: iPhone/iPad Won’t Restore from iCloud >
- If your device has been set up already, you have to erase all existing data firstly by going to Settings > General > Reset > Erase All Content and Settings.
Step 1. Reach to the Apps & Data screen > Tap Restore from iCloud Backup.
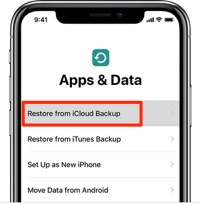
Restore via iCloud
Step 2. Sign in to iCloud (Apple ID) > Proceed to “Choose backup” > Choose the iCloud backup that contains the files you want to restore. Do not disconnect and wait for a progress bar to appear and complete.
Bonus Tip: How to Restore from iTunes/iCloud Backup without Erasing Data
Since both the traditional iTunes and iCloud ways need users to erase all existing data on the device before restoring, lots of iOS users are seeking another way to finish the backup-restoring job. And PhoneRescue for iOS is one of the first choices.
Not just because it doesn’t require users to wipe anything before restoring, but also because it remedies the defects of iTunes and iCloud: It allows previewing the details of the backup file so that you can choose the right backup to restore from; It supports recovering types selectively restoring the files that you wanted most; It supports restoring certain files, there’s no blindly full restore. Now, let’s check how to restore from iCloud backup without Erasing data.
Step 1. Free Download PhoneRescue for iOS firstly, or you can directly click the Download button below > Run PhoneRescue for iOS > Connect your iPhone 12/11/XS/Xr/X/8/7/6s to your computer via its USB cable.
Free Download * 100% Clean & Safe
Step 2. Choose Recover from iCloud mode > Click Right Arrow on the bottom right corner to continue.
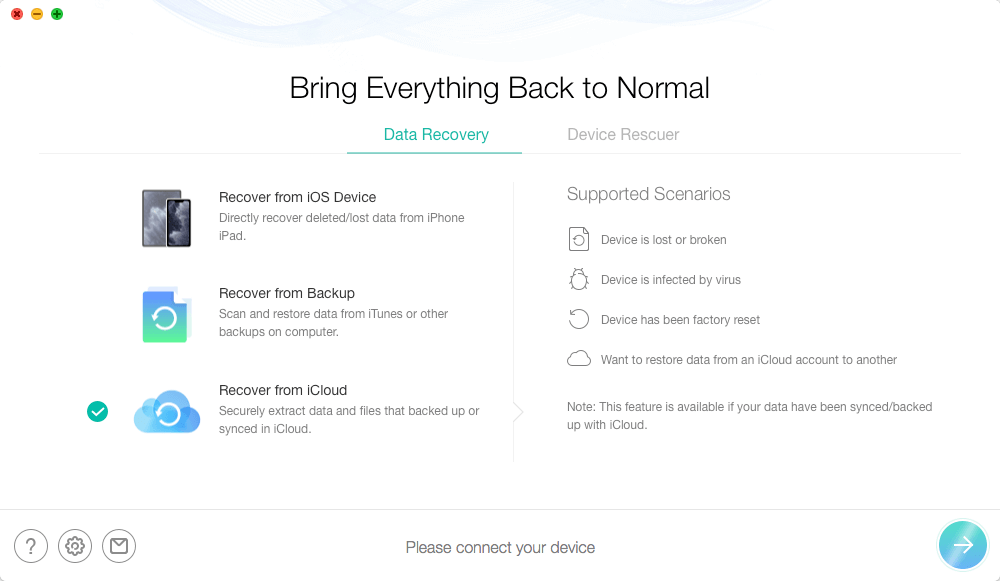
Recover Data from iCloud Via PhoneRescue
Step 3. Sign in your iCloud account (Apple ID) > Click on iCloud Backup option.
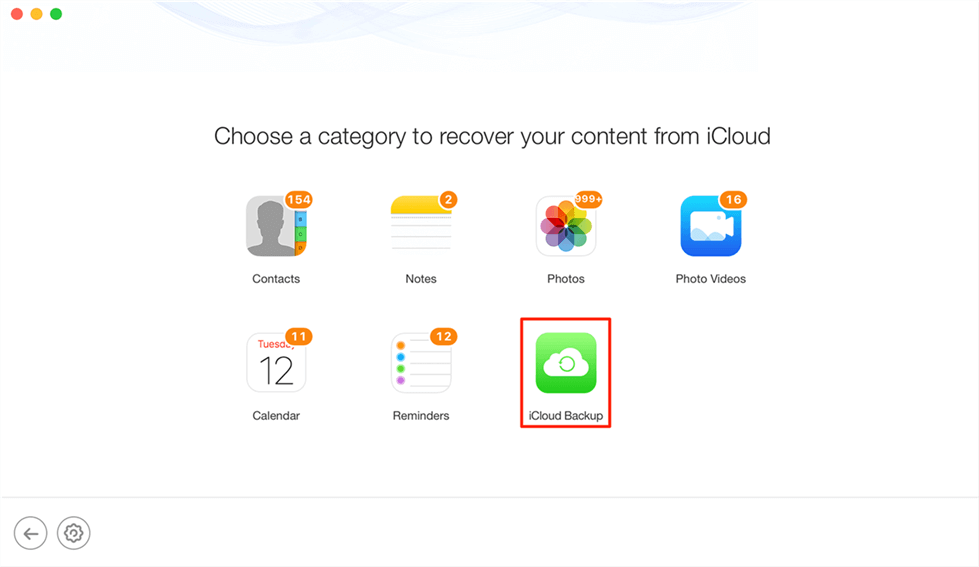
Choose iCloud Backup
Step 4. Select the iCloud backup you want to restore from > Check the file types you want to restore > click “OK” button to proceed.
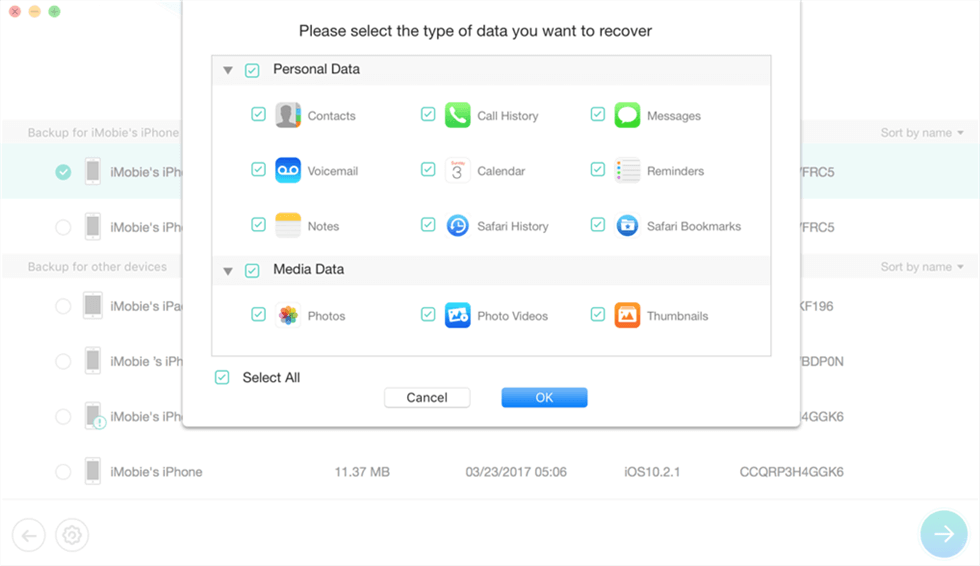
View Backups with PhoneRescue for iOS
Step 5. Select the data you need > Click “To Device” icon to restore them to your iPhone 12/11/XS/Xr/X/8/7/6s. Also, you can click the ”To Mac/PC” to store them on your computer for a backup.
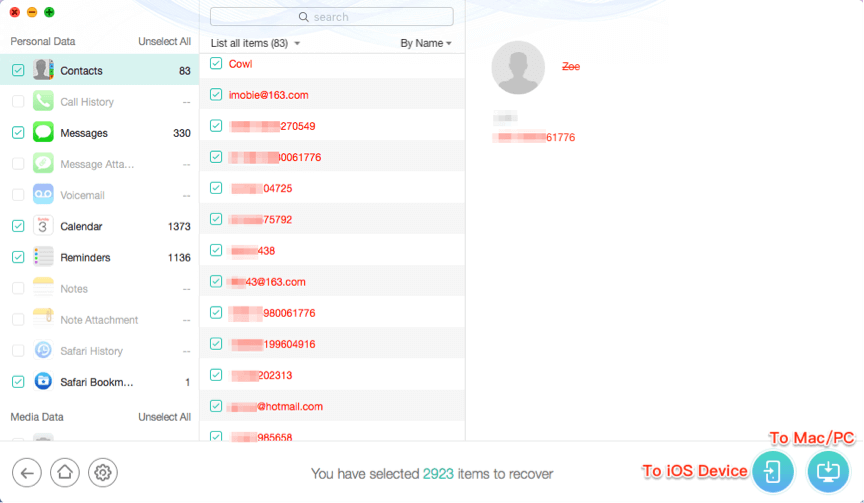
Select Data to Restore
If you would prefer to restore from your iTunes backup without erasing, simply check the guide below,
How to Restore iPhone/iPad from iTunes Backup without Erasing Data >
The Bottom Line
You can go through this guide firstly, and then choose one of two methods to restore your device, according to your needs. If you will meet other problems while restoring iPhone or iPad without computer, feel free to leave your comment in the section below and we will reply to you soon. Lastly, if you find this guide useful, share it to help other iPhone iPad users.
Product-related questions? Contact Our Support Team to Get Quick Solution >

