How to Edit iPhone Videos on PC
If you love recording videos on your iPhone, you would be interested in learning how you can edit your iPhone videos on your PC. There are many ways to do it and the following guide covers some of those methods for you.
When it comes to video recording, the iPhone is just as amazing as it is for capturing photos. If you have been using an iPhone as your primary device, you have likely recorded quite a few videos on your phone. Although the videos do not really need much editing, sometimes you may want to remove certain parts from the videos, add some special effects, and basically do some basic editing of your videos.
If you use a Windows PC, you have a number of iPhone video editors available for your Windows computer. You can use any of these to edit and make your videos more appealing to your PC. The only thing you are going to need is some creativity and you can leave the rest to these apps to take care of.
Part 1: How to Import Videos from iPhone to PC
Before you can use any of the apps on your Windows PC to edit your videos, you will need to first transfer the videos from your iPhone over to your PC. There are various ways to do it including using the iTunes app to transfer your content.
However, most of those methods are not much efficient and you need to go through dozens of screens before your videos are imported to your PC. If this is something you have experienced before and you would now like a more efficient method, a third-party app can help you out.
AnyTrans is an app for both Windows and Mac that allows you to easily transfer data between your iPhone and your computers. You can use it to transfer photos, music, and even videos between your iOS devices and your Windows or Mac machine. You can use the app to have your iPhone videos imported to your PC, and you can then start editing them. The following shows how to do it.
Step 1. Download AnyTrans on your PC and install it > Connect your iPhone to PC via a USB cable > Click on “Device Manager” mode > Choose “Photos” if you want to transfer the photo videos, and choose “Videos” to transfer other types of video.
Free Download * 100% Clean & Safe
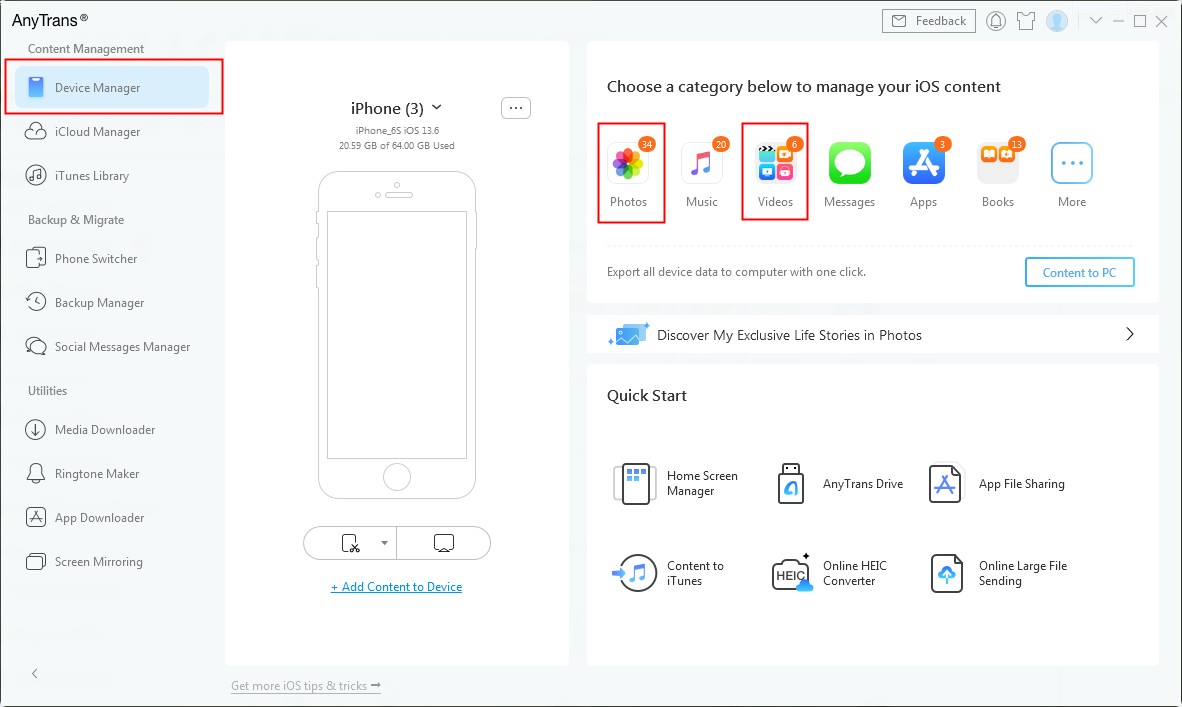
Open AnyTrans and Choose Photos and Videos – Step 1
Transfer photo videos to PC: Click on the “My Photos” option > Choose the “Photo Videos” option > Select the photo videos you want to transfer > Click on the “To Computer” button at the top-right corner to start transferring the selected photo videos to your PC.
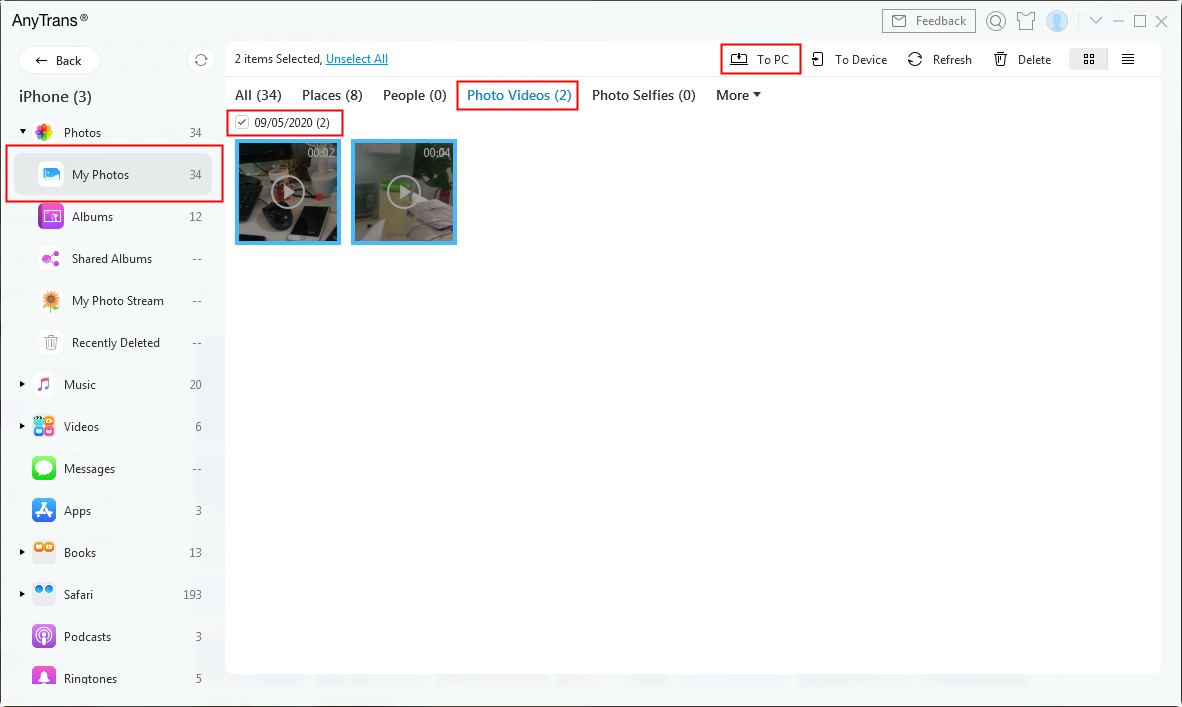
Select Photo Videos to Transfer
Transfer movies and other types of video from iPhone to PC: Here we take Movies for an example. Choose “Movies” > Select the videos you want to transfer > Click on the “To Computer” button to copy them to your PC.
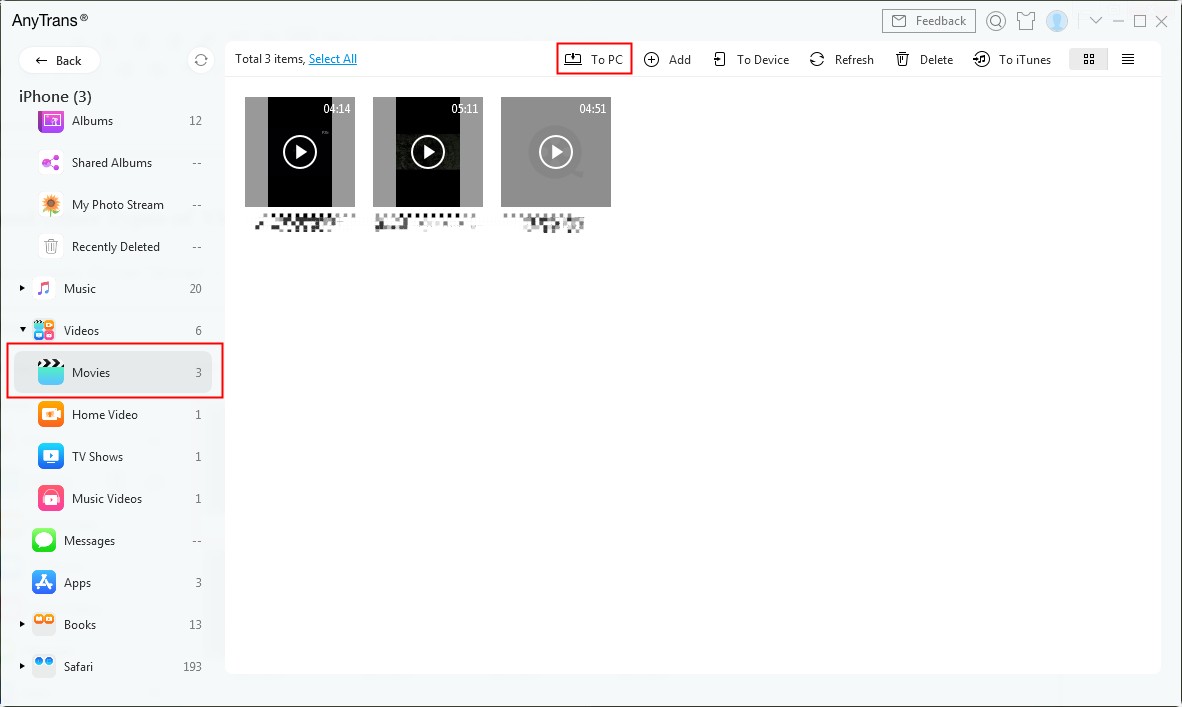
Select Movies to Transfer
Part 2: Edit iPhone Videos on PC Using FlexClip
Once your iPhone videos are available on your PC, you can start editing them using any of your favorite editing apps. If you have not yet installed any video editors on your PC, you can try FlexClip video maker on your computer to do the task. It provides you with a simple and easy solution to take your videos to the next level without a complicated learning curve.
Step 1: Access FlexClip in your browser and click the Make a Free Video button to enter the app. The greatest advantage of FlexClip is that it does not require any software download and installation.

Edit iPhone Videos with FlexClip
Step 2: Once you get into the app, you can choose a video template to edit with your content or simply start from scratch.
Step 3: Upload your videos or photos to the storyboard for editing. You can then drag them to change the order, add custom text, music, and adjust the video speed with a few clicks.
Step 4: When you are done, click the Export Video to download it to your PC.
Part 3: Edit iPhone Videos on PC Using Photos App
Or, you can also directly use the Photos app on your computer, it has all the basic editing tools you need to retouch your videos. If you want more than that, you can always go for a premium editing app such as Adobe Premiere.
Step 1. On your PC, click on the Cortana search box, search for Photos, and click on the app when it appears in the search results.
Step 2. When the app launches, find the option that says New video which is usually located at the top and select the New video project option. It will let you create a new project for your video editing job.
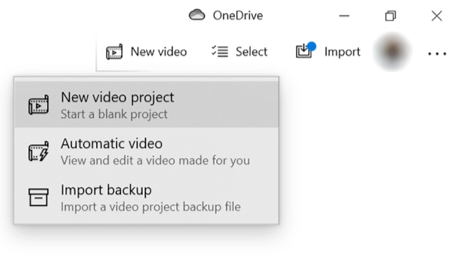
Choose New Project in the Photos App
Step 3. On the following screen, you will be asked to enter a name for your project. It could be anything but you want to use something that you can recognize later.
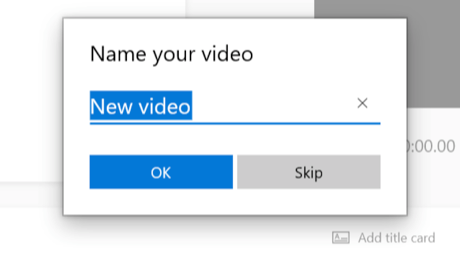
Enter a Name for Your Project
Step 4. Click on the Add button and then choose From this PC to add your imported iPhone videos to the app.
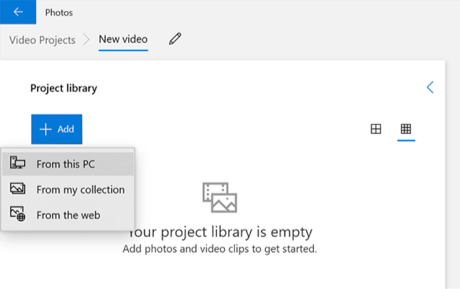
Add Videos from PC to the App
Step 5. Select the folder and then the video you want to add to your project.
Step 6. Once a video is added, right-click on the file and select the Place in the storyboard option. It will add the video to the editing timeline.
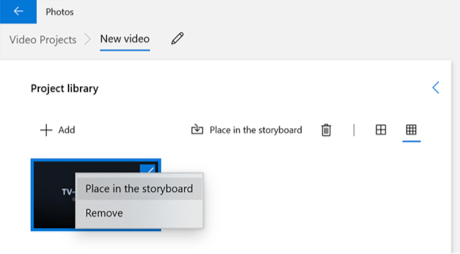
Add the Video to Timeline for Editing
Step 7. You can now start editing your video however you want. You can use various text styles, trim the video, add filters, add motion effects, and so on. Feel free to play around with the available features to edit your video. Make sure to save your project when you finish editing it.
Part 4: Edit iPhone Videos on PC Using Adobe Premiere
If you are looking for more than some basic video editing tools, the Photos app might not be sufficient for you. A better and more suitable app would be Adobe Premiere. It is a professional-grade video editor that lets you turn your basic iPhone videos into some of the really great-looking videos you have ever seen. You will find using Adobe Premier a bit more difficult than the Photos app but it is all worth the hassle.
Step 1. Download and launch the Adobe Premiere app on your PC.
Step 2. Click on the File menu at the top and then select the option that says Import. It will let you import your iPhone videos.
Step 3. Once your video is imported, you are free to use any of the available tools to edit your video. You can add custom text, custom background music, various effects, and so on.
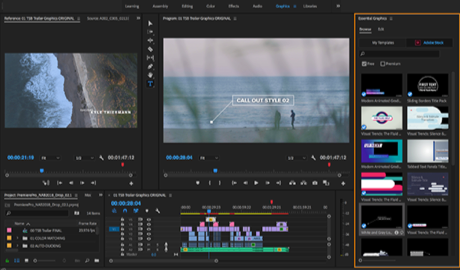
Edit the iPhone Video Using Adobe Premiere Pro
The Bottom Line
Editing your iPhone videos on a Windows PC is fairly easy, thanks to both built-in as well as third-party video editors available for the platform. Even if you are a newbie, you will find it easier to add some fancy stuff to your videos on your PC.
More Related Articles
Product-related questions? Contact Our Support Team to Get Quick Solution >

