Fix iPhone Unable to Share Photos Error
This guide will offer you a few solutions to solve “there was an error while preparing to share” error. Read on to find out all the methods to make it possible for you to share photos from your iPhone.
iPhone Photos Tips
Export Photos from iPhone
Import Photos to iPhone
Fix iPhone Photos Problems
Other iPhone Photos Tips
Some iPhone users have been facing a random issue wherein they are unable to share photos from their iPhones. When a user taps the share option and tries to share a photo, a prompt with an error message appears on the screen “there was an error while preparing to share” and prevents the user from going further with the sharing process.
There are many reasons why your iPhone is unable to share. Here in this post, we will show you some ways to help you out.
Tip 1. Check the Internet Connection
When you share something over the Internet, the first thing you will want to check is your Internet connection. If you are trying to share a photo over an email or any other service that uses the Internet and you don’t have a stable connection, you will likely get the error message and your photo will not be shared.
Therefore, make sure your Internet connection is active and is working. You may try opening a website on your iPhone to see if your Internet works. If it does and you are still facing the iPhone unable to share photos error, jump onto the second solution.
Tip 2. Restart Your iPhone
This is the simplest of fixes and it works on many occasions. What you basically need to do is reboot your iPhone and it will fix the issue for you. If the error was caused due to a random bug in the software, this will fix that for you.
To reboot your iPhone, all you need to do is press and hold down the Sleep button for a few seconds. Then, drag the slider appearing on your screen and your iPhone will shut down. Press the Wake button for a few seconds and your iPhone will boot-up.
Tip 3. Disable the Low Power Mode
If you have enabled the low power mode to save battery juice on your iPhone, it could likely be causing the share photos error on your device. When your iPhone detects that operations like sharing photos are using a significant amount of battery, it will suspend those operations resulting in the Photos app throwing the share photos error and preventing you from sharing your photos. You can get around this by disabling the option on your iPhone as shown below.
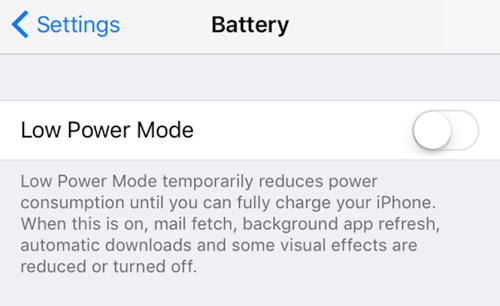
Tip 3 – Disable the Low Power Mode
On your iPhone, open the Settings app and tap on Battery. Turn the toggle for the Low Power Mode option to the OFF position and the option will be disabled on your iPhone.
Tip 4. Reboot the iCloud Photos Library
This solution has been suggested by many users to apply as it has worked for a lot of users to fix their photos sharing error. In this method, what you do is to turn the iCloud Photo Library OFF and then back ON after a few seconds. It fixes the random bug that prevents you from sharing your photos and the following is how you do it.
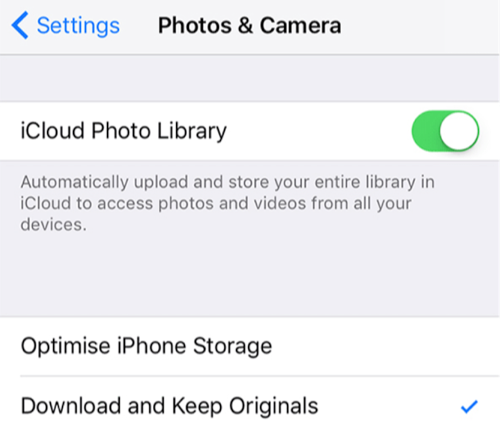
Tip 4 – Toggle off & on iCloud Photos Library
On your iPhone, head to Settings > Photos & Camera and turn off iCloud Photo Library. Choose Remove from iPhone when prompted. Wait for about a minute and then turn the option back on. It should hopefully resolve the issue for you.
Tip 5. Log Back in Your iCloud Account
If you are using iCloud as the medium to share your photos, you can log out of your iCloud account on your iPhone and then log back in to see if that resolves the issue for you. It’s pretty easy to do that and the following is how you do it.
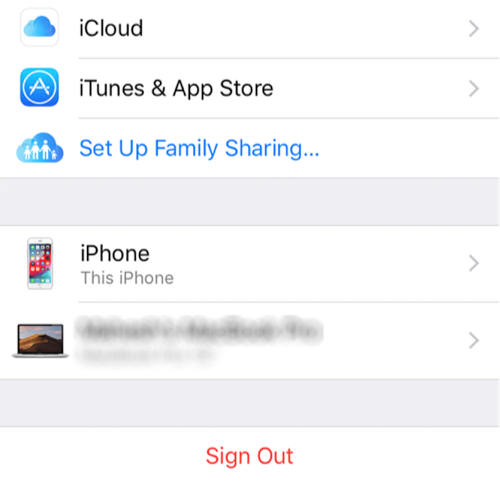
Tip 5 – Log Out of and Back in into iCloud Account
Launch the Settings app on your iPhone and tap on your name to open the iCloud panel. On the following screen, tap on Sign Out at the bottom of the screen and you will be signed out of your iCloud account. Then, log back in using your iCloud credentials and see if you are now able to share photos.
Tip 6. Fix the Photos Sharing Error with AnyTrans
If none of the above methods helped you fix the unable to share photos iPhone, you have a third-party app at your rescue. Enter AnyTrans, an application that lets you easily transfer content between your smartphones and your computers.
With the app installed on your computer, you can easily share photos from your iPhone with another iPhone, iPad, or even your computer. All it takes is a few clicks and here’s how you do it.
The below steps show how you can transfer photos from one iPhone to another using the app.
Step 1. Download and launch AnyTrans on your computer. Plug-in both of your iPhones to your computer using USB cables. Click on Device Manager mode and choose the Photos category.
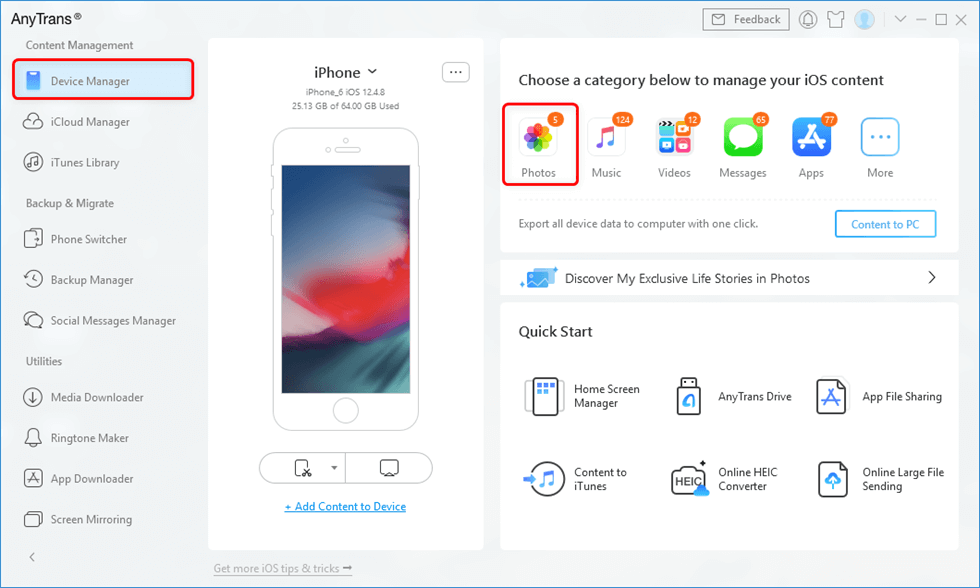
Go to Device Manager and Click Photos
Step 2. Choose My Photos or Albums, etc. that contains the photos you want to share > Select the photos you prefer > Click on the To Device button to share the selected photos to your new iPhone.
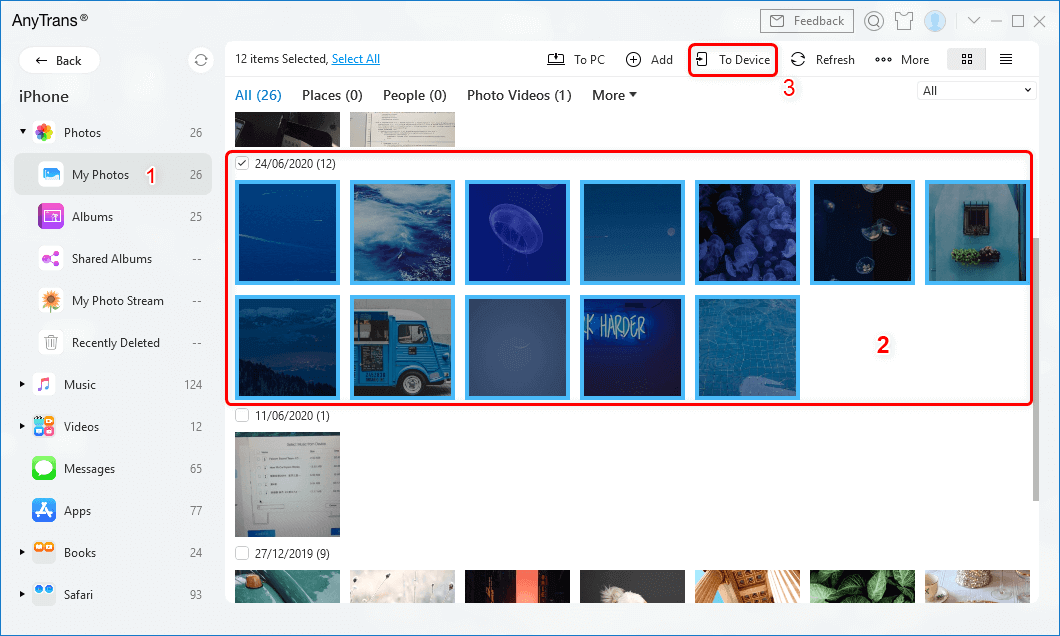
Select Photos and Send to iPhone with Ease
The tips above cover the methods that you can perform on your iPhone without requiring external help. In these ways, you don’t need to download or install anything on your iPhone as all the actions can be performed using the built-in options on your device.
Bonus Tip: How to Convert HEIC Photos
After the release of the iOS 11 version, iDevices use HEIC photos by default. While this new file format is remarkably more efficient in terms of storage space, it is not yet widely compatible. Don’t worry, you can choose iMobie HEIC Converter to freely convert HEIC photos into other formats.

Convert HEIC Photos to JPG Using iMobie HEIC Converter
Also read: How to Batch Convert HEIC to JPG on Mac & Windows >
The Bottom Line
If you ever face the unable to share photos error on your iPhone, our guide above should help you get rid of the issue using multiple ways. If nothing works, you have an excellent third-party app to use to share your photos with any of your devices.
Product-related questions? Contact Our Support Team to Get Quick Solution >

