How to Fix Apple Music Not Syncing Between Devices
If you are suffering from the Apple Music not syncing issue on your devices, the following guide offers some of the solutions that you can apply and get rid of the issue on your various devices. It has got multiple methods so your issue will likely be resolved.
While there are a number of things that Apple has done great, one of the things that everyone likes the most though is how seamlessly all the Apple devices work. If you buy an Apple Music subscription on one Apple device, for example, you can use it on all the devices that you own. The sync feature makes it extremely easy to get content of one Apple device on another.
Lately, some of the users have been complaining that their Apple Music subscription is not syncing between their devices. If you are one of the users facing the issue, you are probably looking for ways to get around it and be able to listen to Apple Music on all of your devices. Fortunately, there are a few ways you can fix the issue on your devices and the following guide shows how you can implement these ways.
4 Fixes for Apple Music Not Syncing Between Devices
This section offers some of the common fixes that you can apply and sync Apple Music across your devices. These fixes will ensure your music gets synced and is available on all the devices you own.
Fix 1. Enable iCloud Music Library on Your Devices
What makes your music tracks available on all of your devices is iCloud. It ensures your songs are in sync and are always available on your devices. If the iCloud music option is not enabled on your devices, your music won’t sync and thus you will have issues with Apple Music. The following is how you enable the option on your devices.
Turn On iCloud Music Library on an iOS Device
Enabling the iCloud music option on an iPhone or an iPad is extremely easy.
Step 1. Launch the Settings app from the springboard of your iPhone or iPad.
Step 2. When it launches, find and tap on the option that says Music.
Step 3. Then, turn the toggle for the iCloud Music Library option to the ON position. Wait while it fetches your music tracks from your account.
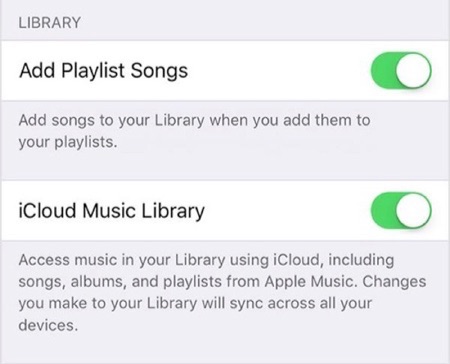
Fix Apple Music Not Syncing Between Devices
Turn On iCloud Music Library in iTunes for Desktop
If you have issues with Apple Music in iTunes for desktop, the following is how you enable the iCloud music option and be able to access your music tracks.
Step 1. Launch the iTunes app on your Windows PC or Mac.
Step 2. If you are a Mac user, click on the iTunes menu at the top and choose Preferences. Windows users need to click on the Edit menu and choose Preferences.
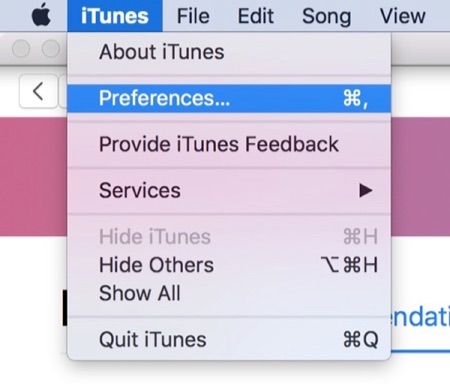
Fix Apple Music Not Syncing Between Devices
Step 3. In the preferences menu, put a checkmark next to the option that says iCloud Music Library > Click on OK to save the changes.
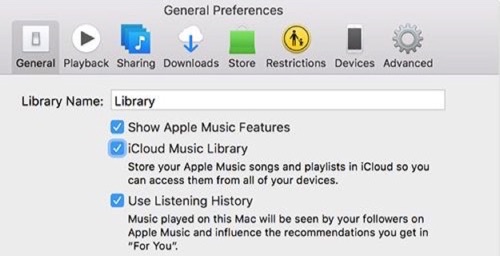
How to Fix Apple Music Not Syncing Between Devices
You are all set. The iCloud Music Library option is now enabled and you should be able to access your Apple Music across all of your devices.
Fix 2. Ensure You Use the Same Apple ID
If Apple Music is still not syncing on your devices, you need to make sure that you are using the same Apple ID on your devices that were used to buy the Apple Music subscription. If you are using a different Apple ID, you will not be able to access your Apple Music subscription. The following is how you find out what Apple ID you are using on devices.
Step 1. On an iPhone/iPad, open the Settings app and tap on your name. You will see your Apple ID on the screen. Make sure it is the one you used to purchase the subscription.
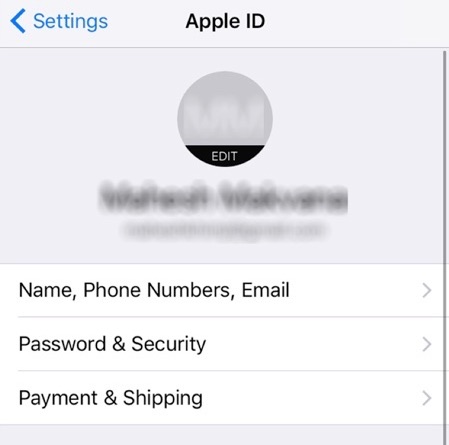
Check Your Apple ID
Step 2. In iTunes on a PC or Mac, click on the Store option at the top and then choose the Account link from the right-hand side menu. You will see the Apple ID being used by iTunes.
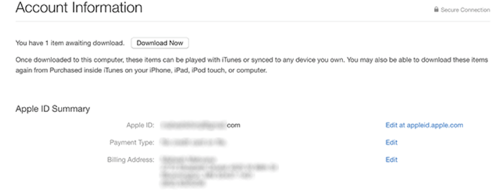
How to Fix Apple Music Not Syncing Between Devices
If you find the Apple ID being used on your devices is not the one that was used to purchase the subscription, all you need to do is log out of that account and then log back in using the ID that has the subscription attached to it. You will then be able to access Apple Music on all of your devices.
Fix 3. Update to the Latest Version of iOS and iTunes
Sometimes the Apple Music service may not sync across your devices if you use an older version of iOS or iTunes. If that is the case, all you need to do is update iOS and iTunes versions on your devices and you should be able to get rid of the issue.
To update the iOS version on your iPhone or iPad, launch the Settings app and tap on General followed by Software Update. Tap on the Download and Install option to download the available updates and install them on your device.
To update your iTunes version, head over to the iTunes official website and download and install the latest version of the app on your computers. It’s quick and easy to do that.
Fix 4. Toggle the Mobile Data Option on Your iOS Device
While this may sound strange but a user could resolve the Apple Music sync issue by toggling the mobile data option on their device. You may try that on your device and see if it helps resolve the issue for you as well.
Step 1. Launch the Settings app on your iOS device and tap on the option that says iTunes & App Store.
Step 2. Then, toggle the option that says Mobile Data. It should hopefully resolve the issue for you.
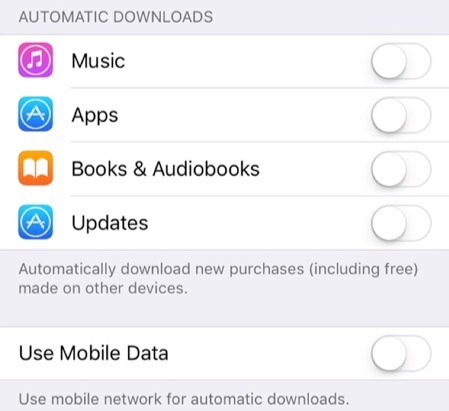
Fix Apple Music Not Syncing Between Devices
Bonus Tip: How to Transfer Music Between iPhones with AnyTrans
If you have still not been able to figure out a solution for the issue, using a third-party app to transfer your music files would be a good thing to do considering the situation. It will let you quickly load up your iPhone with music tracks without having to worry about the Apple Music sync issue.
What makes transferring music between iPhones a breeze is an app called AnyTrans. It allows users to quickly copy all the music tracks from one iPhone and transfer them to another in no time. The following shows how to do it using the AnyTrans app.
Step 1. Download, install and launch the AnyTrans app on your computer. Plug-in both of your iPhones to your computer and click on Device Manager and the music option in the app as shown below.
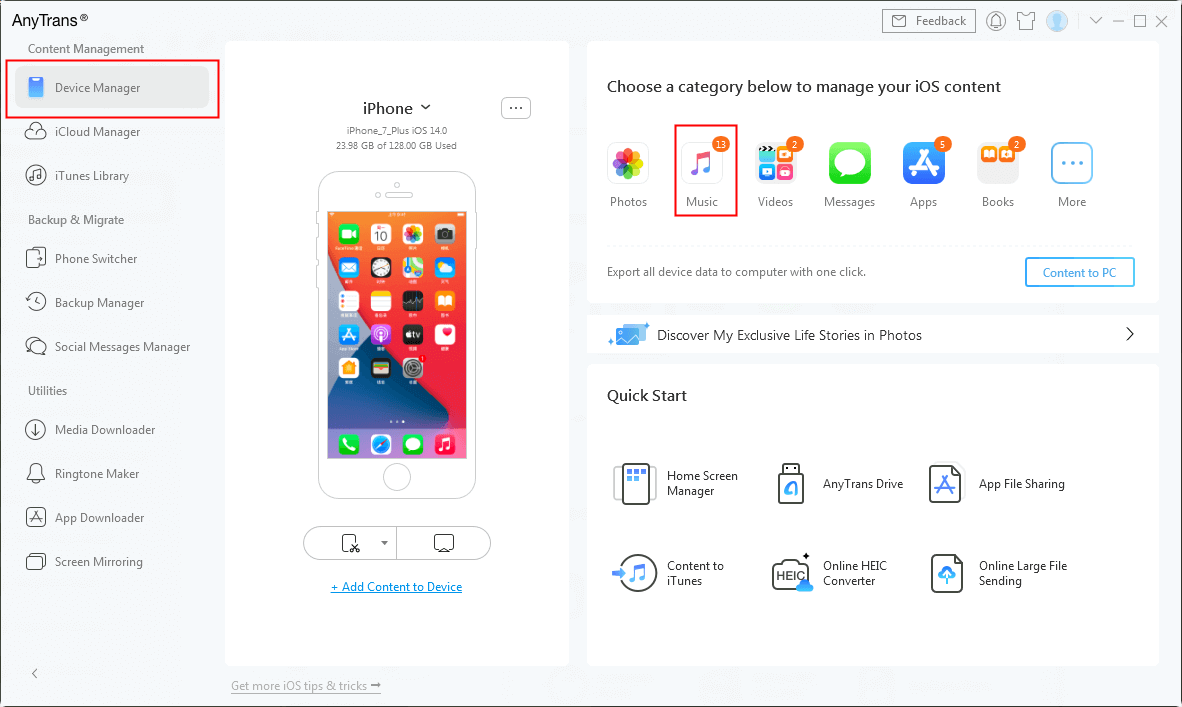
Select Music Tab in AnyTrans
Step 2. On the following screen, the app will ask what you would like to transfer. Select the option that says Audio and then click on Music.
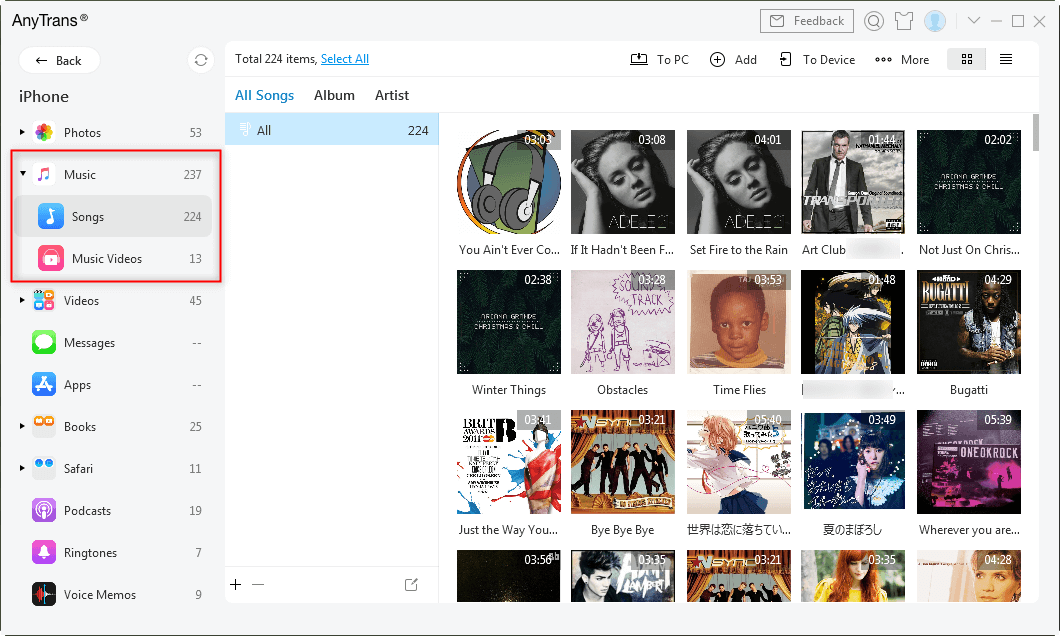
Choose Music from the Left Panel
Step 3. Select the ones you want to transfer to your second iPhone and click on the To Device button at the top-right corner of the app. It will start transferring songs from one iPhone to another and should finish shortly.
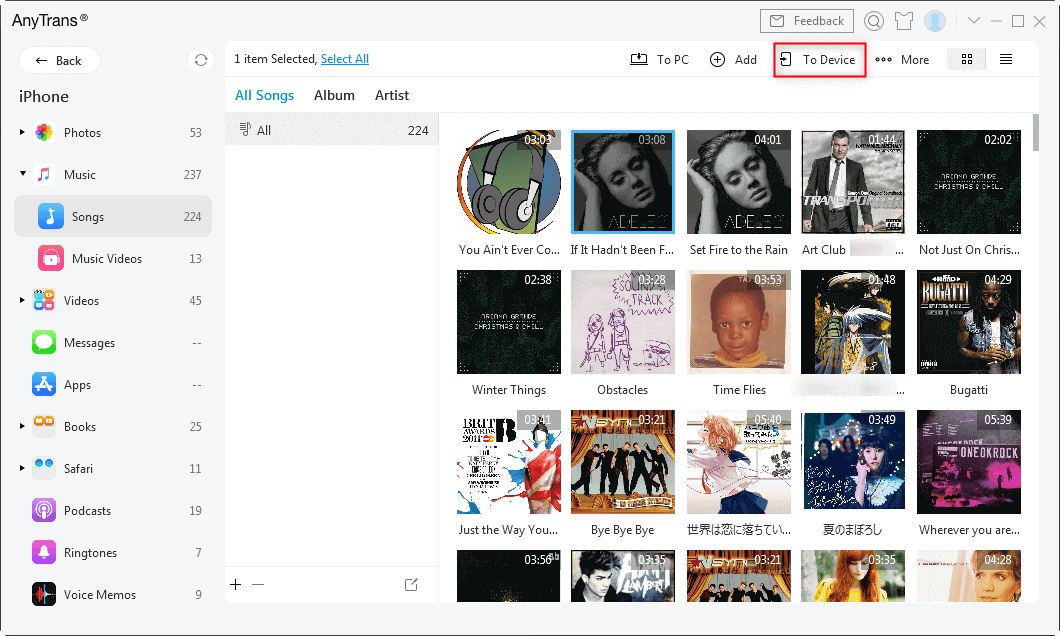
Click the To Device Button
The Bottom Line
If you are having trouble syncing Apple Music between devices, our guide above has a number of solutions to fix the issue. In case nothing works for you, you have AnyTrans to use to transfer your songs from one iPhone to another.
Product-related questions? Contact Our Support Team to Get Quick Solution >

