Transfer Photos from iPad to PC without iTunes
It is time to leave iTunes behind. Without iTunes, you are allowed to transfer photos from iPad to PC as well. In this guide, we’ll show additional methods to help iPad users transfer photos to PC.
No matter you are an iPhone or an iPad user, you may need to transfer photos from your iOS to your computer to give iOS devices more internal storage space. Since Apple has already cut off the “photo transfer” feature in the new iTunes, you can only transfer music and videos with it. This is why more and more iOS users give up transferring photos via iTunes and seek for other options in recent years.

Without iTunes, How to Transfer Photos from iPad to PC
Don’t feel upset if you can’t use iTunes to transfer photos anymore. 5 effective methods will be demonstrated in this post to help you transfer or save your photos to computer. Some of the transferring processes are almost the same for Windows and Mac computers. Thus, you can take these methods on either your PC or Mac computer.
Transfer Photos from iPad to PC with iTunes Alternative
If you don’t want to use iTunes to transfer photos to your computer, you should choose AnyTrans as an iTunes alternative. Allowing you view and select what you want to transfer with 1 click, AnyTrans is much more customer-friendly than iTunes. And this is why AnyTrans has established good reputation in the iPhone data management market.
Free Download * 100% Clean & Safe
Now, download the latest version of AnyTrans and initiate it on your computer. Then take the following detailed instructions to transfer photos from iPad to PC with 3 simple steps.
Step 1. Navigate to the function panel > Click the Device Manager mode and choose Photos to proceed to the next step.
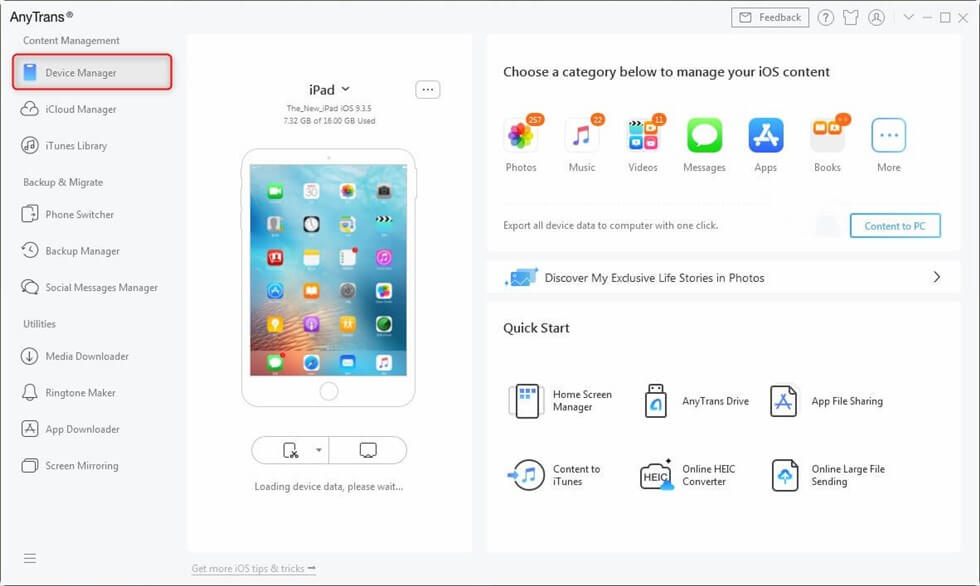
Click the Device Manager mode and Choose Photos
Step 2. You can view photos by photo category. Choose photos you’d like to transfer from iPad to your computer.
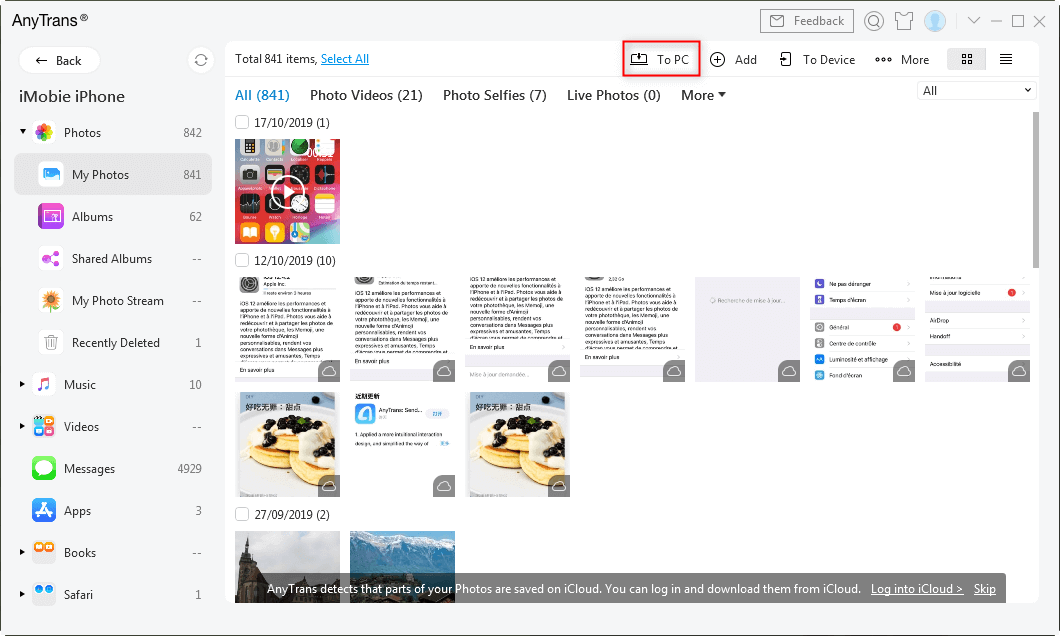
Choose Photos and Click Send to PC
Step 3. Wait for a few minutes until you see the Transfer Completed page on the screen.
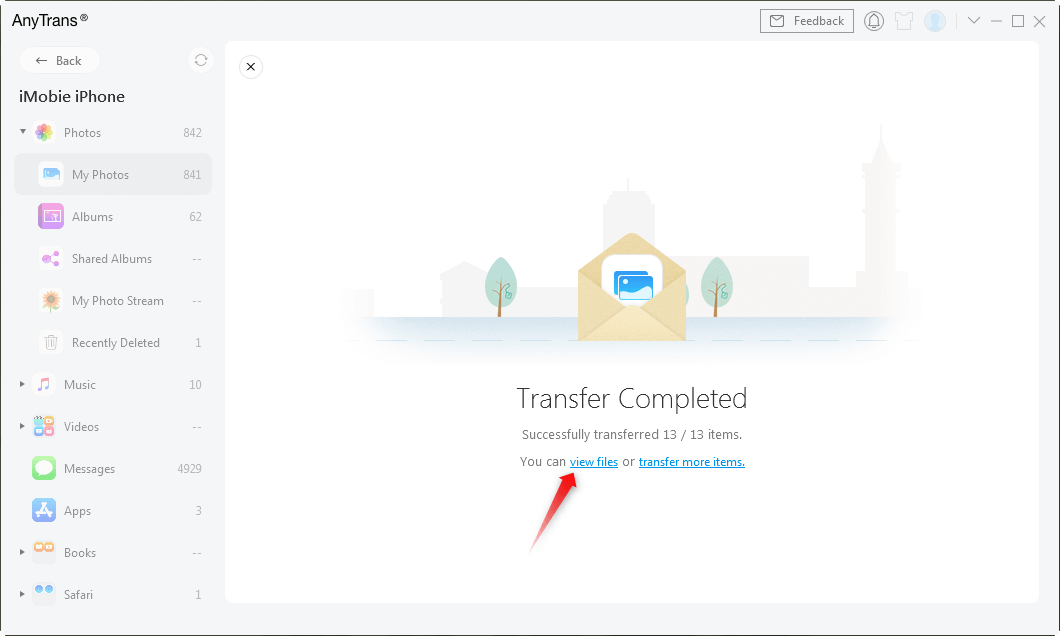
Transferring Completed Page
Transfer Photos from iPad to PC with Dropbox
Saving your precious photos on your pc to prevent you from losing them by accident, you can also turn to non-Apple cloud services like Dropbox. One of the advantages is that you could automatically sync photos to Dropbox when your iPhone and computer are within range of the same Wi-Fi if you let it. Install the Dropbox app on both your iPhone and computer and then follow the instructions below to transfer photos from iPad to PC with Dropbox.
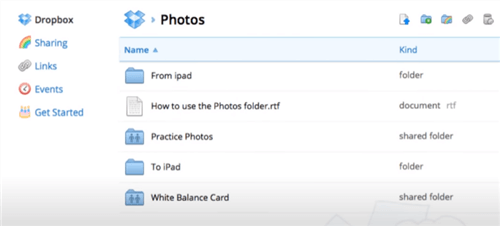
Transfer Photos from iPad to PC with Dropbox
- Launch the “Dropbox” app on your iPhone and open the folder where your photos are stored.
- Click “+” at the upper right side. Select the photo you’d like to transfer and choose the “Upload” button on the upper right corner. Then your photos will be upgraded to Dropbox.
- Open the Dropbox app on your computer or log in to the Dropbox website with the same account and view the photos transferred from iPhone.
Later, you can also download Dropbox to your iOS device if you need it.
Transfer Photos from iPad to PC with iCloud
It is probably a good idea to sync photos with iCloud if you’ve shoot a large amount of photos. Like Dropbox, upgrading your important photos to the cloud will allow you to access iCloud backup either through a web browser or the official iCloud client. Read the following part and figure out how to enable iCloud photos on your iPhone and transfer them to PC.
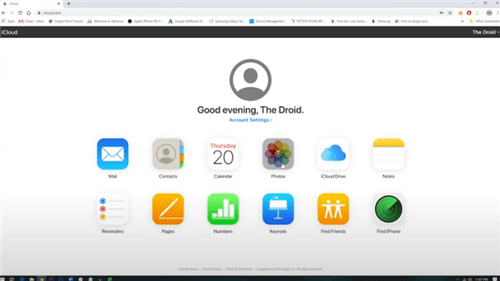
Transfer Photos from iPad to PC with iCloud
- Open “Settings” and scroll down to find “Photos”.
- On the top of the display, toggle on the “iCloud Photos” option, allowing automatically upload photos to iCloud.
- Using the same Apple ID, Log in to iCloud website or open its official app on your computer.
- Click “Photos” in the middle of the interface.
- View the photos that have been upgraded from your iPhone device.
Also, you can easily and directly download photos from iCloud to iPad if you need.
Transfer Photos from iPad to PC with File Browser
Considering you don’t want to bother to set up iCloud or install other tools on your computer, you can simply plug in your iPhone to the computer and take advantage of “File Browser” feature. Your iPhone will play as an external storage device and all you need to do is to give your computer permission to “view files and folders”.

Transfer Photos from iPad to PC with File Browser
- Connect your iPhone to the computer via a USB cable or sync cable.
- There will be a pop-up window on your iPhone screen, asking permission to scan files on your iPhone and share them to the computer.
- Double click to open “My Computer” or “This PC”, where you will find a new folder with the name you’ve given it. Open it and navigate to a folder named “DCIM”.
- You will see many other folders, inside which there are your photos and images.
- Directly copy these photos to a specific folder on your computer.
Transfer Photos from iPad to PC with AirDrop
AirDrop that allows iOS users to share files with Mac is like Bluetooth on Android. As long as your iPad and Mac have connected to the same Wi-Fi, you can take advantage of AirDrop to transfer photos from iPad to Mac computer. Open Bluetooth and connect to the same Wi-Fi on both your iPhone and computer, and then you can send pictures to yourself.
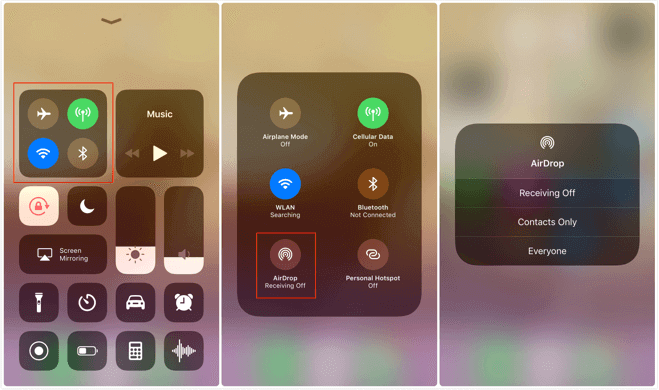
Enable AirDrop Feature from Control Center
- Ensure both your iPhone and computer are under the same Wi-Fi.
- Swipe up the “Control Center” on your iPhone > Tap AirDrop and choose “Everyone”.
- Open the “Photo” app on your iPhone and select photos you’d like to transfer to your computer.
- Tap the “Share” icon at the bottom left and choose your computer under the AirDrop option.
The Bottom Line
Apparently, Using AnyTrans to transfer photos from iPad to PC can be much more easy than any other methods. If you find this tool useful, you can leave us a comment and share it with others who have the same demand.
Product-related questions? Contact Our Support Team to Get Quick Solution >

