How to Solve Photos and Videos Synced from iTunes/Finder will be Removed
If you are facing the “photos synced from iTunes/Finder will be removed” error on your iPhone, the following guide will teach how you can fix the issue and keep your photos and videos secure. Read on to learn how to do it.
iTunes Tips
Basic iTunes Tips
For a while, my phone was not syncing with iCloud. Now when I go to iOS prefs and turn it on, it warns me that “Photos Synced from Finder will be Removed”. Syncing photos via Finder is not supported with iCloud Photos is turned on. 177 photos will be removed.”
Obviously, I would like not to lose 177 photos. What does this warning refer to? What exactly is “syncing from Finder”? and what photos am I likely to lose?
Although most iPhones nowadays ship with enough storage to help you keep your photos and videos stored for a long time on your devices, there are some users who exceed this limit on their iPhones. Then you can use the iCloud Photo Library on your iPhone to store your photos and videos on Apple’s iCloud servers. Doing so will free up the local storage memory on your iPhone.
However, some users encountered the error message “Photos Synced from iTunes or Finder will be Removed” when enabling iCloud Photos on iPhone. Just as the above user said, many people would not like to lose their precious photos and videos. Here in this post, we will introduce what does it mean when it says photos synced from iTunes will be removed, and show you how to fix the issue and keep your photos and videos intact.
Starting with macOS Catalina, syncing photos via Finder is similar to syncing with iTunes. So for Mac users, you may get the message “Photos Synced from Finder will be Removed”. And Windows users will get “Photos Synced from iTunes will be Removed”.
What Does “Photos Synced from iTunes or Finder will be Removed” Mean
This issue happens, because iTunes-based media syncing or Finder-based media syncing and iCloud Photos can not be used at the same time. If you synced iPhone with iTunes or Finder and tried to toggle on iCloud Photos on iPhone, then you will get the message like the below picture shows, which says Syncing photos via Finder is not supported when iCloud Photos is turned on. xxx photos will be removed.
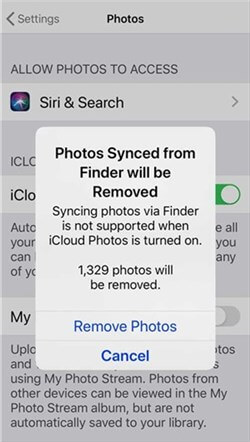
Photos Synced from Finder will be Removed
But don’t worry, there are ways for you to keep your iTunes/Finder synced photos and videos safe and secure with the iCloud Photos option. Before that, you need to transfer iPhone photos and videos to your Mac or Windows PC first. That way, you will have a copy of all of your photos and videos just in case something goes wrong and your data gets erased. Then you can click Remove Photos and enable iCloud Photos to keep your data safe continuously. Read the following methods to sync all your photos easily.
How to Fix Photos Synced from iTunes/Finder will be Removed
Use AnyTrans to Transfer Photos and Videos to Computer (PC/Mac)
AnyTrans is an application that works on both Mac and Windows and allows you to transfer data including photos and videos from iPhone to computer, and vice versa. It is easy to use the app to transfer your content and the following shows how you can go about doing it on your computer.
Step 1. Download and install the AnyTrans application either on your Mac or on your Windows machine.
Free Download * 100% Clean & Safe
Step 2. Launch the app on your computer and plug-in your iPhone to your computer using a compatible cable > On the main interface of the app, click on the option that says Content to PC or Content to Mac. It will let you transfer content over to your computer.
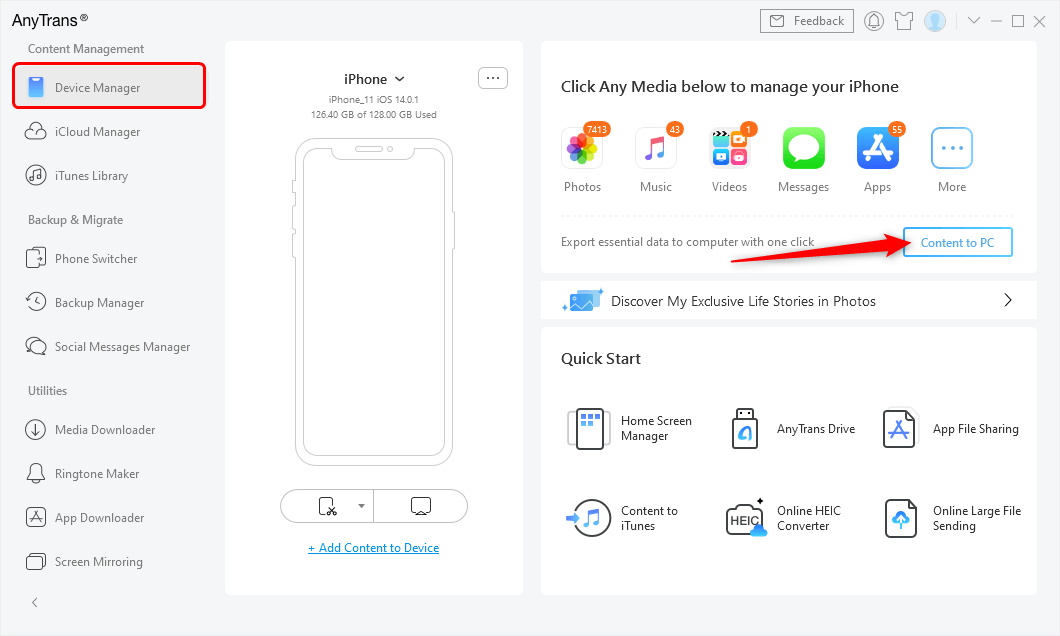
Click Content to PC Under Device Manager
Step 3. The following screen will let you select the content category you would like to transfer to your computer. Here we select all photo categories and click Next button to sync.
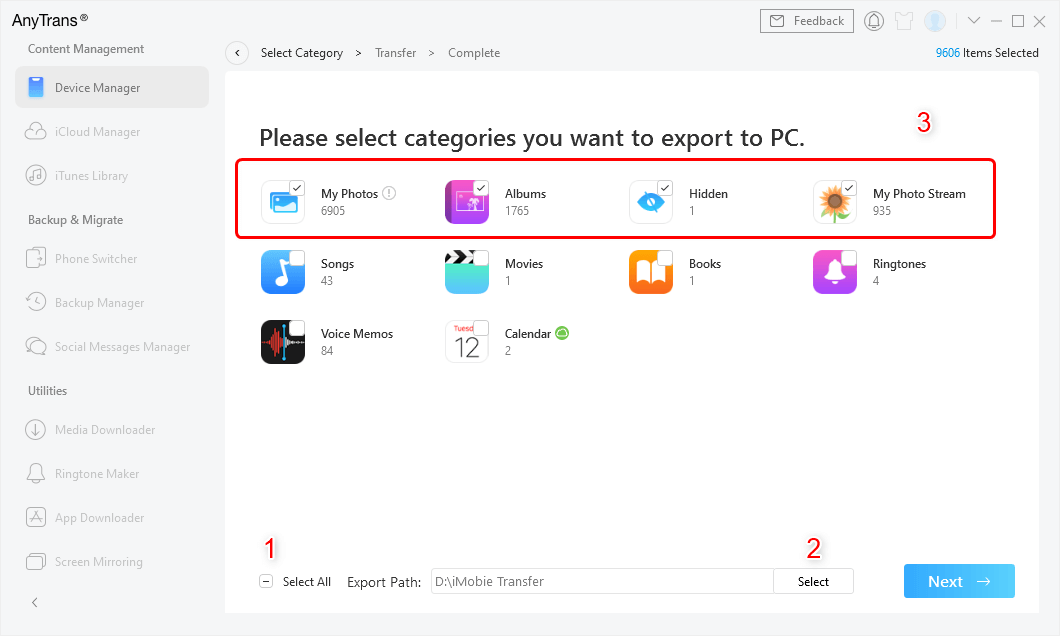
Select All Photos to Transfer
Step 4. Wait while the app transfers photos and videos to your computer. When it is done, you will find your content is now available on your computer.

Photos Successfully Transferred to Computer
One of the great things about using AnyTrans to transfer your content is it preserves your folder structure so your photos and videos will be in their original folder format on your computer.
Since a backup of your content has been created, you may enable the iCloud Photo Library option on your iPhone.
Use Image Capture to Transfer Photos and Videos to Computer
Image Capture is an application that comes preloaded on all the Mac machines out there. It allows you to import and manage multimedia content including photos and videos from your iPhones and other digital gadgets.
It is extremely easy to use the app to import photos from your devices as the app provides a single-click import feature to its users. If you have never used the app to transfer your photos, the following should teach you how you can do it.
Step 1: Click on Launchpad in your Dock and search for and click on Image Capture. It will launch the Image Capture app on your Mac.

Access the Image Capture app on your Mac
Step 2: When the app launches, plug-in your iPhone to computer using USB cable.
Step 3: Click on your iPhone under the Devices section in the app. You will see all the photos you have got on your device. Select the photos you would like to copy, click on the dropdown for Import To and choose a folder to save your photos in, and click on the Import button.
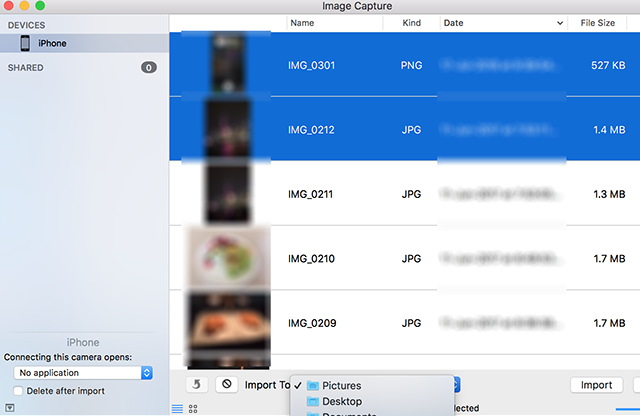
Import selected photos and videos to computer
Step 4: If you would like to import all the photos and videos from your iPhone to your computer, you can click on the Import All button and it will get the job done for you.
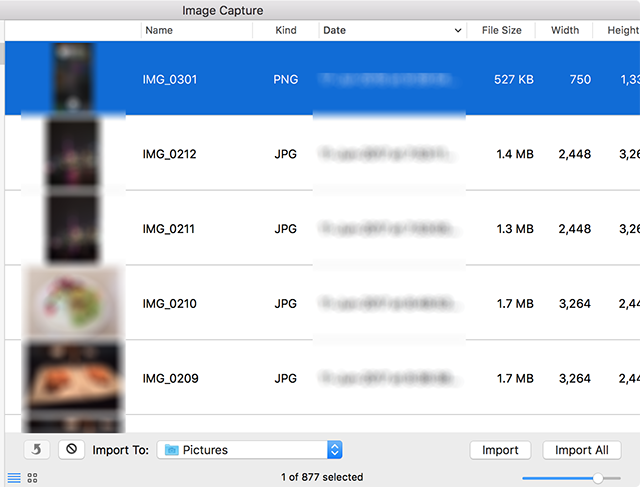
Import all photos and videos to computer
If you have a lot of content to be imported to your computer, the process will take a good amount of time to finish. When it is finished, you will find your photos and videos in the selected folder on your computer.
You may now enable the iCloud Photo Library option on your iPhone as a copy of your photos and videos is available on your computer. That is how you fix the “photos synced from iTunes will be removed” error on your devices.
The Bottom Line
If your iPhone is threatening you with a message that says the content you have synced from iTunes or Finder will be removed, the above guide shows how you can deal with the situation by creating a backup of your media files. We hope it helps you out.
Product-related questions? Contact Our Support Team to Get Quick Solution >

