Transfer Music from iTunes to iPhone without Syncing 2025
This article guides you on how to transfer music from iTunes to iPhone without syncing. All these methods ensure a hassle-free experience. So you can enjoy your favorite music on your iPhone exactly as you like.
Have you ever wondered how to transfer music from iTunes to iPhone without syncing your whole library? You’re in the right place! It’s a common thing to want! You might have many songs on iTunes but only want some on your iPhone. Luckily, there are a few easy ways to do this.
Whether you like choosing each song yourself or using a quick tool, there’s a way for you. We’ll show you how to keep your iPhone music just how you want it, without any extra stuff. Let’s get started and make listening to music on the iPhone easy and fun!
Can You Transfer Music from iTunes to iPhone Without Syncing?
The simple answer is Yes! You can transfer music files from iTunes to your iPhone without syncing. To move music from iTunes to iPhone without syncing, you have a few options. First, you can manage your music manually. This means choosing specific songs to transfer.
Second, use iCloud Music Library or Apple Music. This lets you access all your iTunes music on your iPhone through the cloud. Third, try third-party software for more control. Fourth, buy music directly on your iPhone. It adds songs to your library instantly.
Lastly, for non-DRM songs, use iTunes File Sharing. This method moves music to certain apps on your iPhone. Each method makes transferring music easy without the need for syncing.
To understand how to transfer music from iTunes to iPhone without syncing, let’s break down the best methods.
How to Transfer Music from iTunes to iPhone without Syncing?
For transferring music from iTunes to iPhone without syncing, AnyTrans is a great tool. You can pick just the songs or playlists you want and easily transfer them. It works both ways so that you can send stuff back to iTunes or your computer, too. AnyTrans isn’t just for music; it also handles photos, videos, texts, etc. It’s great for backing up your iPhone data safely without using iTunes.
The design is simple and easy to use, making it good for anyone, not just tech experts. In short, AnyTrans is a really useful tool for managing what’s on your iPhone.
Now, let’s have a look at how to transfer music from iTunes to iPhone without syncing using AnyTrans.
Step 1. Download and install AnyTrans on your computer. Using a USB cable, connect your computer to the iPhone. Open AnyTrans and it should recognize your device.
Free Download * 100% Clean & Safe

AnyTrans Interface
Step 2. Select the iTunes Library mode. Now, you can see all your iTunes content on AnyTrans. Now select the music you want to transfer.
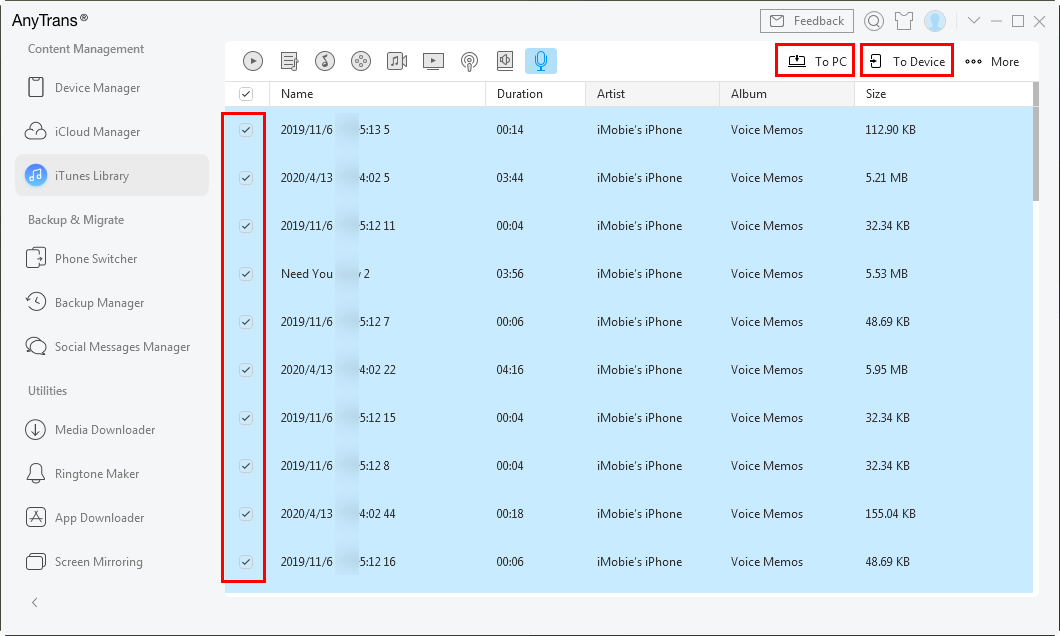
Backup from iTunes Library
Step 3. After selecting the songs, click the option to transfer them to your iPhone. Once the transfer is done, you can check your iPhone. The songs should be there without needing to sync.
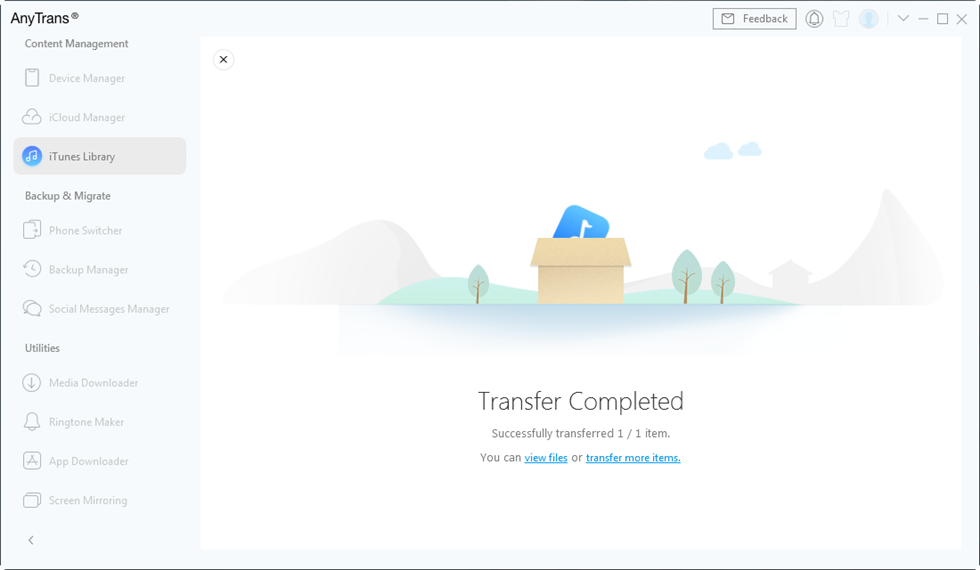
Wait until Transferring Process Complete
That’s all about using AnyTrans to transfer music from iTunes to iPhone without syncing. Now, let’s move on to another method of how to transfer music from iTunes to iPhone without syncing.
How to Transfer Music from iTunes to iPhone without Syncing Manually?
If you want to put music from iTunes on your iPhone without syncing everything, you can do it manually. This way, you choose only the songs you like, not the whole music library.
It’s great if you often change what music you listen to and want to quickly add new tunes or take off ones you don’t listen to anymore. This method is easy and lets you keep your iPhone’s music just how you want it.
Follow the below step-by-step guide to transferring music from iTunes to iPhone without syncing manually.
Step 1. First, connect your iPhone to the PC with the help of a data cable.
Step 2. Unlock your iPhone and set your PC as a trusted device. You may need to enter your password again for confirmation.
Step 3. Now, open iTunes on your Computer and tap on the device icon.
Step 4. Go to the Summary section. Now select the option to ‘Manually Manage Videos and Music.’ Then, click ‘Apply’ to confirm and save these changes.
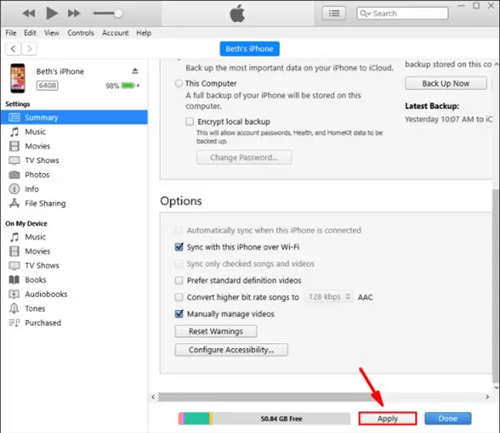
Select the Option of Manually Manage Videos and Apply
Step 5. Go to the Library Section and choose the music files you wish to transfer. Now, hold down the Ctrl key to choose multiple files simultaneously.
Step 6. After selecting the files, drag them from the Library Section to your Device’s Music Section. Wait for the transfer to complete.
Until now, you know how to transfer music from iTunes to iPhone without syncing manually. Now, let’s keep the momentum going and discuss the next best method!
How to Transfer Music from iTunes to iPhone with Syncing [iTunes]
Transferring music from iTunes to an iPhone with syncing is a standard method. It’s easy and syncs your entire iTunes library with your iPhone. This means all your music, playlists, and more from iTunes get copied to your iPhone.
It’s a good choice if you want all your music on both devices. This method keeps your music collection consistent across your computer and iPhone. It’s especially useful if you have a large music library. This will sync everything in your iTunes library, not just selected songs.
Here is the method to transfer music from iTunes to iPhone with syncing using iTunes.
Step 1. First of all, connect your PC to your iPhone using a data cable.
Step 2. Unlock your iPhone and set your PC as a trusted device. You may be prompted to enter your password again for verification.
Step 3. Next, launch iTunes on your PC and click on the Device icon located at the top-left.
Step 4. Now click on the Summary and select Syn with this device over WiFi.
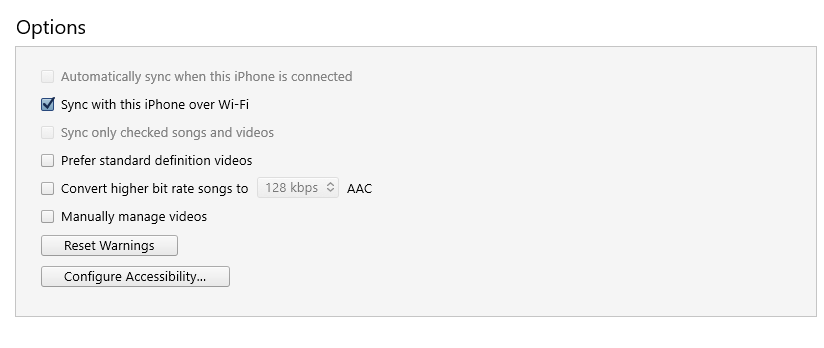
Check the Button “Sync with this iPhone over Wi-Fi”
Now that we’ve explored the syncing method. Let’s transition to another effective technique on how to transfer music from iTunes to iPhone without syncing.
How to Transfer Music from iTunes to iPhone without iTunes [Google Drive]
To transfer music from iTunes to your iPhone without using iTunes, you can use Google Drive. This method involves uploading your music to Google Drive from your computer. Then, download it on your iPhone using the Google Drive app. It’s a good option if you prefer not to use iTunes for transferring music.
This way, your music is stored in the cloud and can be accessed easily from your iPhone anytime, as long as you have internet access. It’s a simple and effective way to keep your music with you without needing iTunes.
The following steps will help you to transfer music files from iTunes to iPhone without iTunes using Google Drive.
Step 1. Launch your web browser and go to drive.google.com. If you’re not already registered, you’ll need to create an account.
Step 2. Once logged in, click on the ‘New’ button to upload your music files from your computer.
Step 3. On your iPhone, visit the App Store, find and install Google Drive. After installation, log into your account and download your music onto your iPhone.
The Bottom Line
In summary, you’ve got several great options when looking at “how to transfer music from iTunes to iPhone without syncing.” You can pick tools like AnyTrans, choose songs by hand, or use Google Drive. These ways let you select just the songs you want.
It’s great because it saves space on your iPhone and lets you keep only the music you like. You can use a tool, do it yourself, or use the cloud. All these ways are easy, and make sure you can enjoy your music on your iPhone without any trouble.
Free Download * 100% Clean & Safe
iPhone Transfer Tips
iPhone Manager
- [Solved] How to Fix A Device Attached to the System Is Not Functioning
- How to Access iCloud Photo Library on Mac
- How to Backup iPhone with Broken Screen
- Top 8 Backup Software for Mac
- How to Delete Blocked Numbers on iPhone
- 4 Ways to Export iPhone Contacts to Excel or CSV
- Full Guide on How to Export Safari Bookmarks on iPhone iPad
- How to Delete Duplicate Photos on iPhone? (2025)
- How to Sync Notes from iPhone to Mac with/without iCloud
- iBooks Not Syncing? 7 Quick Fixes Here
- How to Go to iOS Setup Assistant? How to Use It to Transfer Data?
- How to Select All Photos on iCloud on Various Devices
- How to Transfer Google Photos to iCloud (4 Ways)
- 3 Ways to Transfer iTunes Music to iPhone
- How to Transfer Text Messages from Android to iPhone with/without Computer
- Ways to Transfer Videos from iPhone to Windows 10
- Easy Ways on How to View iCloud Photos on PC
- What Happens When I Delete iCloud Backup [2025]
Cloud Transfer

Senior writer of the iMobie team as well as an Apple fan, love to help more users solve various types of iOS & Android-related issues.
Product-related questions? Contact Our Support Team to Get Quick Solution >
