How to Backup Viber Messages on iPhone
If you are going to do something that might affect your Viber messages, the following guide should teach you how to backup your Viber messages so you have a backup before you do anything on your device. Read on to learn how to do it.
Social Apps Backup & Restore
WhatsApp Tips & Issues
Kik Backup & Restore
Viber Backup & Restore
Line Chat Backup & Restore
Whether you are playing around with the core features of your iPhone or you are experimenting with new options, you should always make sure to have a backup of your important data. It is to ensure you can get access to your data if it gets lost during your experiments. While you can always create a full backup of your iPhone data with iTunes, the following guide particularly focuses on how you can save your Viber messages as a backup on your computer.

Save Viber Messages on iPhone
Many of you out there may be using Viber to send and receive messages and you may want to have the ability to create backups of your messages. Viber offers you a built-in option to back up your messages and you may also use a dedicated application to get your Viber messages backed up to your computer.
The guide teaches both the two ways of doing the task and let’s get started:
How to Backup Viber Messages Using Two Ways
As mentioned earlier, you have two ways available to backup Viber messages on your iPhone. Either you can use the option that is built into the Viber app itself or you can use a third-party app.
Method 1. Use the Stock Option to Backup Viber Messages
If you would like to use the stock backup option in the Viber app to backup your messages, this section will teach you how to do it. It is pretty easy to use this option as it is conveniently located in the app settings and works great.
In order for the feature to work, Viber must be enabled for iCloud on your iPhone. The following steps include this prerequisite as well so jump onto the steps to start backing up your messages.
Step 1. Launch the Settings app on your iPhone and tap on your name. Then, tap on the iCloud option to access your iCloud settings.
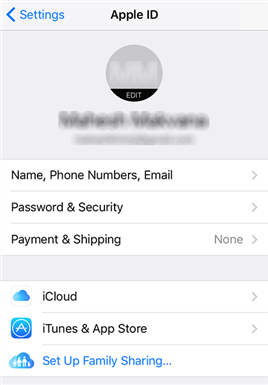
Open the iCloud settings on iPhone
Step 2. Turn the toggle for the iCloud Drive option to the ON position. This must be done or you will not be able to back up your messages.
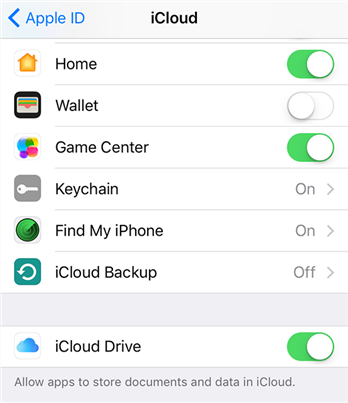
Enable the iCloud Drive option on iPhone
Step 3. Enable the toggle for the Viber option so Viber is allowed to use your iCloud storage.
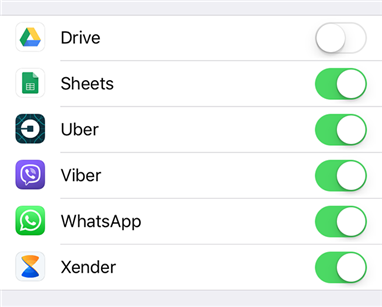
Turn on the Viber option
Step 4. Launch the Viber app on your iPhone and tap on More followed by Settings to open the settings menu.
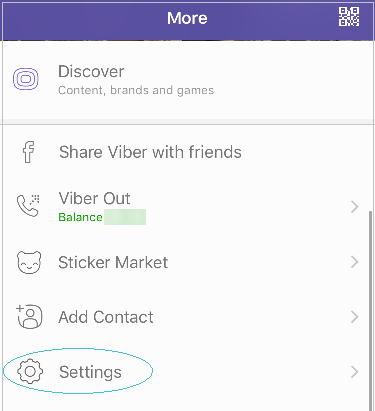
Access the Viber settings menu
Step 5. Tap on Account followed by Viber Backup to open the backup menu in your app.
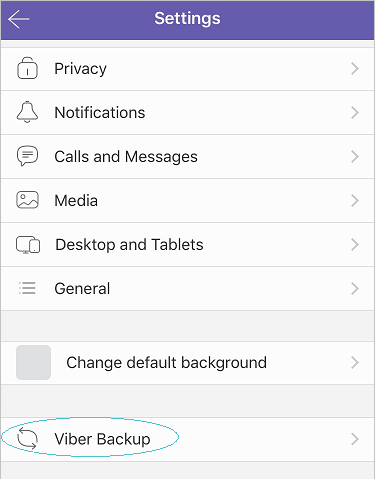
Launch Viber backup settings
Step 6. Tap on the Back up now option to start backing up your Viber messages.
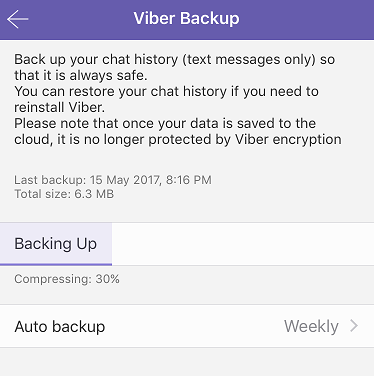
Backup Viber messages on iPhone
Your Viber messages backup should be available in your iCloud account.
Method 2. Use AnyTrans for iOS to Backup Viber Messages
Despite you could back up Viber messages within itself, if you find the default method is inconvenient or it does not work for you, you may want to use a third-party app to have your messages backed up.
Enter AnyTrans for iOS, an application that has a dedicated section to help you create backups of your social media accounts including Viber on your computer. With a few clicks in the app, you should be able to create a full backup of your Viber data.
Here are some of the reasons why you should consider using this app:
- Add password protection to your backups.
- Quickly create a full backup of your messages.
- Backup messages to both Windows PCs and Macs.
- Safe and secure transmission of your messages.
If you would like to see the app in action, the following is how you use it to create a backup of your Viber messages.
Step 1. Download and install the AnyTrans for iOS on your computer. Connect your iPhone to your computer using a compatible cable and launch the application.
Free Download * 100% Clean & Safe
Step 2. Click on the top menu where it says Device Manager and you will see several other options. Select the one that says Social Messages Manager.
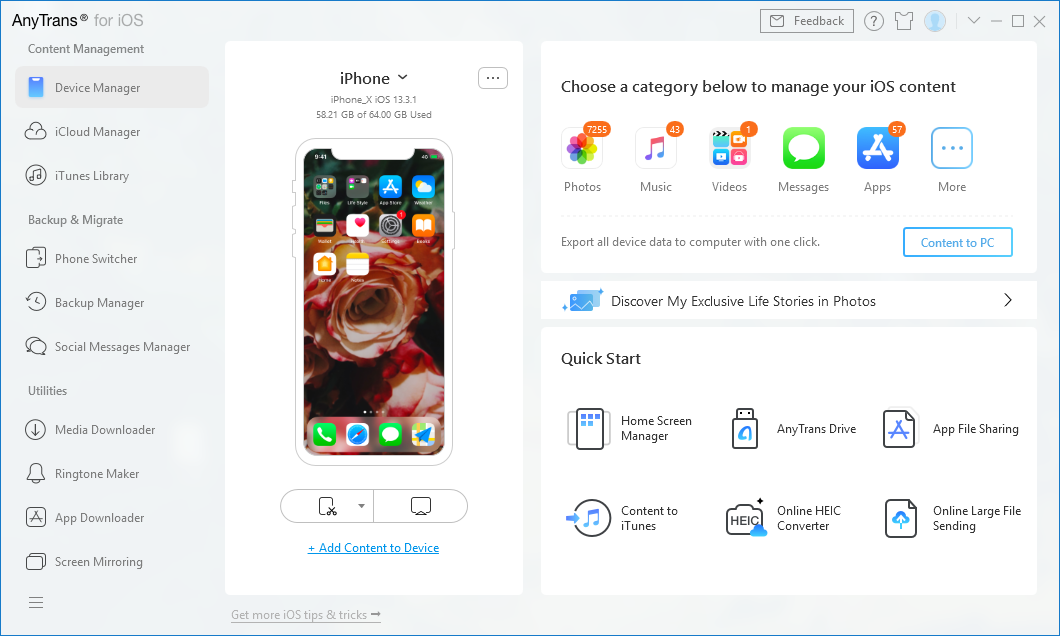
Click on Device Manager Option
Step 3. When the feature opens, click on the Viber icon and choose the option that says Backup. It will let you create a Viber backup.
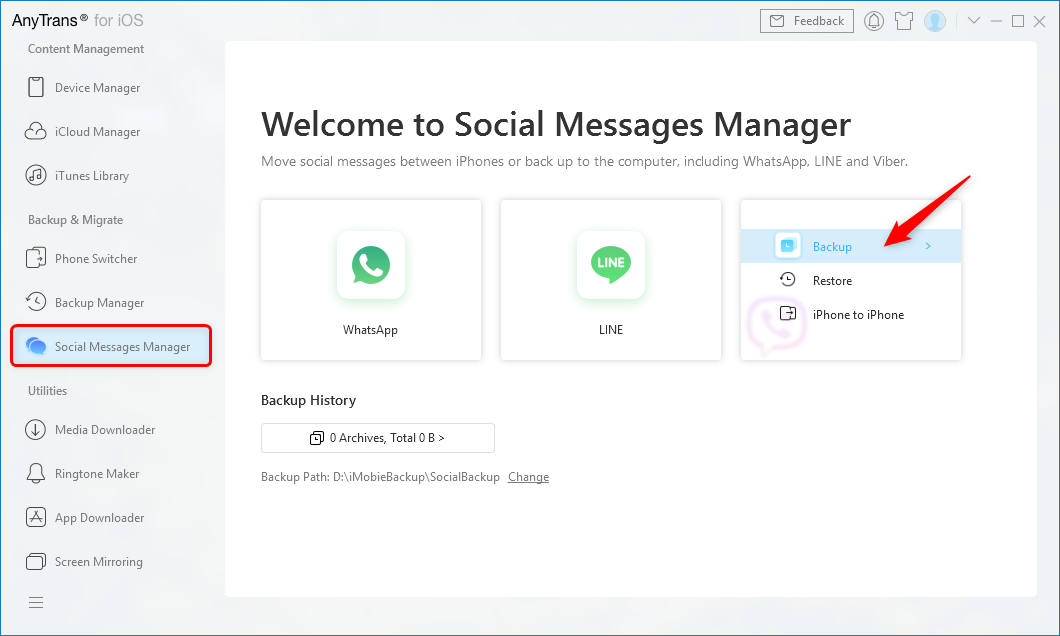
Tap Social Messages Manager and Choose Backup from Viber Tab
Step 4. Optionally, you may add password protection to your backup.
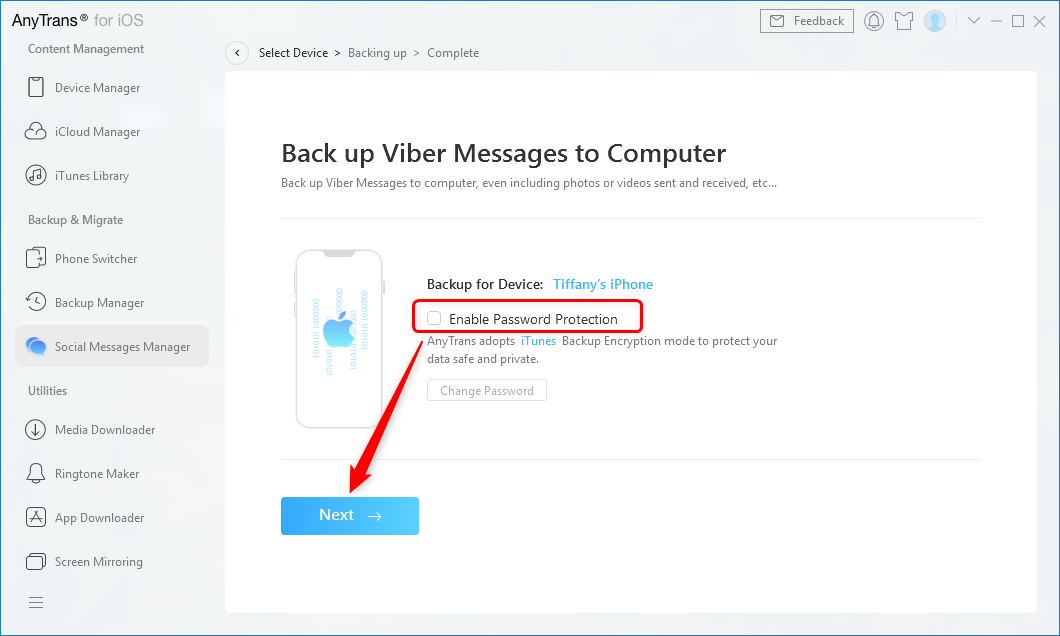
Enable Password Protection and Tap Next
Step 5. Wait while and the backup will be created on computer.
You are all set. Your Viber backup has been successfully created and you may restore it anytime you want from your computer.
The Bottom Line
If you would like to keep a copy of your Viber messages somewhere safe, the above guide helps you backup your Viber messages to your computer using two unique methods. We hope it helps you keep your Viber data safe and secure.
Product-related questions? Contact Our Support Team to Get Quick Solution >

