[8 Ways] How to Fix Vertical Lines on iPhone Screen?
All smartphone devices commonly experience vertical lines. It extends beyond just iOS devices. You could deal with the issue using most of the techniques listed in this article.
Do you have vertical lines on your iPhone screen and don’t know why? You’re not the only one. Many iOS users have reported that their iPhone screens, especially older ones, have pink, blue, green, red, and black lines. If you see vertical lines on your iPhone screen, it usually means something is wrong with the device, either a software error or a hardware problem.

Vertical Lines on iPhone Screen
Lucky for us, some solutions work. You can remove vertical lines from your screen by restarting your iPhone, updating iOS, cleaning the display, or resetting the device to factory settings. If you’re having this problem and want to fix it quickly, this article will explain why your iPhone screen has vertical lines and what you need to do to solve vertical lines on your iPhone screen.
Why Are There Lines on My iPhone Screen?
As previously mentioned, vertical lines on an iPhone screen can be caused by both physical damage and software problems. Here are some reasons why lines might be showing up on your iPhone.
- Accidental Damage: Vertical lines on iPhones typically appear after a device has fallen because the LCD wire separates from the logic board.
- Electro-Static Discharge: If excessive ESD (Electro-Static Discharge) is produced, vertical lines can appear, even if there is a good connection between flex cables and the logic board.
- Hardware Problems: The vertical lines on the iPhone screen can also be caused by problems with the hardware, such as a broken display screen.
- Software Glitch: Sometimes, a software glitch can cause the iPhone’s screen to show vertical lines.
8 Fixes to Vertical Lines on iPhone Screen Issue
We’ve mentioned eight popular working solutions below to solve vertical lines on your iPhone or iPad screen.
Fix 1. Force Restart iPhone
The easiest thing to try is to restart your iPhone. Some minor software bugs that make lines appear on the screen can be fixed by turning the device off and on again. If the lines are still there after your iPhone restarts, you can fix the problem by doing a force restart. It clears out the memory that all apps use. This also fixes any bugs in the software that a simple restart might not have caught.
Since no data is lost during this process, you don’t need to back up your device before you start. This is handled in different ways by different iPhone models.
These steps should be followed to force restart your device:

Force Restart iPhone
- For iPhone 8 and newer models: Immediately pressed and released the Volume Up button > Press the Volume Down button similarly > Hold down the Side button for a while to boot into Apple’s logo screen > To finish the hard reset, give the device a few seconds to start up again.
- For iPhone 7 or iPhone 7 Plus: Press the Power and Volume Down buttons until you see the Apple logo appear on the screen. Then just let the device start up again to see if the lines have gone away.
- For iPhone 6 or earlier models: Keep holding the Home button and power button until the Apple logo shows. After you see the logo, you can let go of the buttons, and the hard reset will be done. After the phone restarts, the lines should be gone.
This should eliminate the vertical lines on the screen of your iPhone.
Fix 2. Cycle Charge
Cycle charging the battery is when you charge the device up to 100% and then use it until it is fully utilized. That might make the vertical lines go away when the phone is fully charged again.
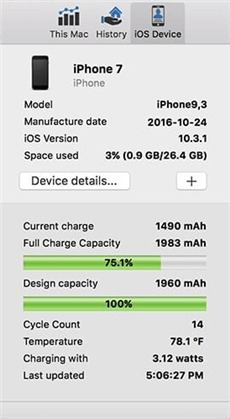
Cycle Charge iPhone
Fix 3. Repair System without Data Loss
Sometimes, this issue may be caused by system issues, so you need to repair your iOS system. As most of the methods to fix system erros will erase all your data on iPhone, here we recommend a method without data loss – AnyFix. It is a professional iOS repair and recovery tool that can help you quickly solve the vertical lines on iPhone screen.
For easy system fixes, please refer to the comprehensive instructions below.
Step 1. Download and install AnyFix on your PC.
Free Download * 100% Clean & Safe
2. Launch AnyFix and use a USB cable to connect your iPhone.

AnyFix Main Screen
3. Click System Repair, then choose Screen Stuck and click Start Now.
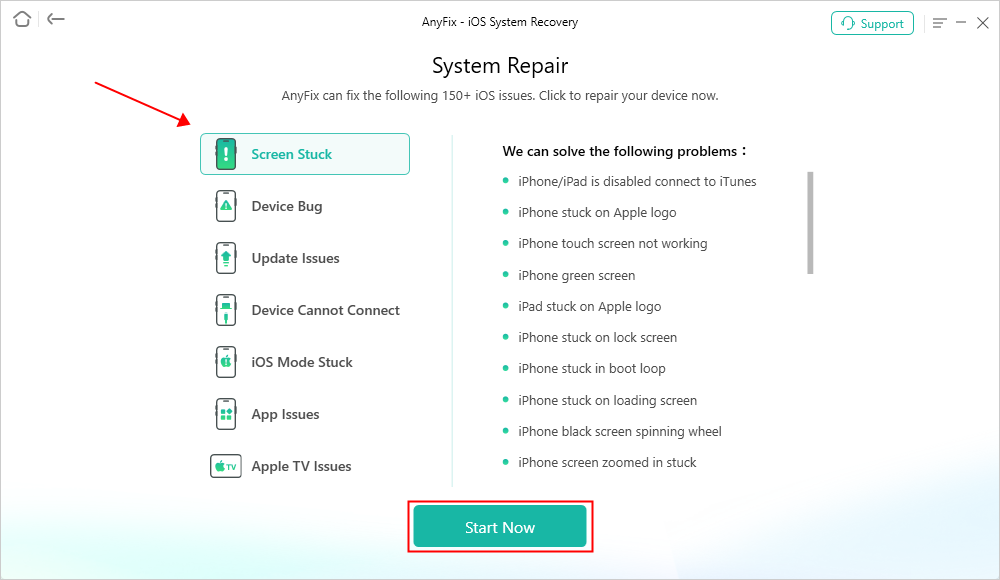
AnyFix System Repair Screen Stuck
4. Choose Standard Repair and go on. No worries, it won’t cause data loss under this repair mode.
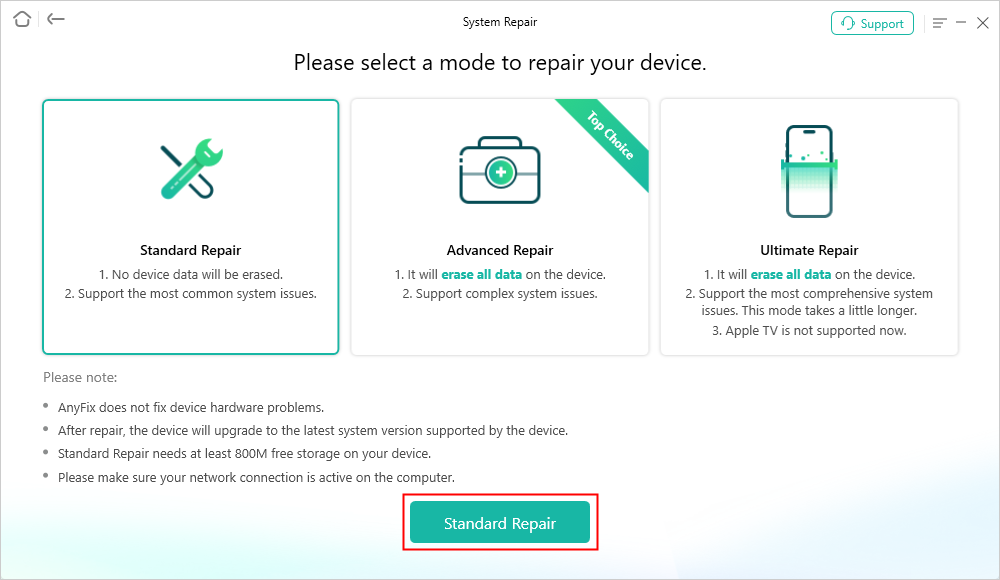
AnyFix Standard Repair
5. Follow the instructions to finish the repair process.
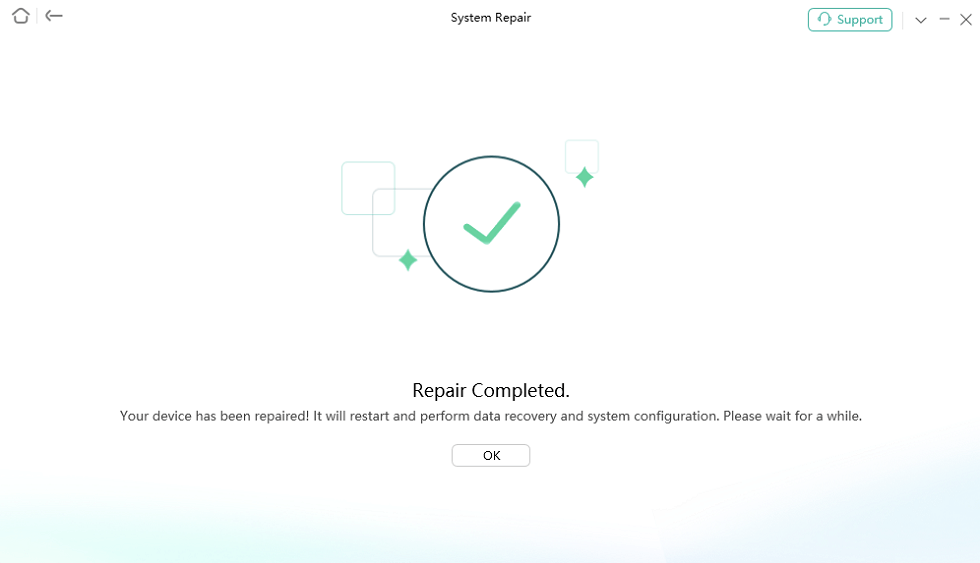
Repair Is Completed
After the iOS system has been repaired, you will notice that your iPhone is again in working order, and the vertical lines are gone.
Fix 4. Put iPhone into DFU Mode
If hard resetting doesn’t work, you can try putting the iPhone in DFU (Device Firmware Update) mode to eliminate the vertical lines on the screen. Follow these simple steps:
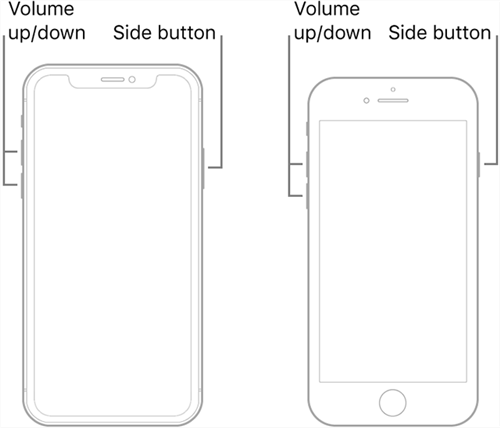
Put Different iPhone Model into DFU Mode
- If you have a Mac with macOS Catalina 10.15 or later, connect the iPhone to the computer and open iTunes and Finder.
- For the next eight seconds, hold down the Power and Home buttons ( for iPhones six and older versions ) or the Power and Volume Down buttons ( for iPhones seven and newer versions ) simultaneously.
- While holding the Home/Volume Down button, keep holding the Power button until iTunes notifies you that “iTunes has discovered an iPhone in recovery mode.”
Fix 5. Update iOS
Some older iOS versions may include bugs that are the reason for this issue. Users complain about vertical lines on the iPhone 5s screen; however, updating the system fixes the problem. Some believe that iOS updates are generally pointless, but that is inaccurate. In addition to adding new features, iOS upgrades frequently include bug patches, which are crucial to the iPhone’s regular operation.

Update iOS on Your iPhone
Step 1. To update the iOS software of your iPhone, head to “Settings” > “General” > “Software Update.”
Step 2. Click the “Download and Install” option to approve your update if one is available. The updating procedure will start; all you have to do is check that your Wi-Fi connection is strong and wait for it to be finished.
Fix 6. Restore with iTunes
iTunes is another way to restore your iPhone to its default factory settings. Here is what you have to do:
Step 1. Attach your iPhone to the computer, then launch iTunes.
Step 2. Select the device after it appears in iTunes, then click “Restore iPhone” in the summary panel.
Step 3. To finalize the action, click “Restore” once more. The most recent version of iOS will be installed by iTunes when your device is erased.
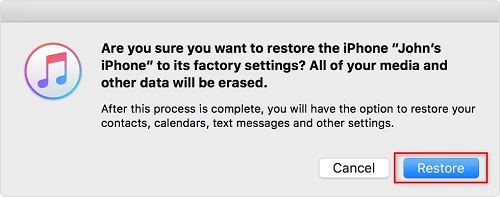
Restore iPhone with iTunes
Fix 7. Factory Reset iPhone
A factory reset is required if neither of these workarounds solves the problem. Your device must be entirely erased to be returned to its factory settings. You will therefore lose all of your data during this process. Make sure you back up your data.
Two basic ways to factory reset your device are through the Settings app or through iTunes on a computer.
Using the Settings App, perform the following steps to return to factory settings:
Step 1. Open Settings > Tap the option “General” > Choose “Erase All Content and Settings” after navigating to the “Reset” or “Transfer or Reset iPhone” menu option.

Choose Erase All Content and Settings
Step 2. You’ll be prompted to back up your files at this time. To begin, select “Back Up Then Erase.”
Step 3. After that, you must confirm the factory reset by entering your passcode. The erasure starts when you enter the passcode and click OK.
Step 4. Give the device some time to do the factory reset. After restarting the device, look to see whether the vertical lines are gone.
Fix 8. Repair/Display LCD Screen
The issue might be with the screen itself and other physical damage to the hardware if none of these above fixes resolves the issue and you still see vertical lines on your iPhone. You should either get the screen replaced or repaired in this situation. If the iPhone is still covered by warranty, you can visit your nearby Apple Store to have the experts fix it or replace the screen for free.
The device will undergo a thorough inspection, and the issue will be identified. If the cause of the vertical lines on iPhone difficulties is hardware-related, you might be required to purchase some parts. A drop or heavy knock could cause internal damage to the screen, which would show up as vertical lines on the iPhone screen. As they are quite delicate and prone to falls, this could occur if the LCD wire that supports the panel becomes loose.
It isn’t much you can do to repair a damaged screen other than buy a new one. You could pay out of pocket to replace a screen that has been physically harmed if the warranty does not cover it.
What Should You Do Before Fixing Vertical Lines on iPhone Screen?
If there are lines on your iPhone’s screen, you should back it up before going to the solution. If your iPhone is badly broken, this may be your last chance to save important data like contacts, photos, and videos.
You can use iTunes or iCloud, the official ways to back up an Apple device. If you use iTunes to back up, you will need the lightning cable ( USB cable ) that came with the device. But if you choose to use iCloud, make sure you have enough space on iCloud for all the information on the device.
The Bottom Line
You can apply any of the mentioned fixes to remove vertical lines from your iPhone’s screen. Depending on the causes, we advise choosing a solution you can rely on to work for your device and then following the directions to repair it. Please back up your vital iPhone data, including photos, contacts, videos, and more, as some fixes may delete the device and return it to its factory settings. And if you do not want to lose your data, just try AnyFix for free first.
Free Download * 100% Clean & Safe
Product-related questions? Contact Our Support Team to Get Quick Solution >

