How to Downgrade iOS 17 to iOS 16 Without Losing Data
In this article, you are going to discover various methods to downgrade iOS 17 to iOS 16. You will explore their step-by-step guides to grasp the concept and perform it. Apart from downgrading, you will also learn how to back up your iPhone data before downgrading. To enhance your smartphone experience, we will introduce you amazing methods.
Did you upgrade your iPhone, and now you don’t like it? Do you want to know how to downgrade iOS 17 to iOS 16 without losing data? If yes, then you are in for a treat! Every year, Apple comes with an update that brings new features and security improvements. Most iPhone users install the new update right away and are sure to love the new changes. Meanwhile, some users like their previous iOS version and want it back.
In this article, you are going to uncover some methods to downgrade to iOS 17. You will also explore how to back up your data before downgrading. Let’s dive in!
Can I Go Back to iOS 16 from iOS 17?
Many iPhone users want to downgrade iOS 17 to iOS 16, especially when they find the new update isn’t what they expected. If you are wondering whether it is possible, the good is that it can be done. Also, it’s not as complicated as it might seem.
Apple allows its users to roll back to the previous iOS version for a limited time after an update. Therefore, it’s essential to act quickly because you won’t be able to do it once it’s too late. The best part? You can make it happen without losing any of your valuable data.
Downgrade iOS 17 to iOS 16
Is It Possible to Downgrade iOS Without PC?
There are various ways to downgrade iOS 17 to iOS 16. Some can do the job without needing a PC, and some may require a PC. However, Apple has made it easier for users to manage their device software directly from their iPhones. It lets you switch to iOS 16 hassle-free, even if you don’t have a computer at your disposal. Let’s see how!
How to Downgrade iOS 17 to 16 Without a Computer
You cannot directly downgrade iOS 17 without a computer. Because it requires specific tools and software that are only available on a computer. However, if you want to remove the iOS 17 beta (you haven’t upgraded your iPhone to the iOS 17 official version). In that case, following the simple steps below to uninstall iOS 17 without a computer will be suitable for you:
Step 1: Open the “Settings” on your iPhone.
Step 2: Scroll down and click “General.” Here, look for “VPN & Device Management” and click it.
Step 3: Click the “[Name of latest update]” option. Then, Select “Remove Profile” and confirm it.
If you are unable to do it by following this method, you can try the next method.
How to Downgrade iOS 17 Without Losing Data In Simple Clicks
Since iOS 17 has launched, most of the users are complaining that their iPhones keep freezing. If you are facing the same issue, we have got you an amazing solution – AnyFix. It is an effective and reliable tool to fix almost all of your iOS-related issues. With AnyFix, there’s no need to downgrade to iOS 17 manually. Just a few clicks and the job is done. Apart from the iPhone freezing issue, you can even solve issues like the iPhone won’t charge, won’t turn on, stuck on the Apple logo, and many more. It is an all-in-one solution with the highest success rate. The best thing? You don’t need to be a tech expert to use AnyFix. Its intuitive interface makes it accessible to everyone.
Free Download * 100% Clean & Safe
Free download AnyFix and follow the steps to Downgrade iOS 17:
Step 1: After the installation is done, connect your iPhone to your PC/Mac. Launch the AnyFix app and select the “Upgrade/Downgrade iOS” mode.
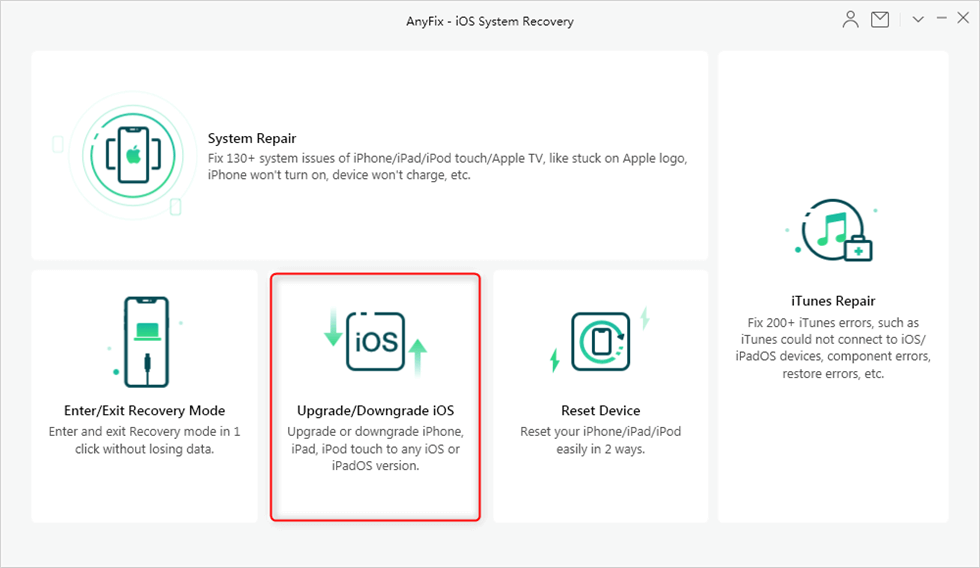
Upgrade or Downgrade iOS Version
Step 2: After your iPhone is successfully detected, select the “1 click to downgrade iOS/iPadOS” option. Then, click the “Start” button to get started.
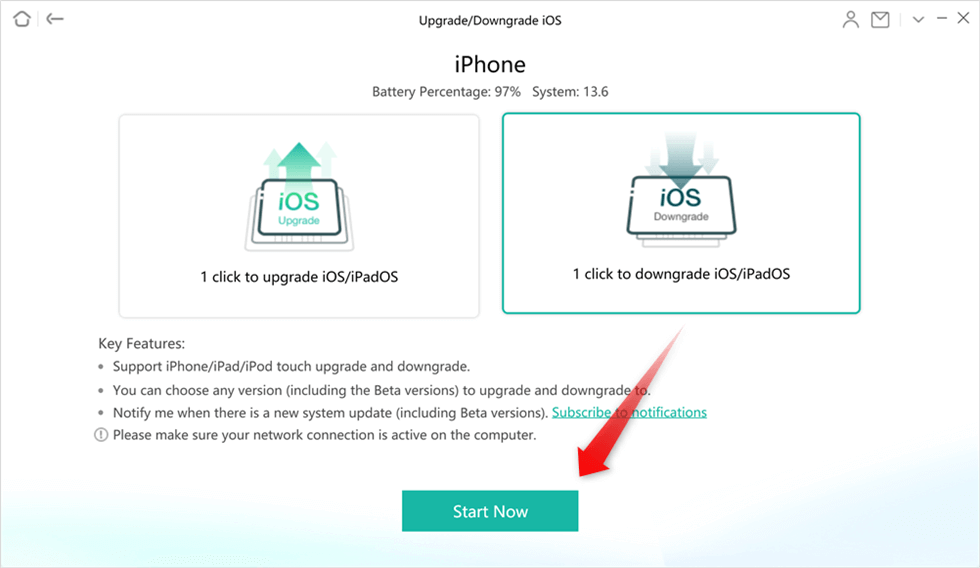
Click to Downgrade iOS/iPadOS
Step 3: After clicking the “Start Now” button, the whole supported firmware packages for your device will be displayed on the page. Select any and click the “Download” button. When the downloading process is completed, please click the “Downgrade” button to downgrade iOS 17.
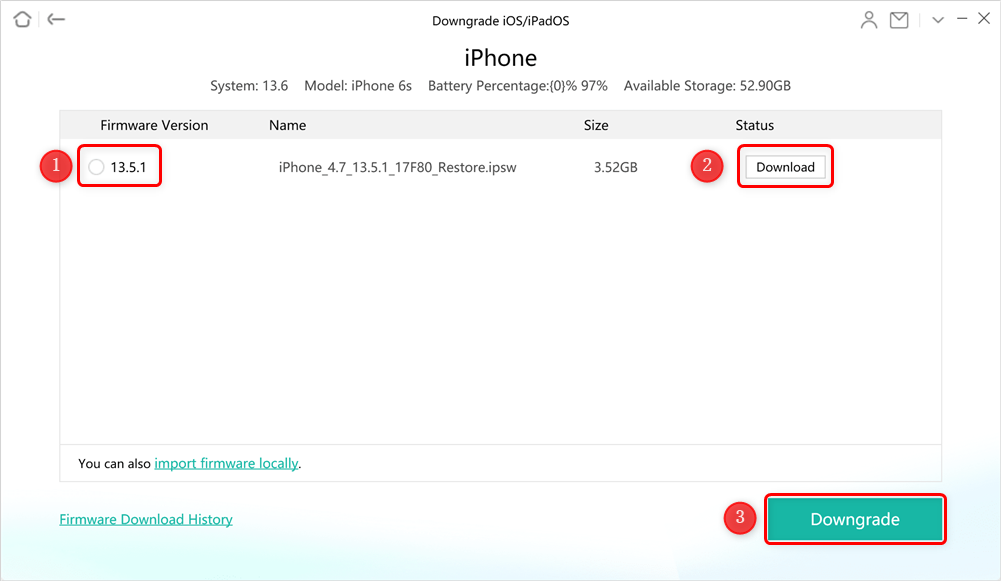
Download Firmware to Downgrade
Step 4: After clicking the button, AnyFix will start to downgrade the iOS version automatically. After the process is completed, you will see the below interface.
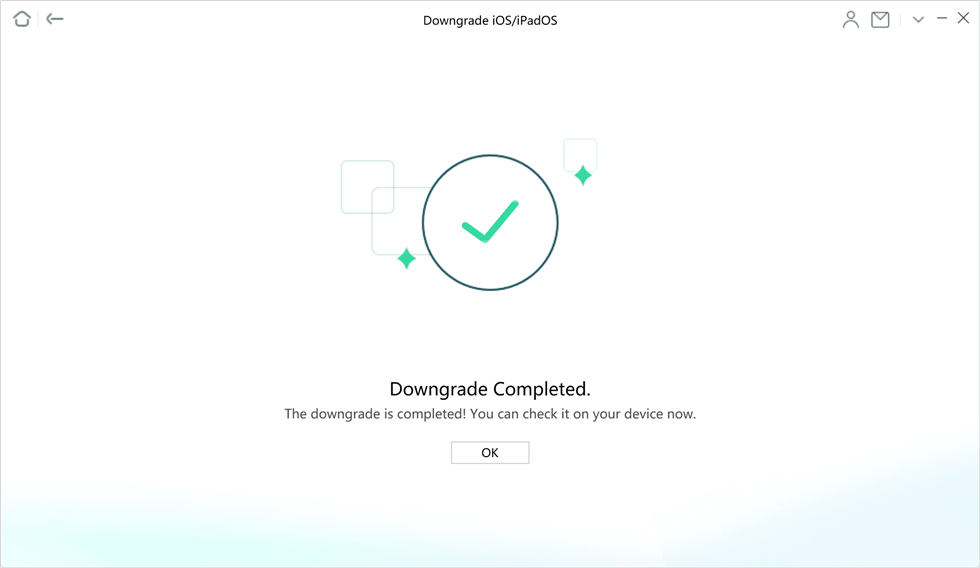
Downgrade Completed Page
How to Downgrade from iOS 17 to 16 Using iTunes
Another way to downgrade iOS 17 to iOS 16 is by using iTunes. However, this method can be tricky because it requires to download a firmware. Plus, if you don’t have a backup, you will permanently lose your data. You can follow the instructions given below to downgrade iOS 17 using iTunes:
Step 1: Visit IPSW Download and download the official iOS 16 firmware that matches your iPhone model.
Step 2: Now, connect your iPhone to the PC/Mac via a USB cable and run the latest version of iTunes.
Step 3: Tap and hold the “Shift” key on the keyboard and click on “Restore iPhone.” Keep holding the Shift key until a new window appears.
Step 4: Now, browse and select the firmware package you downloaded earlier and hit open.
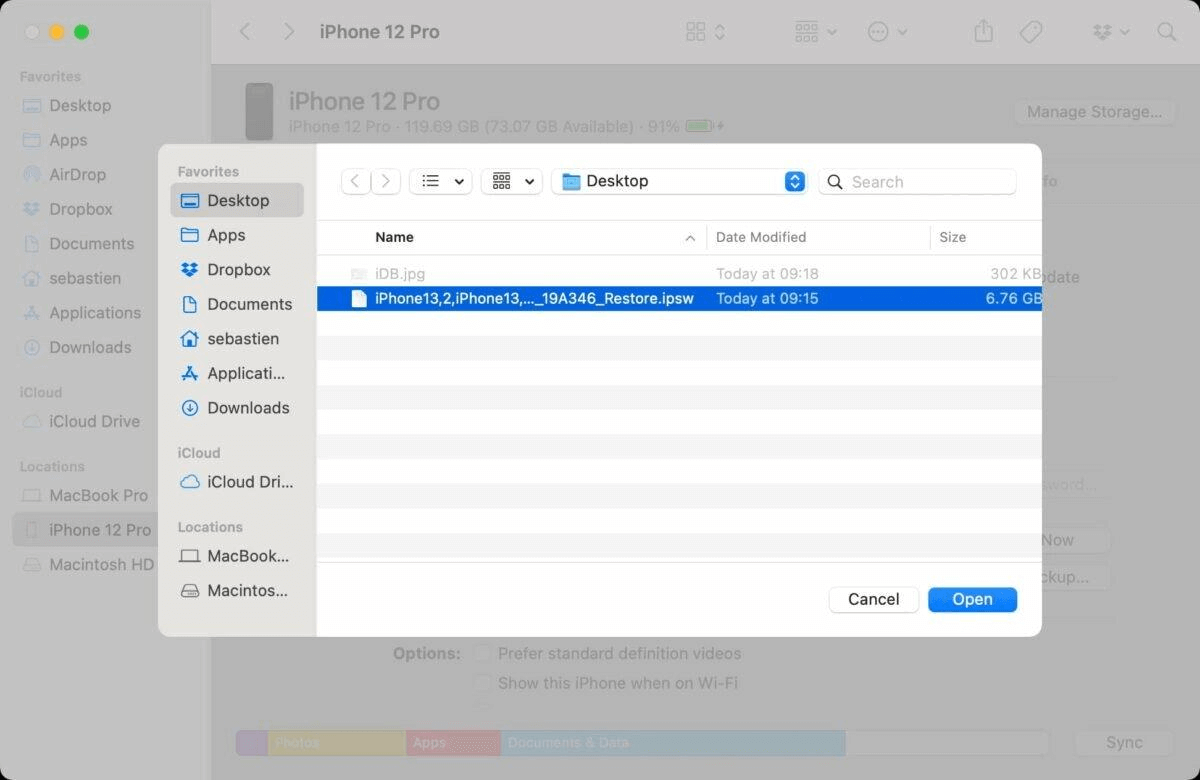
Open Firmware Package
Step 5: Once again, click the “Restore” button, and iTunes will instantly start restoring your iPhone to the available iOS version.
Step 6: After the restoration process is completed, start setting up your iPhone as a new device. Choose “Don’t transfer apps and data,” and here you have just downgraded the iPhone.
This method is lengthy and requires the download of firmware from an untrusted source. So, it is better to choose a reliable way instead. Wait, there’s one more way!
How to Downgrade from iOS 17 Using Recovery Mode
Another way to downgrade iOS 17 is by using recovery mode. It will delete everything stored in your iPhone. So, it is essential to create a backup before performing recovery mode. If you already have a backup, you can follow the instructions given below:
Step 1: Connect your iPhone to a PC with iTunes (or Finder) installed.
Step 2: Put your iPhone in Recovery Mode:
- For iPhone 8 and later: Quickly press Volume Up, Volume Down, then hold the Power button.
- For iPhone 7 and 7 Plus: Hold Volume Down and Power buttons.
- For iPhone 6s and earlier: Hold Home and Power buttons.
Step 3: Choose “Restore” when prompted in iTunes (or Finder).
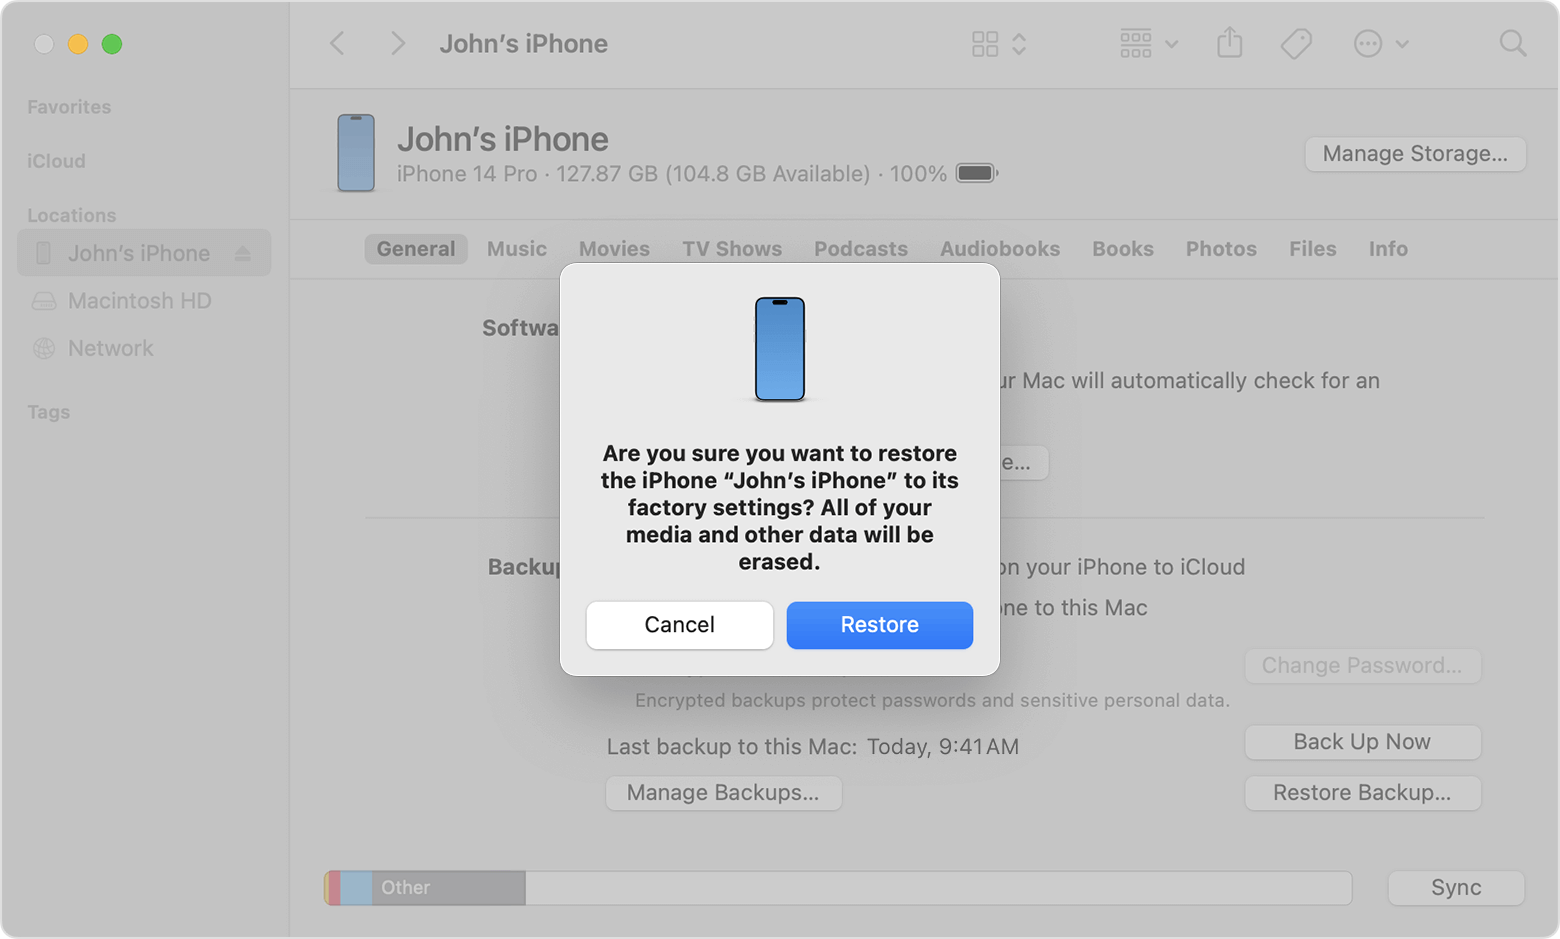
Click Restore
Step 4: Wait for the downgrade to complete.
Step 5: Set up your iPhone after the downgrade.
Step 6: Restore your data from a backup made before downgrading.
If you want to downgrade iOS, you must know how to back up your data to keep it safe. In the next section, we will explore various ways to back up your iPhone.
How to Backup iPhone Data Before Downgrading
Most of the time, downgrading iOS wipes out all the data in your iPhone. However, it is essential to have a backup of your important files and media. You can restore this backup once the downgrading is done. There are various ways to back up data. Let’s explore them!
Way 1. Back Up Data via iTunes
Creating a backup of your iPhone data using iTunes is a reliable and straightforward method. Follow these easy steps to ensure your data is safe before downgrading 17:
Step 1: Connect your iPhone to your PC/laptop via a USB cable. Then, launch iTunes if it doesn’t open automatically.
Step 2: If prompted, tap “Trust This Computer” on your iPhone and enter your device passcode.
Step 3: In iTunes, click the iPhone icon in the upper-left corner. It will take you to your device’s summary page.
Step 4: Then, click “Back Up Now.” iTunes will start creating a full backup of your device, including your apps, settings, photos, and more.

Click Back Up Now Button
The backup process may take some time, depending on the amount of data on your device. Make sure not to disconnect your iPhone during this time. But that’s not it. You can explore other methods as well.
Way 2. Back Up Data via iCloud
Backing up your iPhone data via iCloud is a convenient and wireless method. The best part is you don’t need a computer to do it. Here’s how you can ensure your data is securely saved in iCloud before downgrading from iOS 17 to iOS 16:
Step 1: Ensure your iPhone has a Wi-Fi connection available for a smooth iCloud backup.
Step 2: Open “Settings” on your iPhone, click your name (Apple ID), then select “iCloud.”
Step 3: Scroll down and tap “iCloud Backup.” If this option is already enabled, your data will automatically back up to iCloud. If not, enable the toggle.
Step 4: To start a backup manually, tap “Back Up Now.” Your iPhone will initiate the backup process.
Step 5: You can check the progress of your backup by going to “Settings” > [your name] > “iCloud” > “iCloud Backup.” It will display the time of the last successful backup.
By following these steps, your important data is securely stored in your iCloud account. It can be easily accessed for recovery after downgrading from iOS 17 to iOS 16.
Way 3. Back Up Data via AnyTrans
Another way to back up the iPhone is by using a reliable and effective tool. Let us introduce AnyTrans, which will make the job easier for you. With AnyTrans, you can back up all your iPhone data to your PC in just a few simple steps. This amazing tool is not just limited to data backup. If you are an iOS user looking for an app to manage, transfer, and back up your data easily and quickly, go for AnyTrans. It is the all-in-one manager for your iPod, iPad, iPhone, iTunes, and iCloud content.
Free Download * 100% Clean & Safe
Download and install the AnyTrans app on your computer. Then follow the instructions given below:
Step 1: Launch the AnyTrans app. It will detect your iOS device automatically. Once your device is detected, click the “Backup Manager” option. Then, click the “Back Up” option.
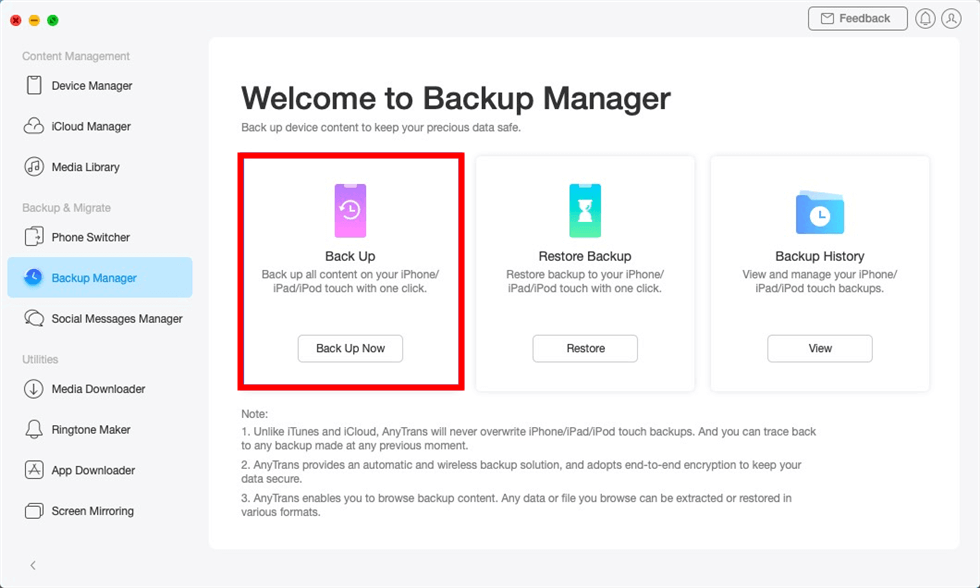
Click Backup Now
Step 2: To protect your data, you can enable the “Enable Backup Encryption” option and set the password. If you do not want to encrypt the backup, click the “Back Up Now” button directly. The backup process will be started automatically. It may take some time to complete the backup process based on the amount of device data.
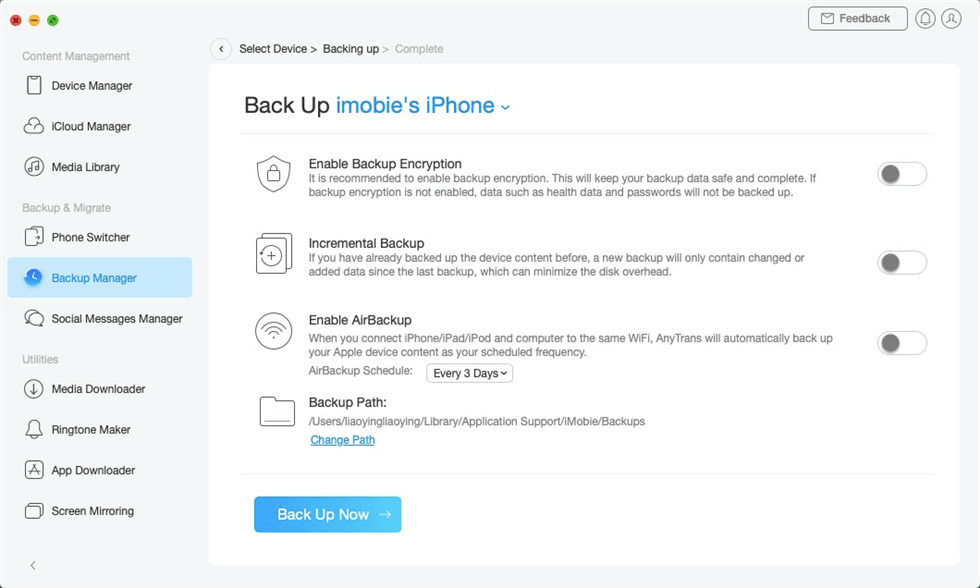
Enable Backup Encryption and Click Back Up Now
Step 3: Once the backup process is completed, you will see the below interface. You can also check the details. Please click the “View” option to check.
FAQs
Can I restore iOS 17 backup to iOS 16?
No, you cannot directly restore an iOS 17 backup to an iOS 16 device. Once you’ve upgraded to iOS 17 and created a backup, that backup is only compatible with iOS 17. If you decide to downgrade to iOS 16, you’ll need to rely on a previous backup created while you were using iOS 16.
How do I update to iOS 17?
To update to iOS 17, you can follow these simple steps:
- Go to “Settings” on your device.
- Scroll down and tap “General.”
- Select the “Software Update” option.
- If you see any update available, tap “Download and Install.”
- Follow the instructions to complete the update. Your device will restart, and you’ll have the latest iOS version.
The Bottom Line
Now, you must have an understanding of how to downgrade iOS 17 to iOS 16. We have explored various downgrading methods with their step-by-step guides. However, if you want a convenient way to downgrade iOS 17, download AnyFix. It will help you get the job done in just a few clicks, with no complex tech knowledge required!
Free Download * 100% Clean & Safe

Senior writer of the iMobie team as well as an Apple fan, love to help more users solve various types of iOS & Android-related issues.
Product-related questions? Contact Our Support Team to Get Quick Solution >
