Data Recovery Cannot be Completed Please Restore Your iPhone from Backup
To solve the data recovery cannot be completed issue, we give you some practical solutions in this article.
One of the most commonly iPhone issues is probably “data recovery cannot be completed please restore your iPhone from backup”. If you’re facing the same issue, there’s no need to worry because we’re going to reveal several ways to fix the problem. In this article, we will firstly tell you why this problem occurs and then we will show you how to tackle this situation.
Part 1. Why Would This Problem Occur?
Before you set out to fix the iPhone stuck in recovery mode issue, it is important that you understand the possible underlying causes of the problem. There are two main causes of iPhone being stuck in recovery mode: namely software corruption or hardware issues. If this issue occurs due to external factors, like water or strike, it is a hardware issue. While software causes of iPhone stuck in recovery mode often include:
- Trying to update your device to the latest iOS software.
- An unsuccessful attempt to jailbreak your iPhone.
- You activated the recovery mode to solve another issue.
Part 2. How to Solve the “Data Recovery Cannot be Completed” Issue?
We offer you some practical ways to recover the data that you wanted to get. The difference is that some of them need a third-party application and can repair the system in the meantime, while some don’t need external software but can do less than the former. Choose the one you like.
Restore iPhone from the iTunes Backup
The error message suggests you restore your iPhone from a backup. Therefore, you can restore your iPhone from a backup using the iTunes app. All you need to do is install iTunes on your computer, connect your device, and make a few clicks. The following shows how to restore your device from an iTunes backup.
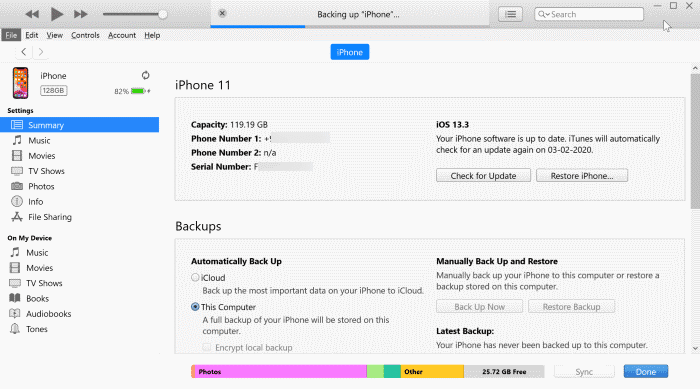
Customize Settings in iTunes
- Connect your iPhone to your computer using a USB cable and launch the iTunes app on your computer.
- Click on your iOS device in the app and make sure you are in the Summary tab.
- Select the “Restore Backup” button from the right pane to restore your device.
- A prompt window will appear on your screen asking you to choose a backup. Use the drop-down menu to select a backup to restore and click on the “Restore iPhone” button. Once your device is restored, your issue should be gone.
Restore iPhone with iTunes Recovery Mode
If the solution above didn’t solve your problem, you may try the Recovery Mode on iTunes. This function is built to help you recover your device when your phone does not work normally. This mode is usually used to fix bricked devices, but you can use it in normal circumstances as well. It simply requires you to put your iPhone into recovery mode and use iTunes to restore it. The following tutorial explains this procedure step by step.
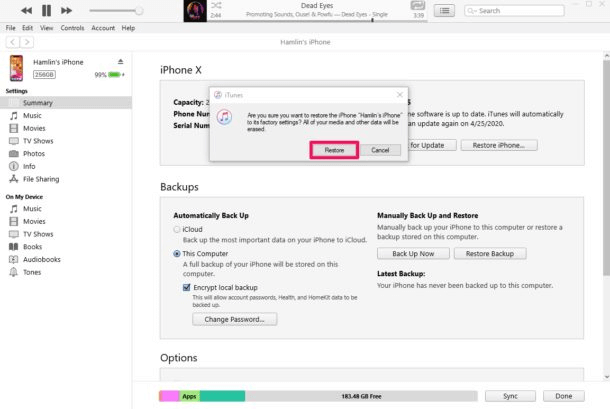
Click on the “Restore” Button to Restore
- Launch iTunes on a Windows computer.
- Connect your iPhone to your computer with a USB cable.
- Reboot your iPhone into recovery mode by pressing the home button and volume keys at the same time for a while.
- Find your device in the iTunes app and click on the “Restore” button to restore your device. Wait for a while and the issue should be fixed.
Fix the “Data Recovery Cannot be Completed” Issue with Simple Clicks
The above two methods actually restore your device to a new one, as they erase all the data on your device. But PhoneRescue for iOS’s advanced repair mode offers you a way to do this without erasing data. And even if your data is erased when you use standard mode to repair your device, you don’t have to worry, PhoneRescue for iOS can help you restore your data from iCloud/iTunes backup in one click!
- Fix almost all iOS system issues, including data recovery cannot be completed issue, black screen, etc.
- No computer skills required, even novice computer users can easily operate.
- Easily recover iPhone messages, contact, and so on from iTunes or iCloud backup directly.
- Support all iPhones and iOS 16 supported, 100% clean & safe.
After understanding how powerful PhoneRescue for iOS is, please download and follow these steps to repair your device:
Free Download * 100% Clean & Safe
Step 1. Please launch PhoneRescue for iOS and choose Repair iOS System.
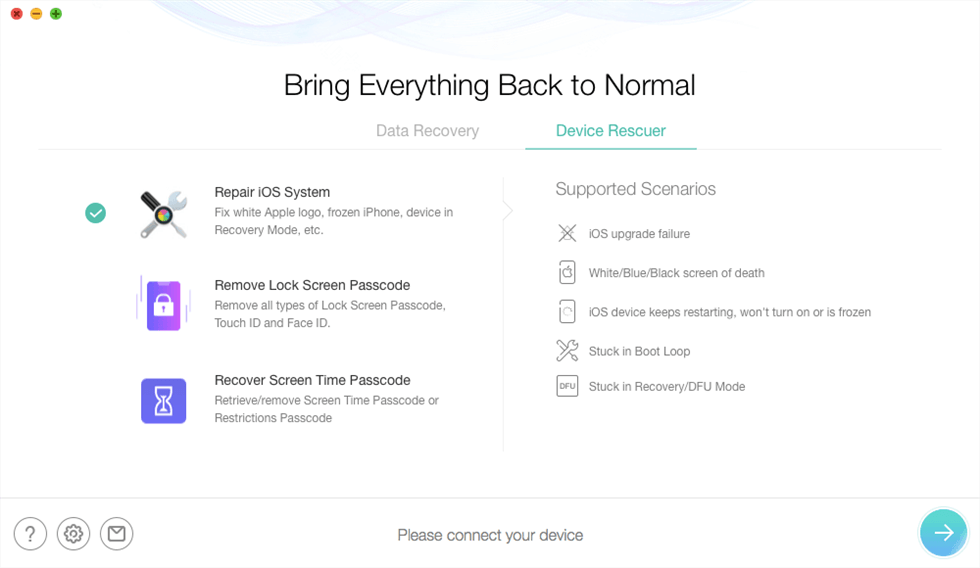
Choose Repair iOS System
Step 2. Connect your iPhone via a USB cable. Choose Advanced Mode, which will repair your iPhone to normal and won’t cause data loss.
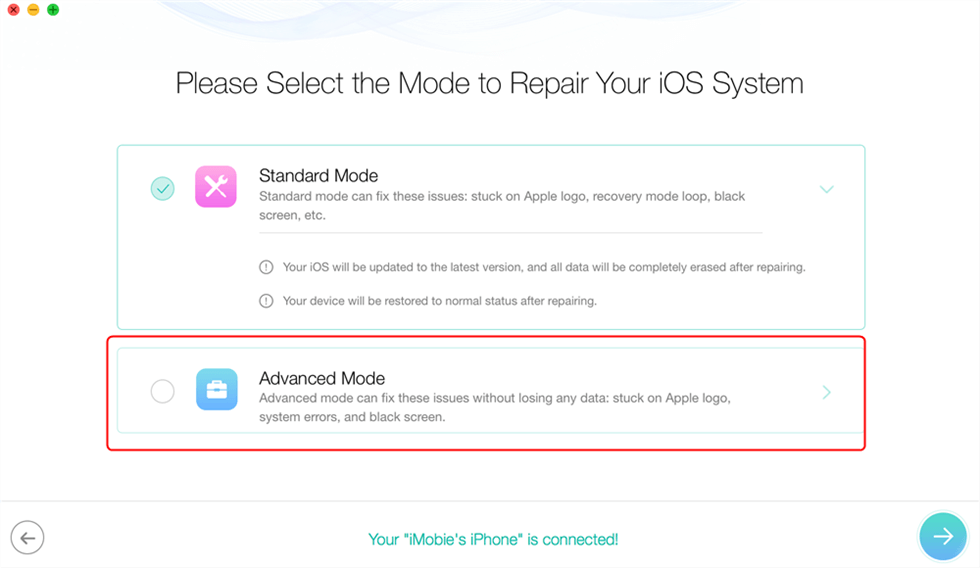
Choose Advanced Mode
Step 3. Follow the on-screen instructions to enter your iPhone into recovery mode, and get a matching firmware package for your iPhone.
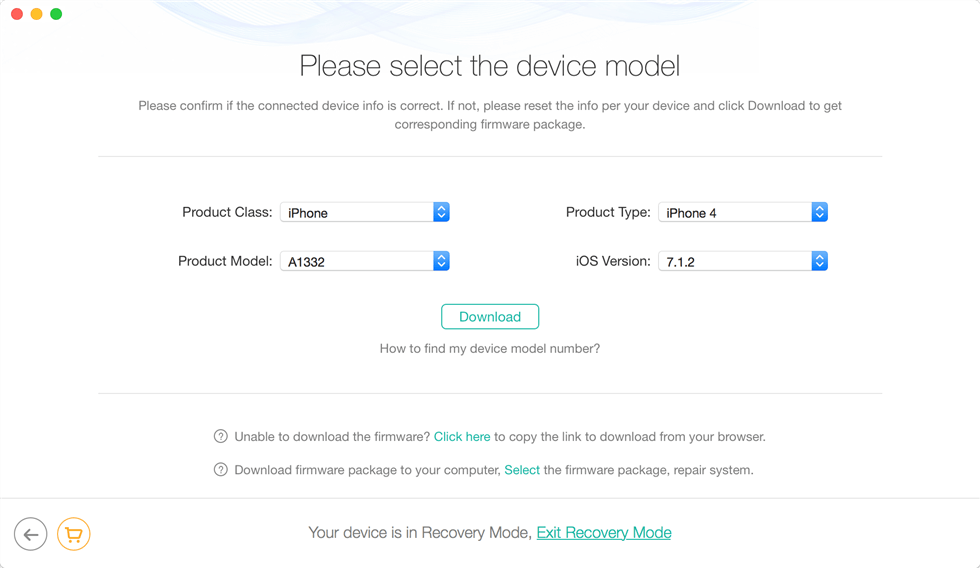
Download Firmware
Step 4. After downloading the matched firmware, PhoneRescue for iOS will automatically start repairing your phone. Minutes later, you’ll see iOS Repairing Completed page.
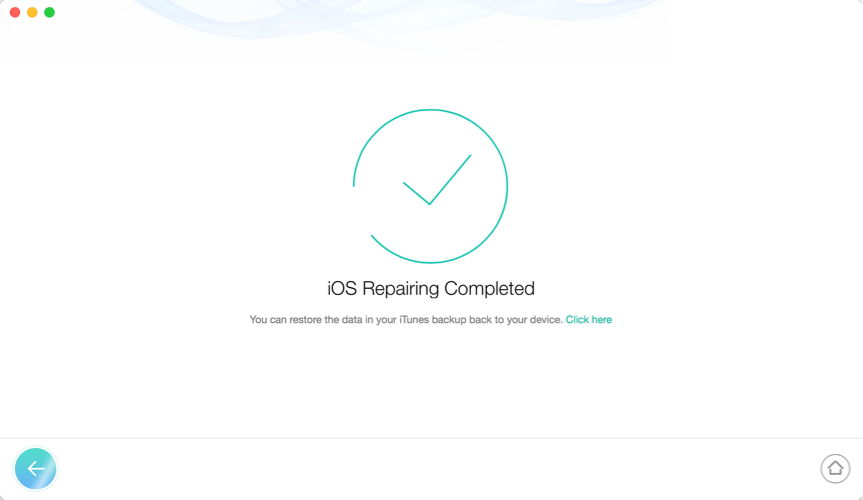
iOS Repairing Completed
After the repair is done, you can use your phone normally. However, if you choose the standard mode, the data on your device will be erased after the repair is completed, so you can also restore your data from iTunes/iCloud backup with the help of PhoneRescue for iOS.
Step 5. If you are in the habit of backing up your device using iCloud, you can easily restore your previous data to the restored device. After launching PhoneRescue for iOS, please choose Recover from iCloud under Data Recovery category.
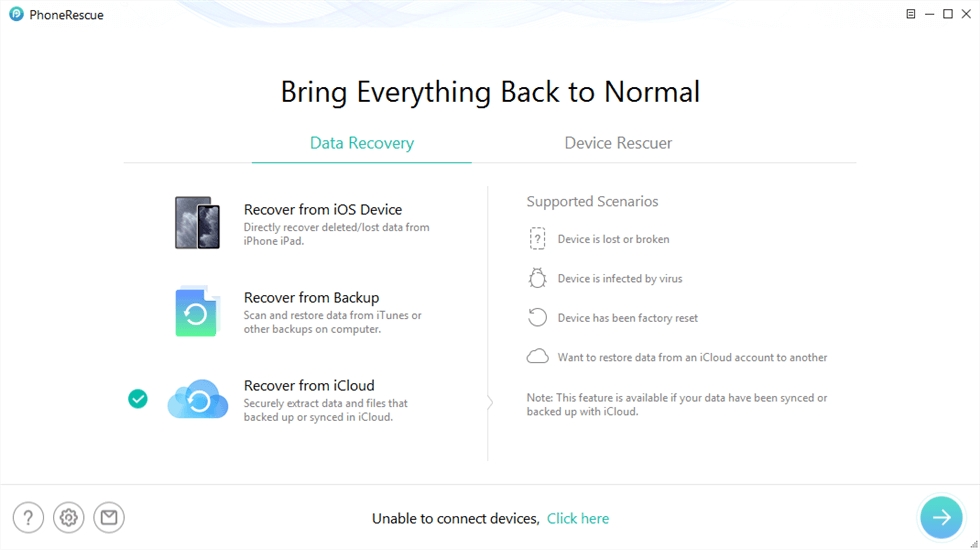
Click Recover from iCloud Function
Step 6. However, if you do not have an iCloud backup, but have backed up your device using iTunes on your computer, then you can select the latest backup to restore to your device. After launching the software, please click Recover from Backup under Data Recovery Mode.
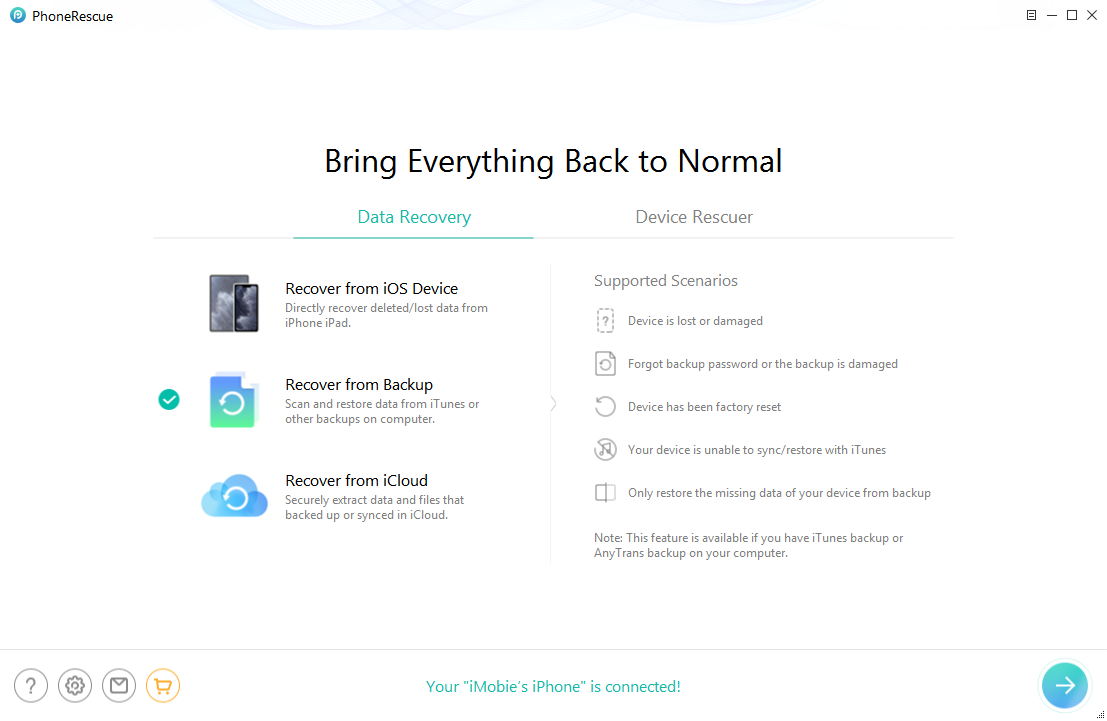
Choose Recover from Backup
Fix the “Data Recovery Cannot be Completed” Issue with Ease
AnyFix, as the best iOS system repair tool, is designed to fix the 150+ system potential problems you may encounter on your iPhone, iPad, iPod touch, or Apple TV, like iPhone stuck on Apple Logo, the device won’t charge, iPhone won’t turn on, etc., and its performance is very satisfying. AnyFix has helped many people solve their problems. So you can give it a try.
Free Download * 100% Clean & Safe
Now, refer to the detailed guide to fix your problem with AnyFix.
Step 1. Free Download AnyFix on your computer. Launch it on your computer and connect your iPhone to the computer with a USB cable. Click on the “System Repair” option.
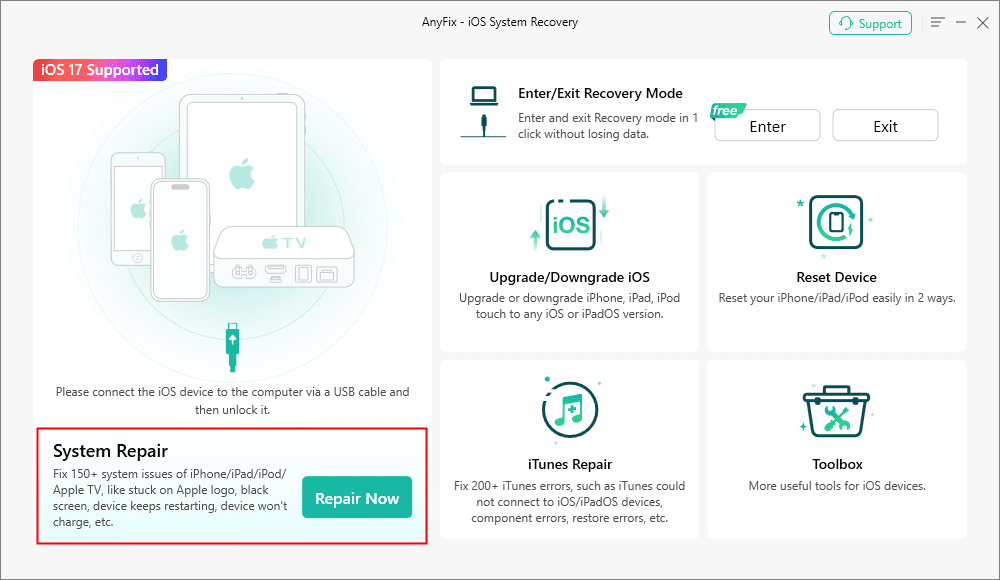
AnyFix System Repair Option
Step 2. Choose the category of iPhone problems as the picture shows.
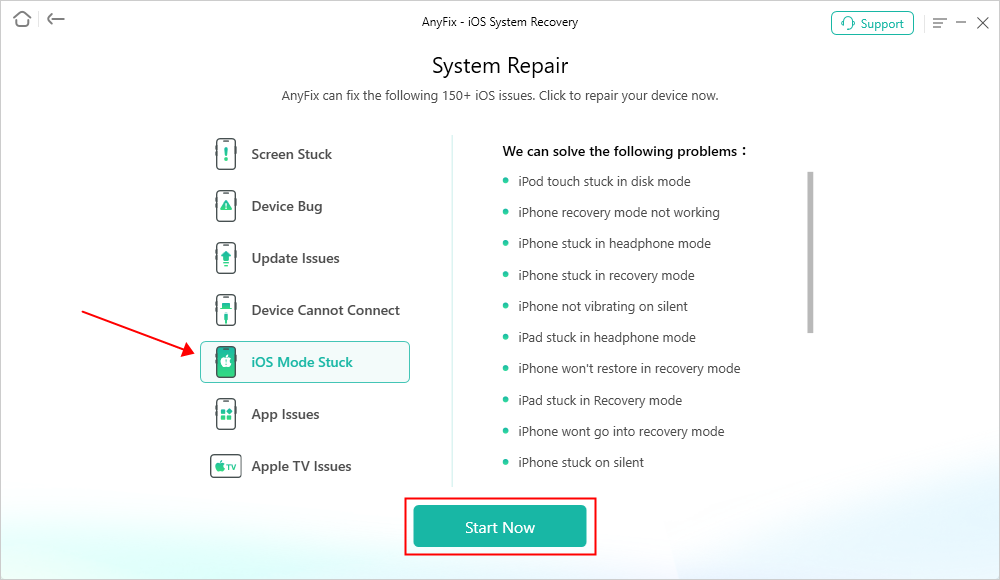
AnyFix System Repair iOS Mode Stuck
Step 3. Now choose the “Standard Repair” mode. This should fix your problem, if it doesn’t, try the other two modes.
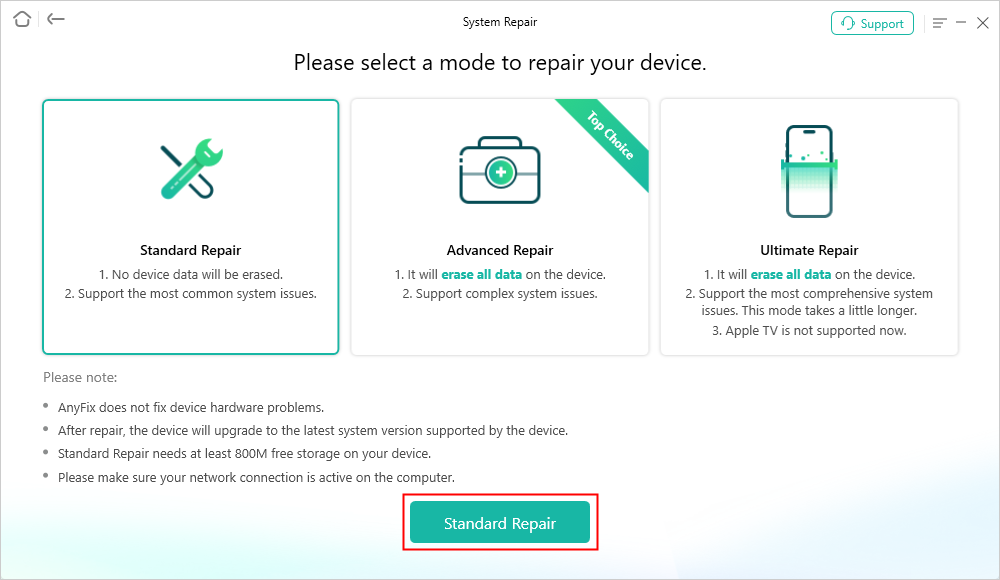
AnyFix Standard Repair
Step 4. Click on the “Download” button to get a matching firmware.
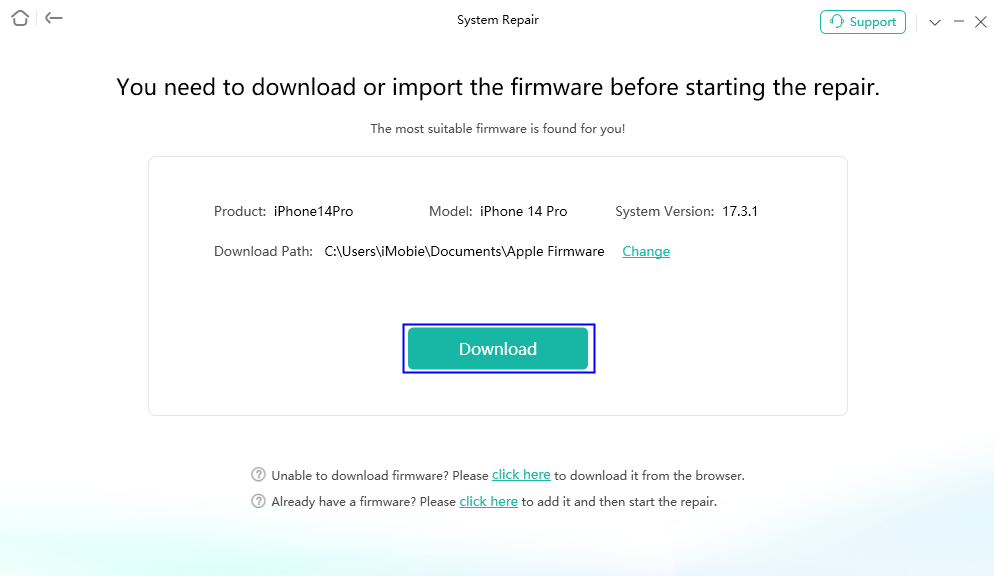
AnyFix System Repair Firmware Download
Step 5. When the firmware is downloaded, click on the “Fix Now” button. Also, put your iPhone in recovery mode. Wait for a while, and the system issue will be fixed.
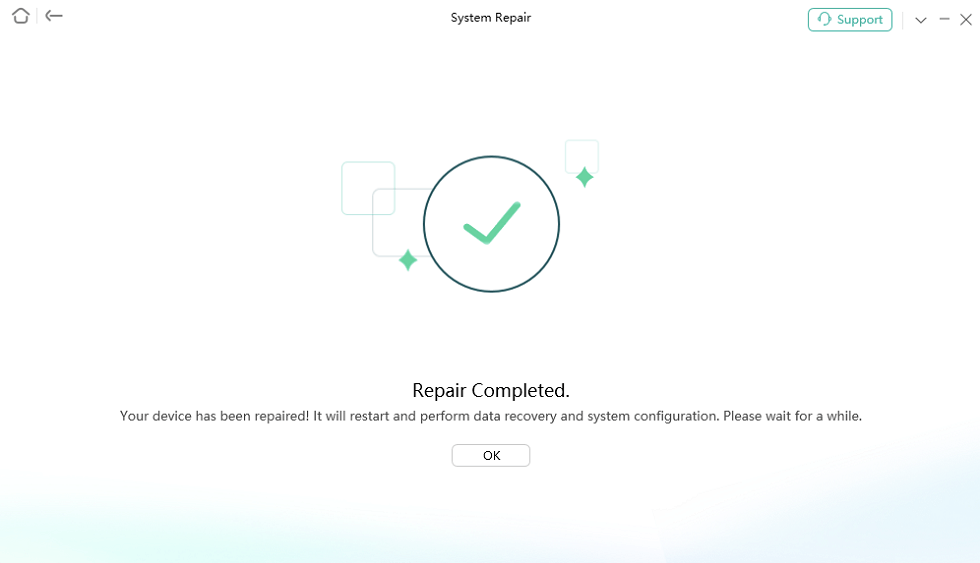
Repair Is Completed
The Bottom Line
We provided three solutions in this article to solve the “data recovery cannot be completed please restore your iPhone from backup” issue. Hope you can get some help from this article. In addition, if you have any problem, suggestion or request you can say, just by commenting in the comment section. Now, just download the efficient system fix software – PhoneRescue for iOS to fix your problem!
Free Download * 100% Clean & Safe
Product-related questions? Contact Our Support Team to Get Quick Solution >

