How to Fix Apple Watch Won’t Charge or Charging Slowly
Why Apple Watch won’t charge or is charging slowly? There are a few ways to get your Apple Watch to charge and this guide covers them for you. It also tells you the reasons your Apple Watch will not charge.
Apple Watch Issues & Tips
Common Apple Watch Issues
- Apple Watch Activity Not Working
- Apple Watch Not Counting Steps
- Apple Watch Pairing Issues
- Apple Watch Won’t Turn On
- Apple Watch Stuck on Apple Logo
- Apple Watch Contacts Not Syncing
- Apple Watch Not Charging
- Apple Watch Stuck Updating
- Touch Screen Not Working
- Apple Watch Not Updating
- Apple Watch Keeps Restarting
- Apple Watch Not Vibrating
- Apple Watch Black Screen of Death
It is exciting to buy a new Apple Watch as you can now do much more than just seeing the time on your wrist. However, for some users, this excitement sometimes turns into sadness. That is mostly because your new Apple Watch charges slowly or will not charge at all.
If you are experiencing issues where your Apple Watch charger will not work or your Watch stops charging after a few minutes, this guide is all that you are going to need to troubleshoot your issues. There are many reasons why you have charging issues on your Watch and this guide lists the methods to fix them.
Part 1. Why is My Apple Watch Not Charging
Reason 1. Third-Party Charger
If you are using a third-party charger or cable that you bought from the aftermarket, it is highly likely that your Watch is not charging because of that. Not all the unofficial cables work with your Apple devices and yours might just be one of them.
Unofficial chargers and Apple devices have always had issues. It may be that your charging cable is not fully supported with your Apple Watch. Or, there is a damage to your cable and it does not supply the power that your Apple Watch requires.
Reason 2. Software Issues
Another possible reason your Apple Watch will not charge is that there is an issue with the software on your Apple Watch. While most Apple devices are stable and are not as problematic as other devices, they sometimes get caught up in various problems and yours could be just one of them.
Your Apple Watch is not just a watch but a small gadget that carries with it a watchOS of its own. If there is a minor or major glitch in this software, it can cause the Watch not to charge even when you plug it into a power socket.
Reason 3. Dirt in Your Apple Watch or the Charger
One of the common reasons why people have charging issues is that their chargers or charging cables are dirty. Over time, your cables may be that your charging cable has collected a lot of dust and debris. In this case, your equipment cannot supply the power to your Watch which results in your Apple Watch not charging at all.
Part 2. How to Charge a New Apple Watch
While you may think you already know how to charge a new Apple Watch, it is still a good idea to properly learn the procedure to charge a brand new Apple Watch. There are a few steps you need to follow to get your Apple Watch charging using the provided cable.
The following steps should help you with that.
Step 1. Plug one end of the charging cable into your Apple Watch and the second end into the USB adapter.
Step 2. Plug your USB adapter into the power socket and turn the power socket on.
Step 3. A green light indicator will appear on your Apple Watch’s screen confirming that it is charging.
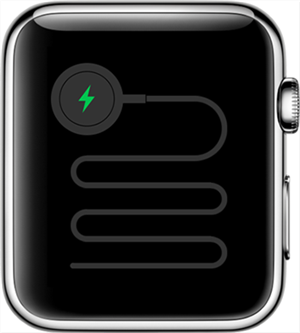
Properly Charge an Apple Watch
Part 3. What to Do If Apple Watch Won’t Charge or Charge Slowly
If your Apple Watch will not charge even after following the above steps, there might be an issue that is preventing you from successfully charging your device.
The following methods should help fix issues related to Apple Watch charging so you can charge your new Watch.
Fix 1. Use the Original Charging Cable
One of the recommended things to do when your Apple Watch is not charging or is charging slowly is to use the original charger and the cable that has been provided with the Watch. This charger knows exactly how to charge your Watch and is Apple-certified so you should not face any issues with it.
Most unofficial chargers are not high-quality and they often cause issues with charging your Apple devices. Replace your aftermarket charger with the Apple-certified one and you will immediately notice that your Apple Watch starts charging without a single issue.
Fix 2. Force Restart Your Apple Watch
If your Apple Watch is not charging even after using an Apple-certified charger, the issue might be with the software on the device. Software issues are sometimes difficult to deal with as you are not sure where the issue comes from. In some cases, you can force reboot your Apple Watch to fix the issue.
Force rebooting basically means forcing your Apple Watch to turn off and then turn back on. This refreshes the operating system on the Watch and clears any problematic content in some cases. Use this method as the last option as force rebooting is not recommended.
You can do this as follows.
Step 1. Press and hold down both the Side button and Digital Crown for about ten seconds.
Step 2. Let go of the buttons when the Apple logo shows up.
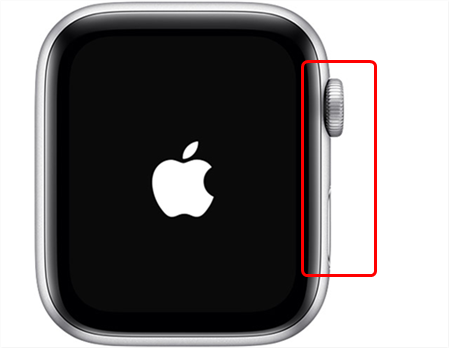
Force Reboot an Apple Watch
Fix 3. Remove the Plastic Wrap
Some of the newer models of the Apple Watch have a plastic cover wrapped around and you need to remove it before you can charge your Watch. Oftentimes, most users leave this plastic wrap as is and it prevents your Watch from being charged. Therefore, get rid of it from your Watch and you should find that it charges without any problems.
Fix 4. Update the Software on Your Apple Watch
As said earlier, an issue with the software on your Apple Watch can actually cause the Watch not to charge. This could be the reason why you are having trouble charging your new Apple Watch. Fortunately, it is pretty easy to fix software-related issues on an Apple Watch.
One of the reasons you have a charging issue is that your Apple Watch’s software is not up to date. If you have not installed any software updates in a long time, you may be using an older version of the software that has many bugs in it.
Updating your Apple Watch to the latest software version will patch those bugs and hopefully resolve the charging problems. The following is how you can do that.
Step 1. Connect your Apple Watch to a WiFi network if you have not already done so.
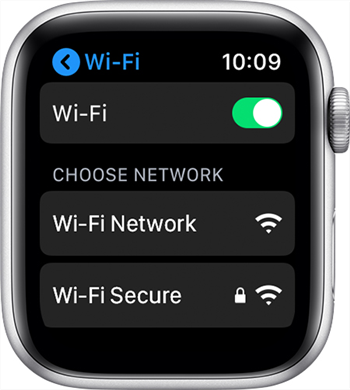
Join a WiFi Network on an Apple Watch
Step 2. Launch the Settings app on your Apple Watch and tap on General followed by Software Update.
Step 3. Download and install the available updates on your Watch.
Fix 5. Reset Your Apple Watch
If nothing else works, your last option is to reset all the settings and data on your Apple Watch. This option clears everything that you have stored on your Watch so far including your custom setting configurations. If there is an issue with any of these items, it will be fixed when your Apple Watch is reset.
Resetting is not recommended because it then requires you to set everything up from scratch. However, if you have no other methods left, you might need to do it.
The following shows how to reset an Apple Watch.
Step 1. Launch the Apple Watch app on your iPhone, head to My Watch > info, and tap Unpair Apple Watch.
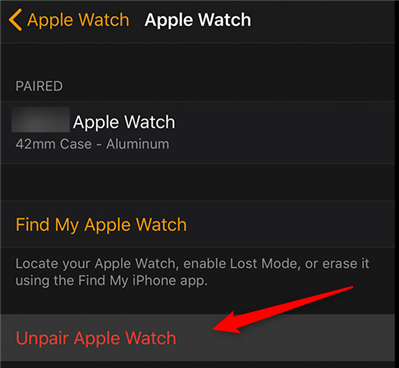
Unpair an Apple Watch from the iPhone
Step 2. Head to Settings > General > Reset and tap Erase All Content and Settings on your Apple Watch.
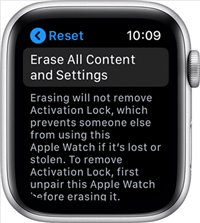
Reset an Apple Watch
You can now reconfigure your Watch from scratch.
Bonus Tip. An Easy Way to Fix iPhone/iPad/iPod Touch Not Charging
Apple Watch is not the only device where you can experience charging issues. You can face it on your other Apple devices as well like your iPhone, iPad, or iPod Touch.
Fixing the issue on these devices is actually easier than doing so on an Apple Watch. That is because you have a third-party tool available to fix nearly all issues on your iOS-based devices. This tool is called AnyFix – iOS System Recovery, which offers an option called system repair that repairs the problems on your device from inside. This way, everything on the frontend also gets fixed. It is easier to use this tool than you might think and the following shows how.
Step 1. Install the latest version of AnyFix on your Windows or Mac computer. Plug your iOS device into your computer and open the tool.
Free Download * 100% Clean & Safe
Step 2. Click on System Repair on the main interface of the tool to repair your iOS device.

Click on System Repair
Step 3. Choose the problem you need to repair. Here we take iPhone Problems as an example.
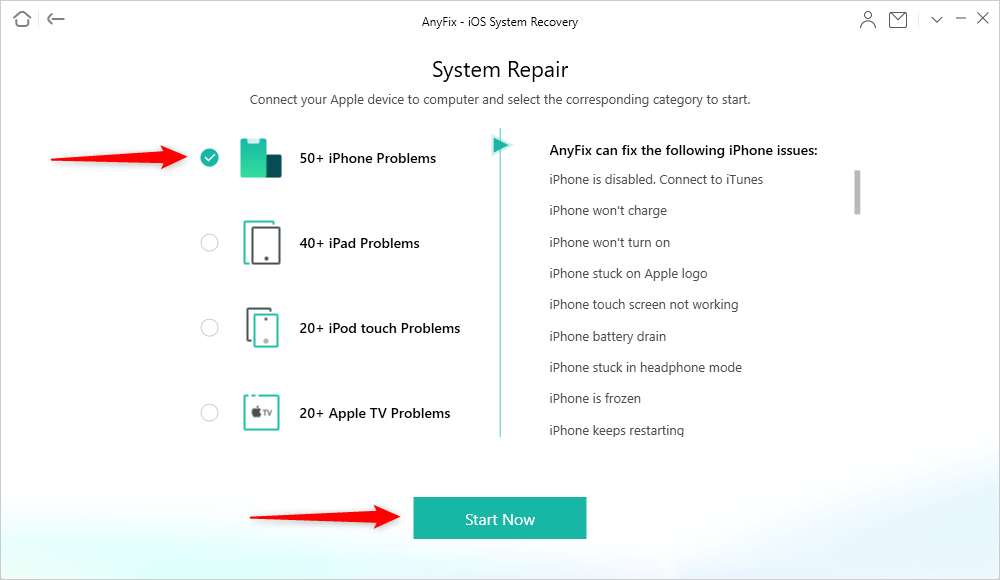
Choose iPhone Problems and Start Now
Step 4. Click Start Now and choose a repair mode on the screen that follows.
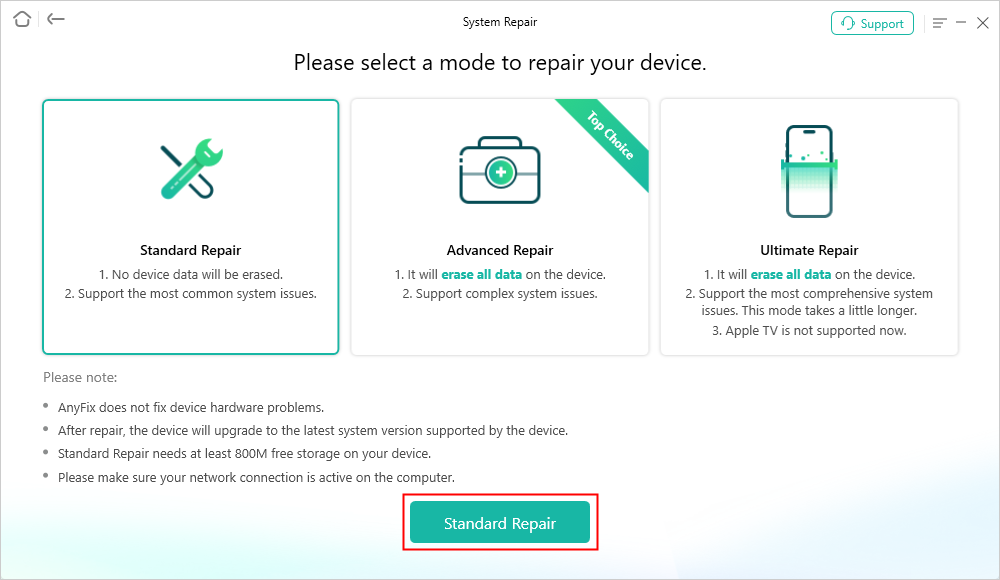
Choose One Repair Mode
Step 5. Then download a matching firmware for your device. Once the download finished, head to Fix Now button. And it will start repairing the charging issue automatically. Wait for the tool to fix your device. When it is done, you will see the following on your screen.
Your iOS device should now charge without any problems.
The Bottom Line
When your Apple Watch is not charging, what to do to fix that? There could be various reasons why it happens, and the above guide should help you fix most of those issues so your Watch can be charged. Also, when other Apple devices are facing the same charging issue, AnyFix – iOS system recovery can help you out easily. And if you have any further questions or some tips, share it in the comment area below.
Product-related questions? Contact Our Support Team to Get Quick Solution >

