To make good use of Screenify, please complete the settings before recording: General, Output Format, Recording, Watermark, Mouse, and Shortcuts settings. Please refer to the detailed instructions below.
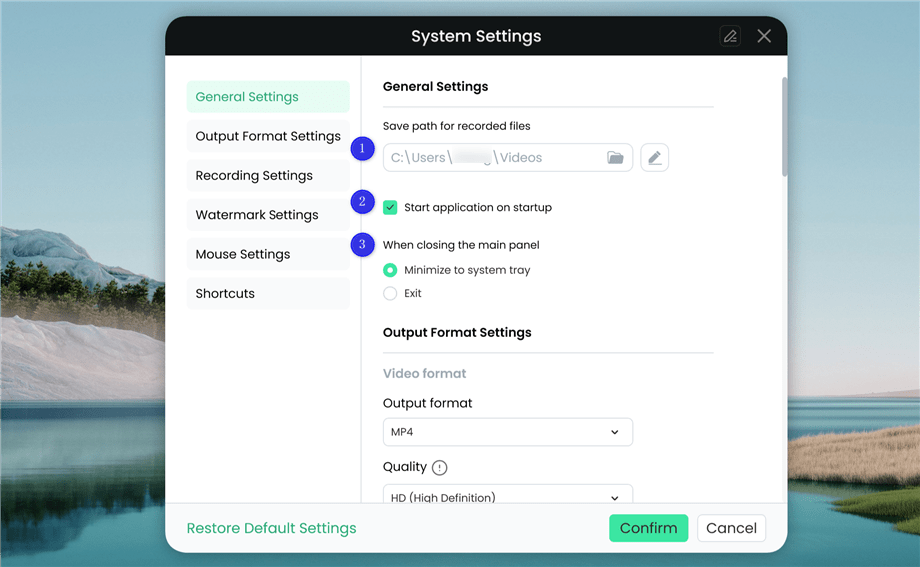
The General Settings mainly help you configure recorded file paths, startup settings, and minimize window options. Please launch Screenify on your computer and choose the System Settings > General Settings option. Then, you will see the below interface.
General Settings
In this setting page, you can:
1 View or change the save path of the recorded files.
2 Choose whether to launch Screenify upon startup of the computer.
3 Set the status of the Screenify when closing the main panel.
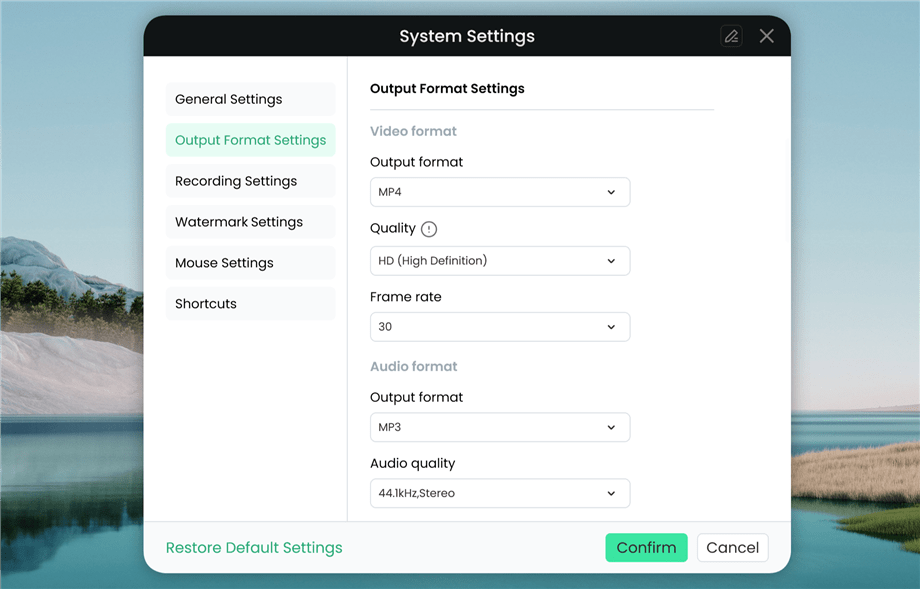
Part 2. Output Format Settings for Video/Audio/Screenshot
The Output Format Settings mainly help you choose video, audio, and screenshot formats. To complete these settings, please launch Screenify on your computer and choose the System Settings > Output Format Settings option. Then, you will see the below interface.
Output Format Settings
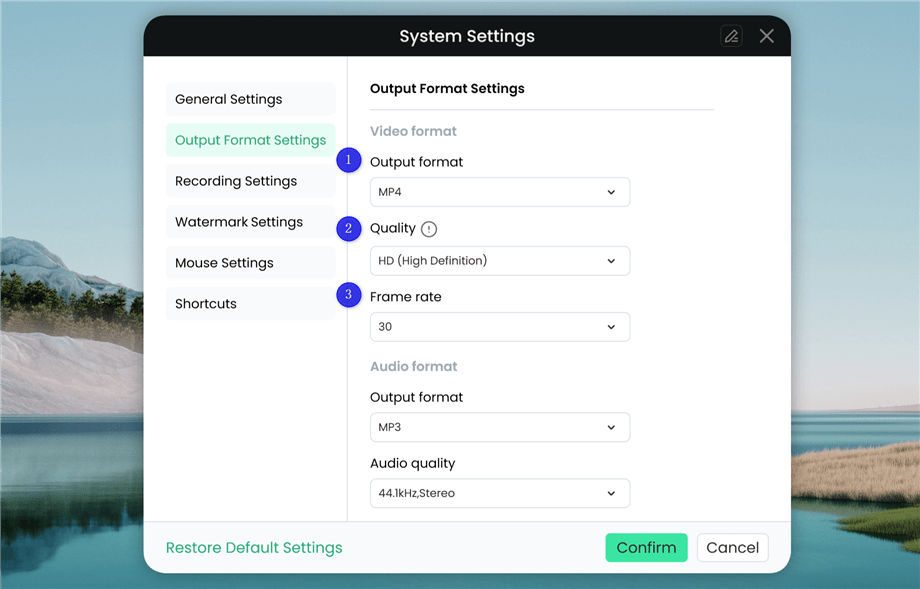
Please slide the interface to the Video format setting area, you can expand each setting option. Then, you will see the below page.
Video Format Settings
With the Video format settings interface, you can:
1 Choose the video output format from MP4, GIF, MOV, FLV, MKV, or AVI. The default selection is MP4.
2 Select the video output quality from options, such as SD, HD, and original resolution. The default selection is HD.
3 Set the video frame rate, with a maximum setting of 60fps. The default selection is 30fps.
1. On Windows computer, it does frame interpolation, so the recorded video will generally match the set frame rate.
2. On Mac computers, there is a distinction between different versions.
① For macOS 12.3 below, it will record at a fixed frame rate.
② For macOS 12.3 and above, it uses a new method that adjusts the frame rate based on the current screen activity. For instance, when the screen is static, the frame rate will decrease and may not match the set frame rate.
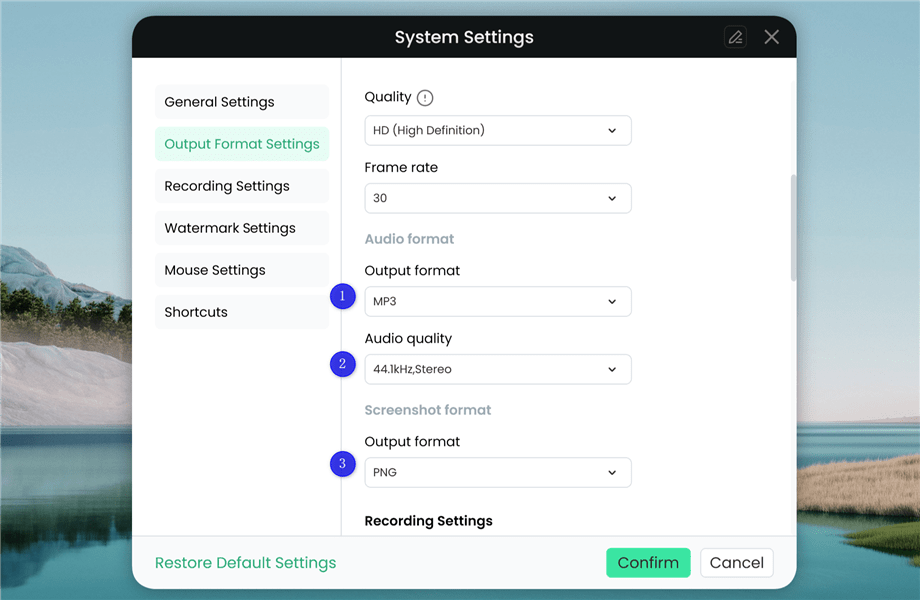
To finish the Audio format setting and Screenshot format setting, please slide the mouse to the corresponding setting area. Then, you will see the interface below.
Audio and Screenshot Format Settings
In this setting interface, you can:
1 Choose audio output format from MP3, AAC, OGG, WMA, FLAC, AC3 and WAV.
2 Set audio quality (Stereo, Mono and Sampling Rate).
3 Select screenshot output format.
Part 3. Recording Settings
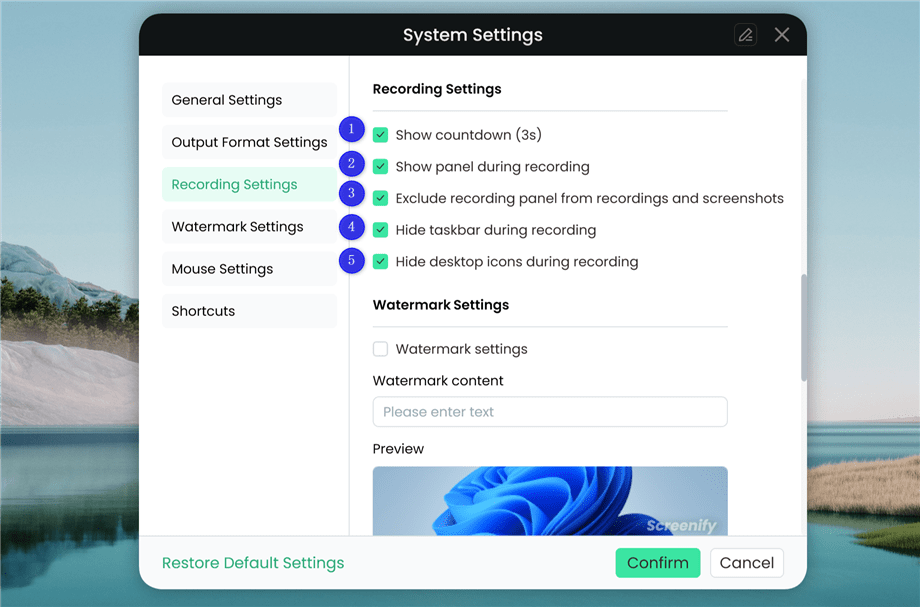
The Recording Settings mainly help you finish the basic settings of recording. Please launch Screenify on your computer and choose the System Settings > Recording Settings option. Then, you will see the below interface.
Recording Settings
In this Recording Setting, you have the option to:
1 Show countdown (3s).
2 Show panel during recording.
3 Exclude recording panel from recordings and screenshots.
4 Hide taskbar during recording.
5 Hide desktop icons during recording.
1. The option to exclude the recording panel from recordings and screenshots is only supported on Windows 10 and 11.
2. The option to hide the taskbar and desktop icons during the recording process is only available on computers that are running on macOS 13 and above.
Part 4. Watermark Settings
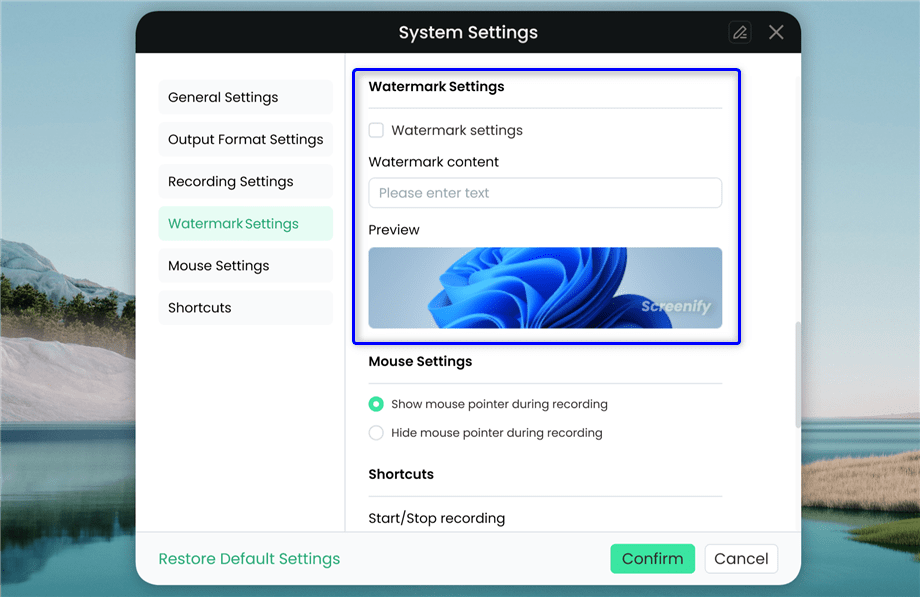
The Watermark Settings mainly help you customize the watermark content to the recording file. Please launch Screenify on your computer and choose the System Settings > Watermark Settings option.
Watermark Settings
Currently, the Watermark Setting is only supported on Windows computers. Files recorded on Mac computers do not have a watermark by default, and it is not possible to set a watermark on Mac.
Part 5. Mouse Settings
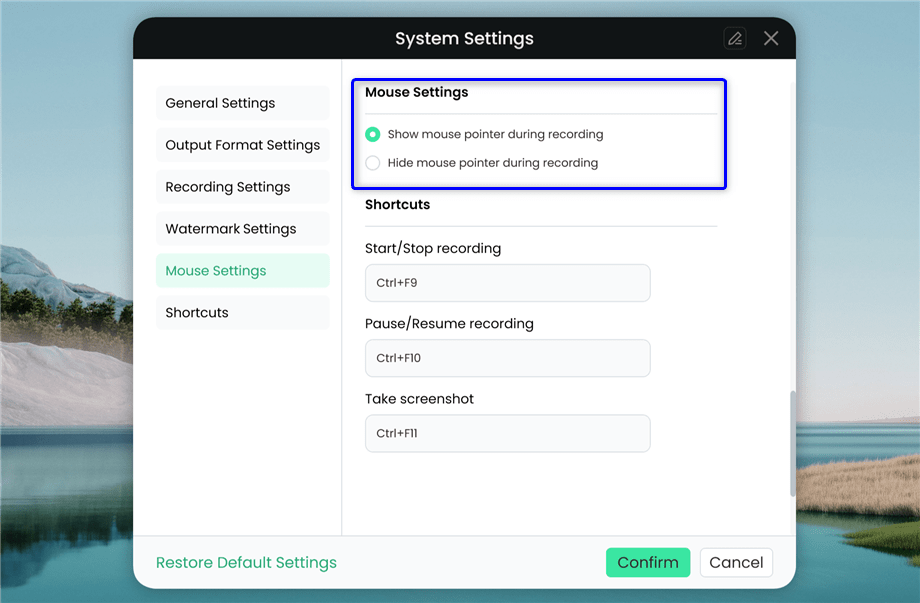
The Mouse Settings mainly help you show or hide the mouse pointer. Please launch Screenify on your computer and choose the System Settings > Mouse Settings option.
Mouse Settings
Part 6. Shortcuts Settings
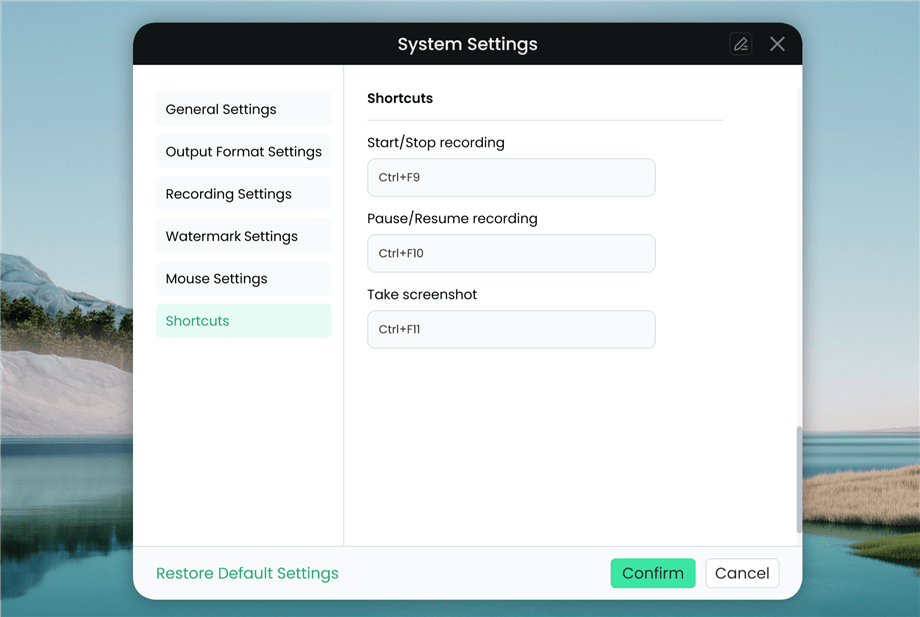
The Shortcuts Settings mainly help you set a shortcut key for start/stop recording, pause/resume recording, and taking a screenshot. Please launch Screenify on your computer and choose the System Settings > Shortcuts option.
Shortcuts Settings
If you still have questions after reading this guide, please refer to FAQs page to check more solutions. Or you can contact our Support Team to get further help. We are here to help you!
iMobie Self-Service
Welcome to iMobie Self-Service. Choose a category or input keywords for swift solutions!😊
End conversation
Do you want to end the conversation? If you need further help , please submit a ticket to get efficient solution soon.
 Screenify
 AnyEnhancer
 FocuSee
 Vozard
 AnyMiro
 AnyMirror