Free Download For Win & Mac | 100% Clean & Secure
Record Locked Window
Whether you encounter the similar situations below?
"I want to record a video editing tutorial so that I can upload it to my video account later. How can I complete the recording?”
"I need to record a software tutorial, but I don't want other windows or notifications to pop up and interfere with the recording. How can I do this?”
If you come across similar situations as mentioned above, please don’t worry. The Record Locked Window function can assist you in recording your window using your computer. With the Record Locked Window mode, you can save and share interesting and useful window recordings. Please refer to the instructions below to initiate the recording process.
Compatibility of Computer System
| Windows | macOS | |
| Basic Configuration | Windows 11, 10, 8.1, 8, 7(64 bit) | macOS 10.13 (High Sierra) and above |
| Suggested Configuration | Windows 11, 10(64 bit) (CPU i3 10th generation and above, NVIDIA graphics card 1650 and above, 8G internal storage and above.) |
macOS 13 and above |
Step 1. Download and Install Screenify on Your Computer.
Please get the tool downloaded onto your computer. Please make sure the network is stable while downloading and installing Screenify on your computer.
Step 2. Choose Record Locked Window Mode.
After completing the installation progress, please launch Screenify on your computer. Then, select Record locked window Mode.
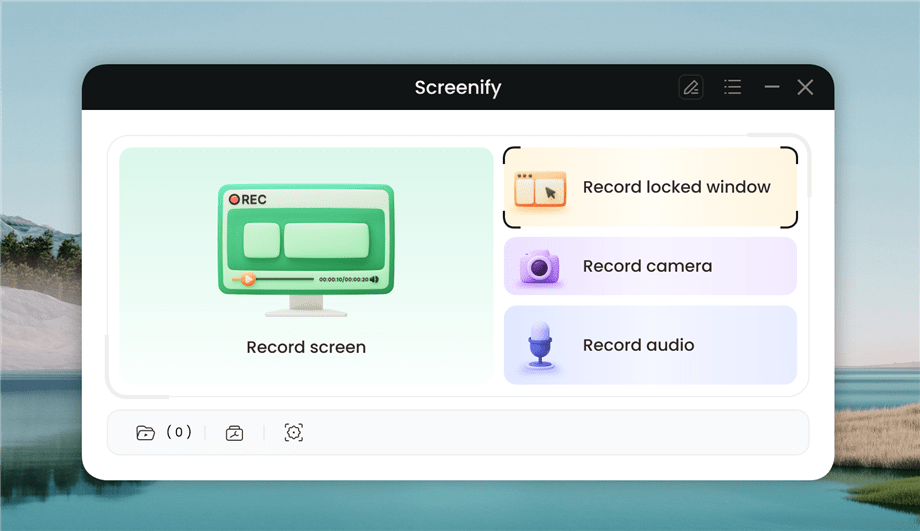
Choose Window Mode
Step 3. Select Recording Window.
After choosing the Record locked window Mode. You will see the following interface. Then, please click the Select Window option.
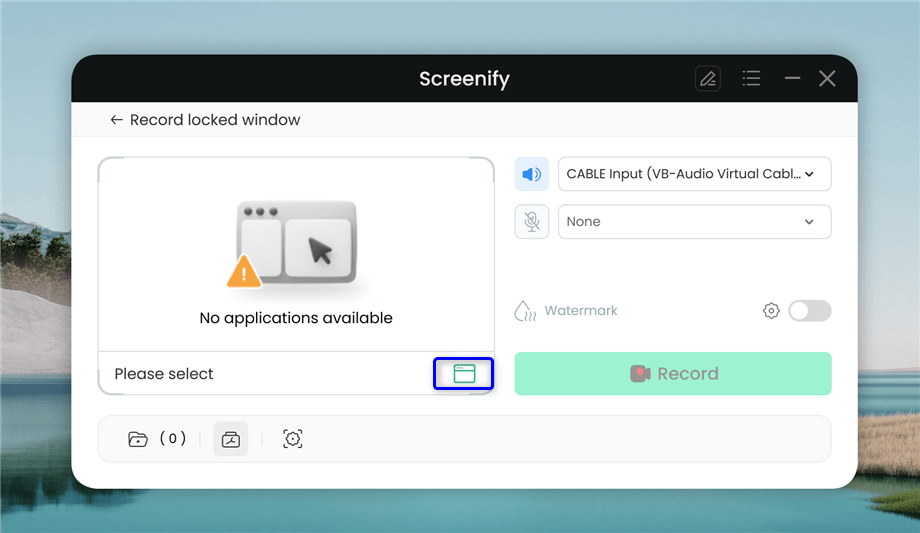
Select Window
And then, all open windows will be displayed, you can select the required window for recording.
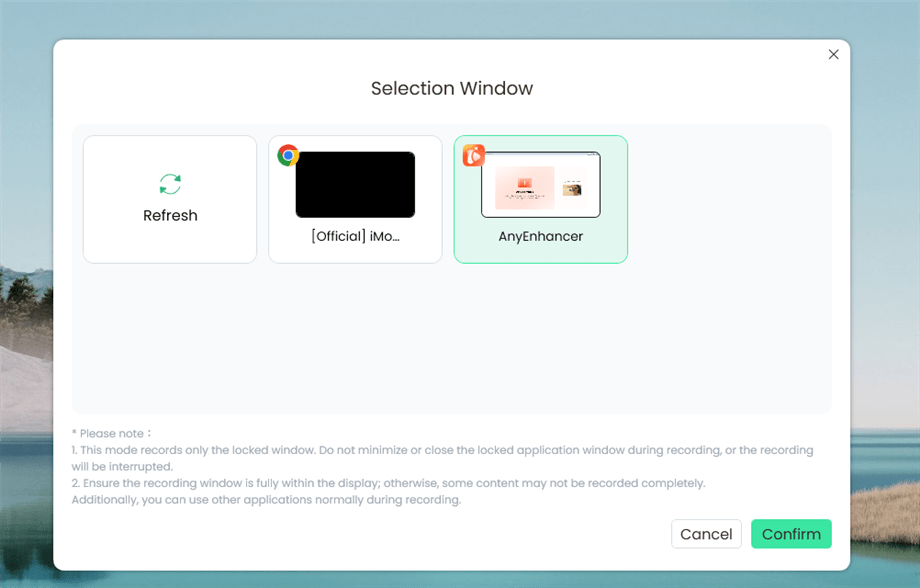
Select Recording Windows
1. If there is no window open on the computer, it will report an error message "no application available". You need to manually open the required application > Select window > Start.
2. Before selecting a window to record, please ensure you haven't minimized the locked application window. Otherwise, the window may not be recognized by Screenify.
Step 4. Configure Settings before Recording.
After you select the window you want to record, you can configure recording settings before recording.
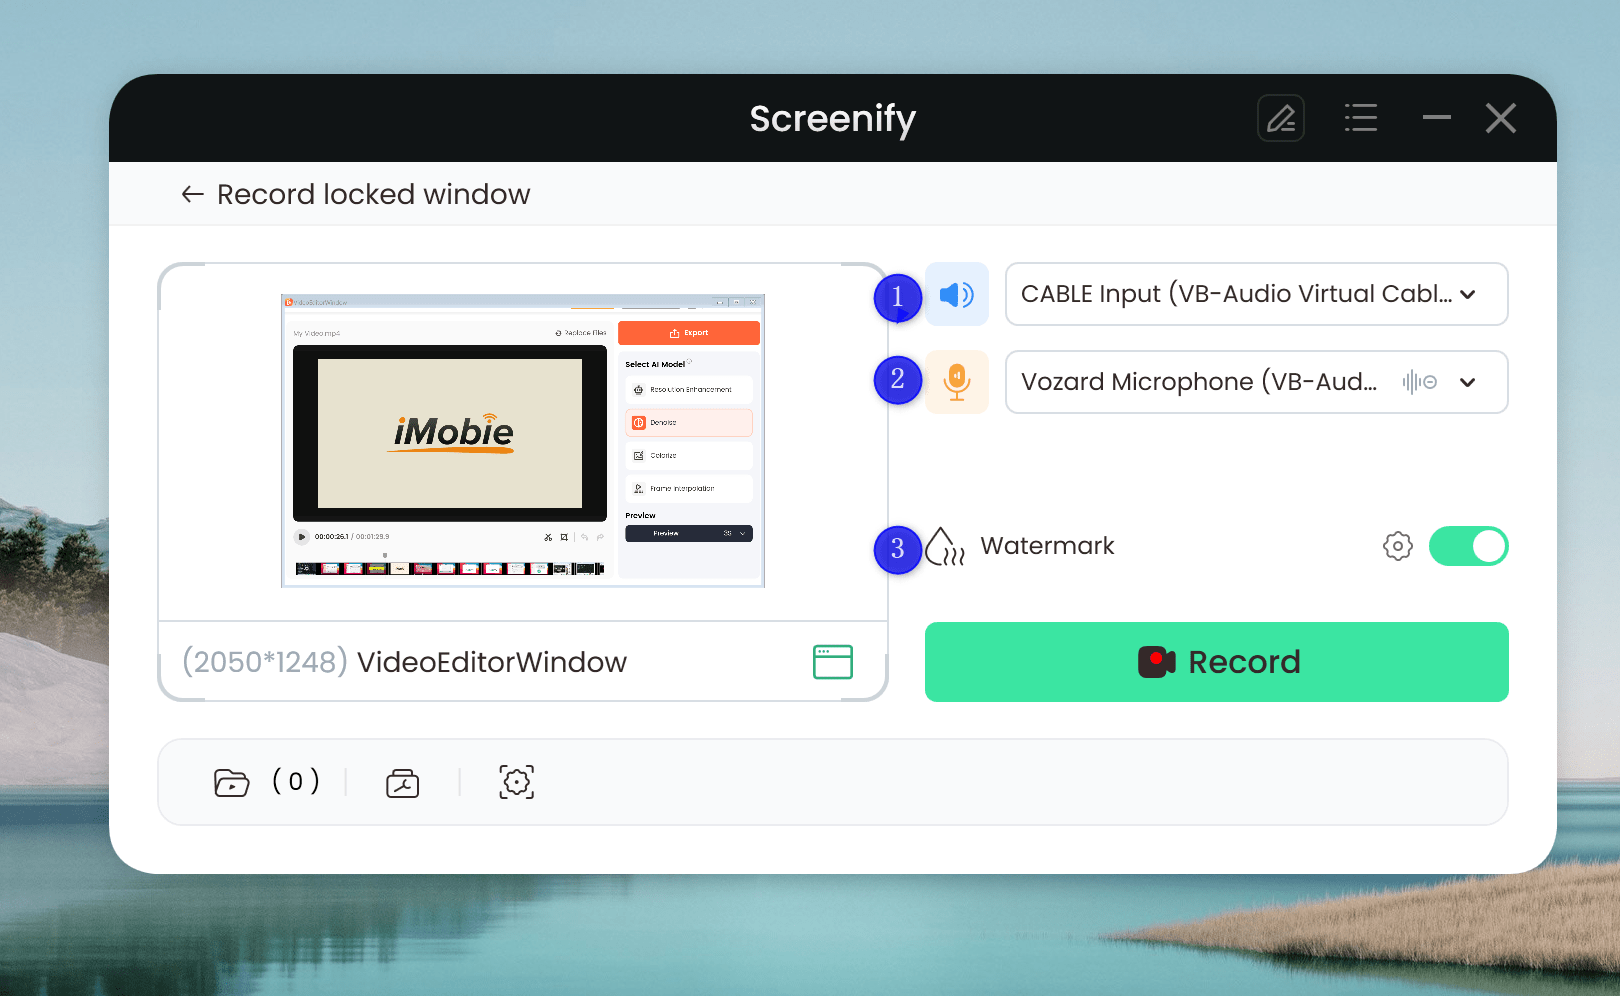
Set Configure Recording Settings
In this setting menu, you can:
If you need to customize the recording video format, quality, frame rate, recording countdown, storage path, and more, please visit Settings guide.
Step 5. Start to Record the Window.
When you are ready, please click the Record button to start the recording. The following demonstration uses iMobie video enhancement software - AnyEnhancer as an example for locked window recording.
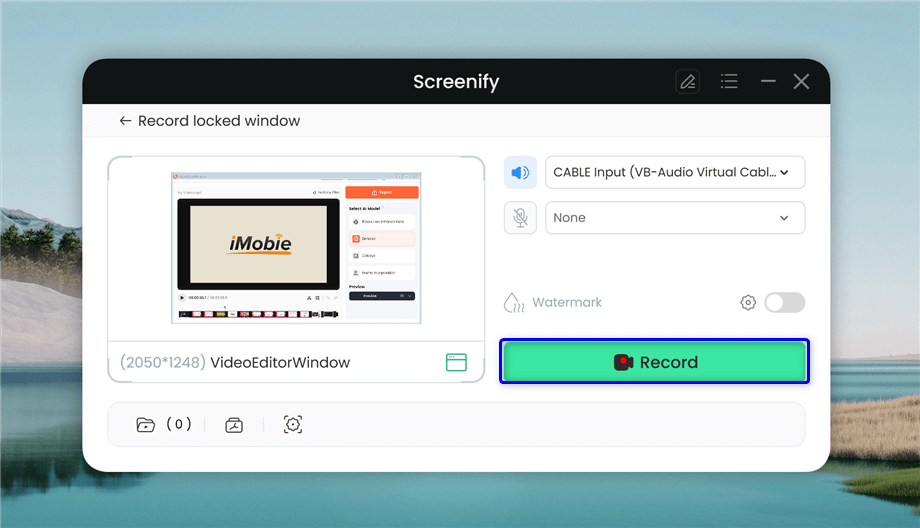
Start to Record Window
After you click the Record button, there is a 3-second countdown to help you prepare the recording after you are ready to start recording. You can click X to cancel the recording.

Wait for the Recording Countdown
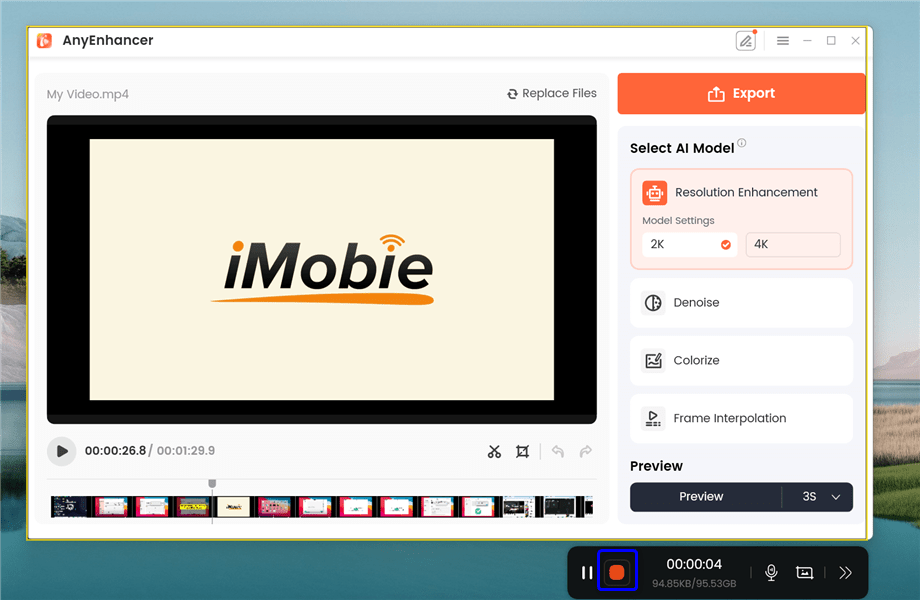
The recording will begin after a 3-second countdown is over. You will see the following interface.

Start Recording
1. If you resize the target window, the recording area will also change with the target window during recording.
2. If you minimize or close the window in which you are recording, the recording will end and the file will be saved automatically.
Step 6. Record Window Process Completed.
After finishing recording, you can click the red "Done" button to end the recording. And the file will be automatically saved.
End Recording
Your recorded files will be displayed in the recording file list. From here, you can preview and manage the recorded content as needed.
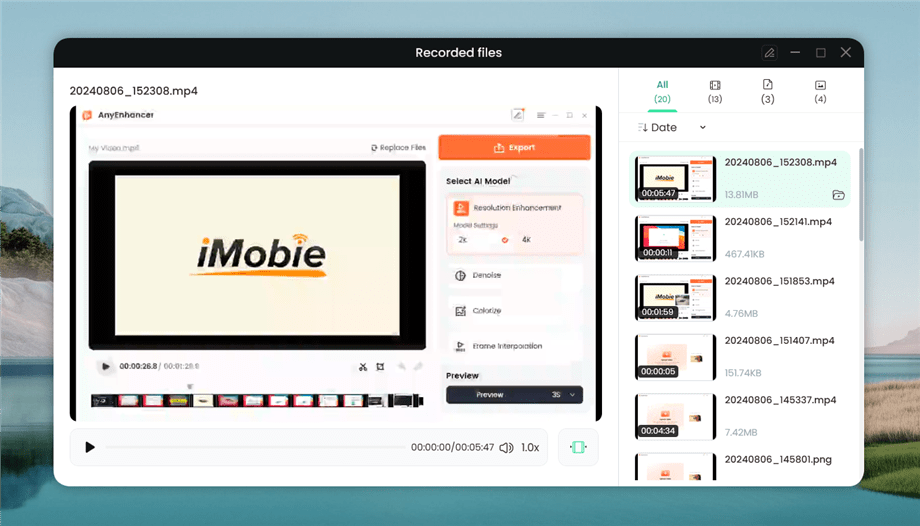
Preview Recording
1. Click here to learn more about how to manage recorded files.
2. If you still have questions after reading this guide, please refer to FAQs page to check more solutions. Or you can contact our Support Team to get further help. We are here to help you!

Try It Out & Share Your Feedback!

We'd love to hear how Screenify is working for you.
Give it a try and share your thoughts—your feedback helps us keep improving.
If you're enjoying Screenify, we'd be so grateful if you could leave us a review on Trustpilot. Your support helps others discover Screenify and motivates our team!
Thank you for being part of the iMobie community — we couldn’t do it without you!
Try It Out & Share Your Feedback!
We'd love to hear how Screenify is working for you.
Give it a try and share your thoughts—your feedback helps us keep improving.
If you're enjoying Screenify, we'd be so grateful if you could leave us a review on Trustpilot. Your support helps others discover Screenify and motivates our team!
Thank you for being part of the iMobie community — we couldn’t do it without you!