Free Download For Win & Mac | 100% Clean & Secure
Record Screen
Whether you encounter the similar situations below?
“How do I capture the full screen of the computer?”
“I wonder if there is a way to record a part of my screen?”
If you encounter the similar situations above, don't worry. Record Screen function can help you record the screen on your computer. Record Screen mode helps you record full screen or region on your computer. Please refer to the detailed instructions to start recording.
Compatibility of Computer System
| Windows OS | Windows 11, 10, 8.1, 8, 7 (64bit) |
| macOS | macOS 10.13 (High Sierra) and above |
Step 1. Download and Install Screenify on Computer.
Before you perform any function operation, please get the tool downloaded onto your computer. Please make sure the network is stable while downloading and installing Screenify on your computer.
Step 2. Choose Record Screen Mode.
Launch Screenify on your computer, and select Record screen mode.
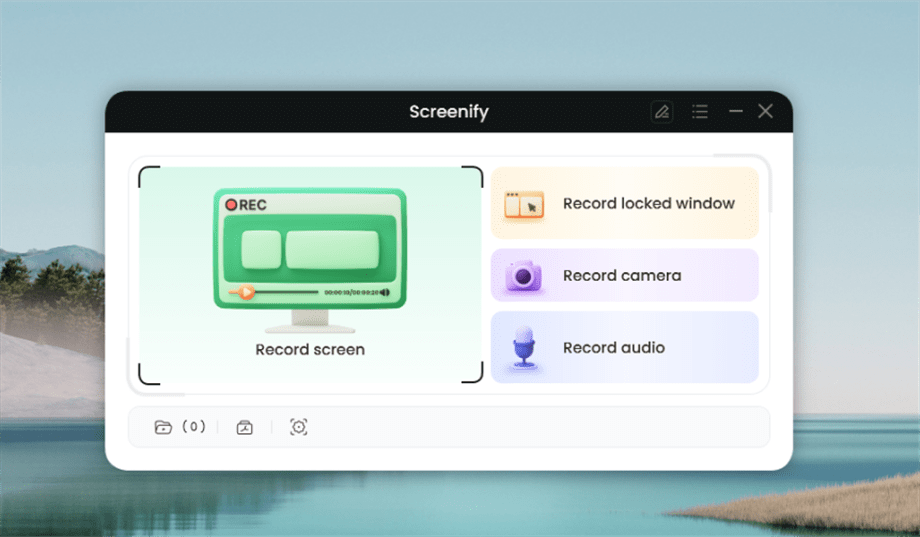
Select Record Screen Mode
Step 3. Configure Settings before Recording.
Configure Recording Settings aims to configure settings like system audio before recording.
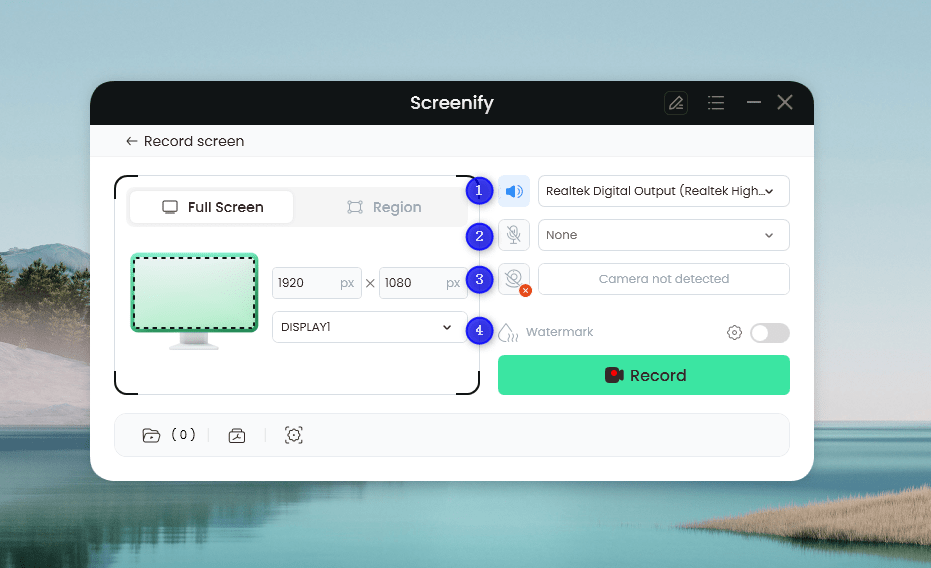
Set Configure Recording Settings
In this setting menu, you can:
Currently, the Watermark Setting is only supported on Windows computers. Files recorded on Mac computers do not have a watermark by default, and it is not possible to set a watermark on Mac.
Step 4. Select Recording Screen.
The screen mode offers two recording options: you can either record the entire screen or select a specific region to record.
Option 1. Full Screen Record
Please select Full Screen mode and choose the display you need to record. Hit Record button to initiate recording.
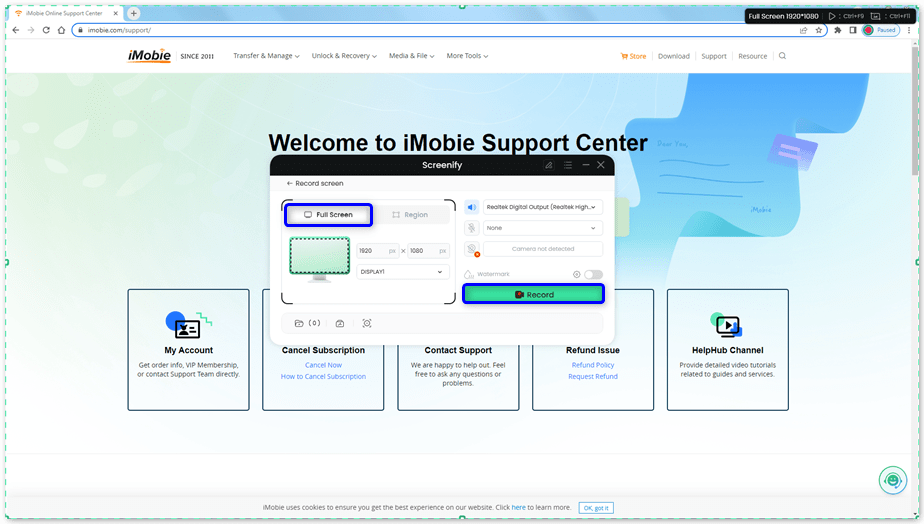
Select Full Screen
Option 2. Region Record
To record region, you need to manually select the recording area. After selection, you can still adjust the selected area. It supports customize selection, full screen, and proportional selection based on common social media dimensions.
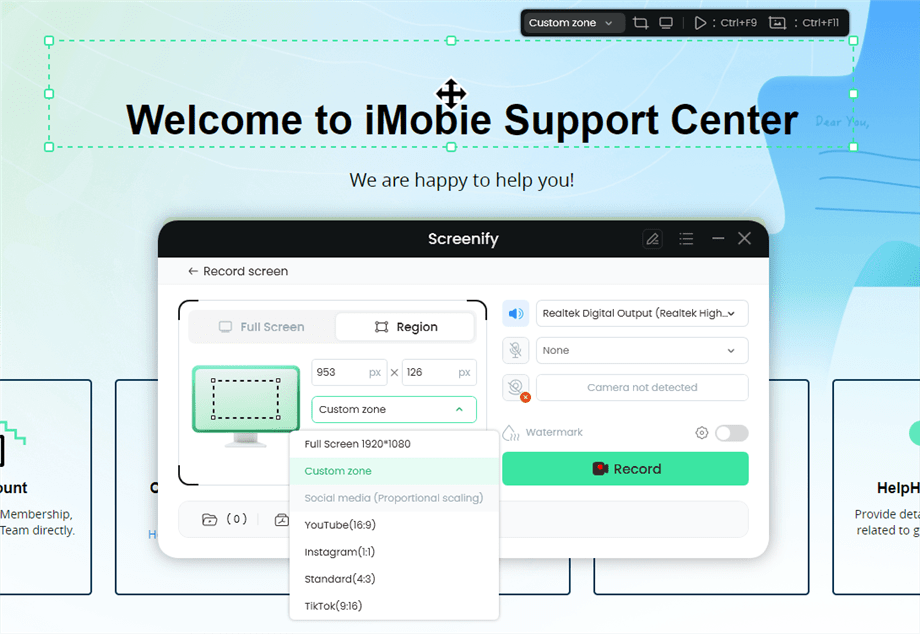
Record Region
Step 5. Wait for the Recording Countdown.
There is a 3-second countdown to help you prepare the recording after you are ready to start recording.
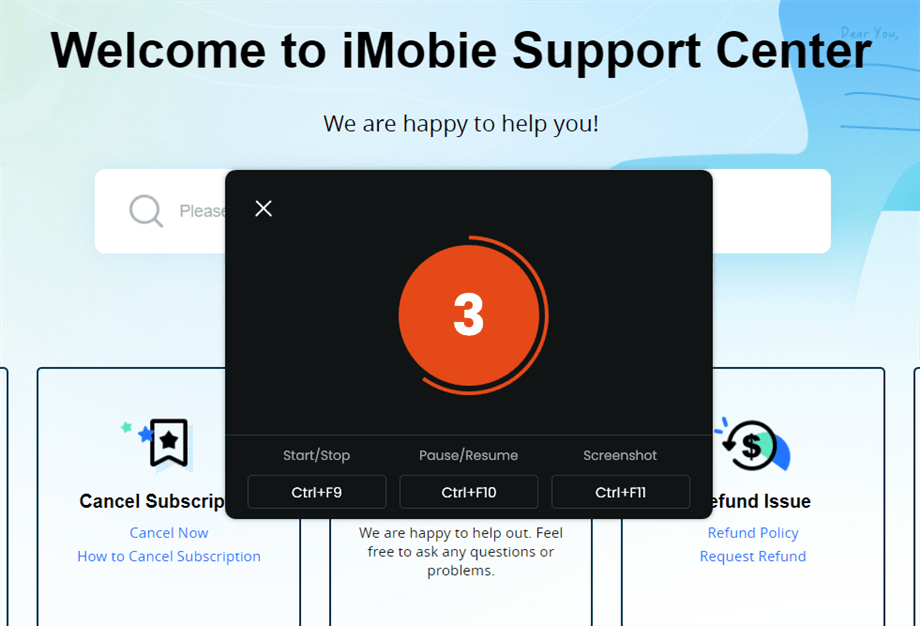
Wait for the Recording Countdown
If you would like to see a recording countdown before your recording starts, you can enable the countdown option. Or you can tap it off. View the post to know how to set the countdown option.
Step 6. Start Recording.
The recording will begin after a 3-second countdown. You can make annotations on the recording interface during the recording.
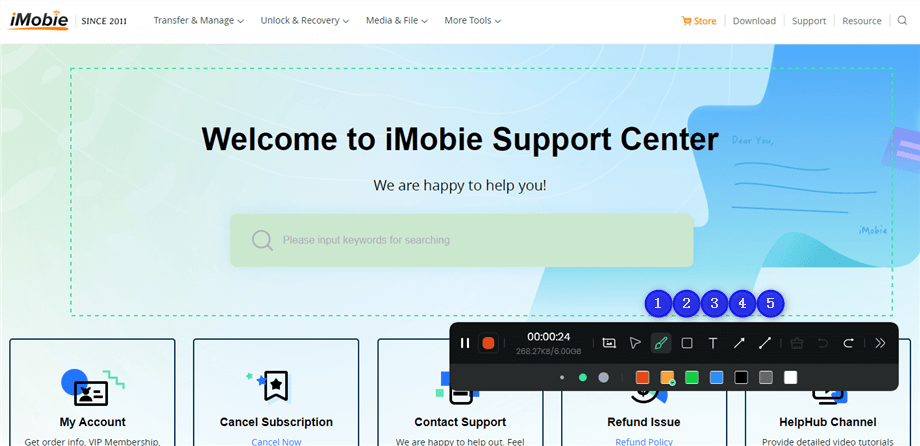
Annotate the Screen during Recording
With the toolbar, you can add the annotation in the screen:
The toolbar can be expanded or collapsed. This feature allows you to access various tools and options when needed, and hide them to keep the workspace uncluttered when they are not in use.
Step 7. Record Screen Process Completed.
When the recording is completed, you can click the red Stop button to end the recording. Your recorded files will be displayed. From here, you can preview and manage the recorded content as needed.
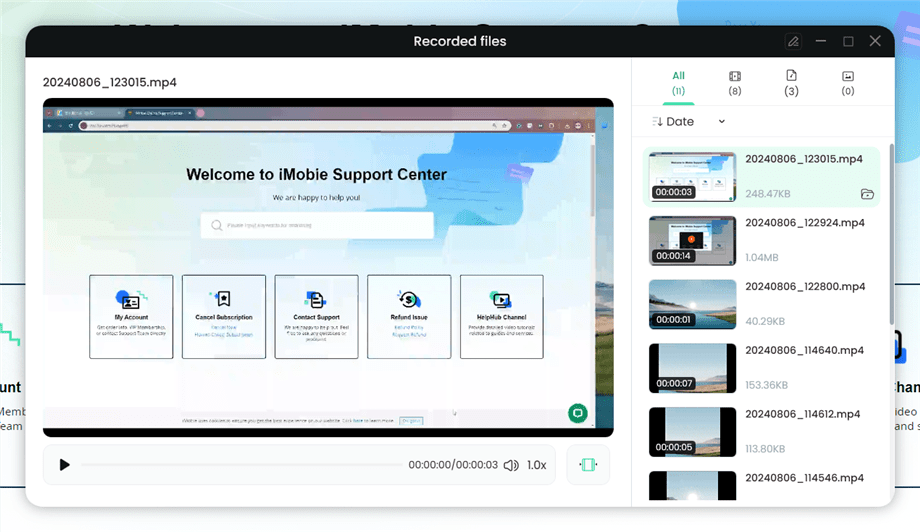
Preview the Recording
1. Click here to learn more about how to manage recorded files.
2. If you still have questions after reading this guide, please refer to FAQs page to check more solutions. Or you can contact our Support Team to get further help. We are here to help you!

Try It Out & Share Your Feedback!

We'd love to hear how Screenify is working for you.
Give it a try and share your thoughts—your feedback helps us keep improving.
If you're enjoying Screenify, we'd be so grateful if you could leave us a review on Trustpilot. Your support helps others discover Screenify and motivates our team!
Thank you for being part of the iMobie community — we couldn’t do it without you!
Try It Out & Share Your Feedback!
We'd love to hear how Screenify is working for you.
Give it a try and share your thoughts—your feedback helps us keep improving.
If you're enjoying Screenify, we'd be so grateful if you could leave us a review on Trustpilot. Your support helps others discover Screenify and motivates our team!
Thank you for being part of the iMobie community — we couldn’t do it without you!