Free Download For Win & Mac | 100% Clean & Secure
Install or Uninstall
This guide is to help you know how to download, install, uninstall, or update Screenify on your Windows or Mac computer.
Computer System Requirements
| Windows OS | Windows 11, 10, 8.1, 8, 7 (64 bit) |
| macOS | macOS 10.13 (High Sierra) and above |
Part 1. Download and Install Screenify on Windows Computer
Step 1. Download Screenify from Our Official Website.
Click the download link of Screenify on your Windows computer. After downloading it successfully, please double-click "screenify-en-setup.exe".

Click the Download Link of Screenify
Step 2. Install Screenify on Windows Computer.
Read the End User License Agreement and accept it. Then click the Install Now button.
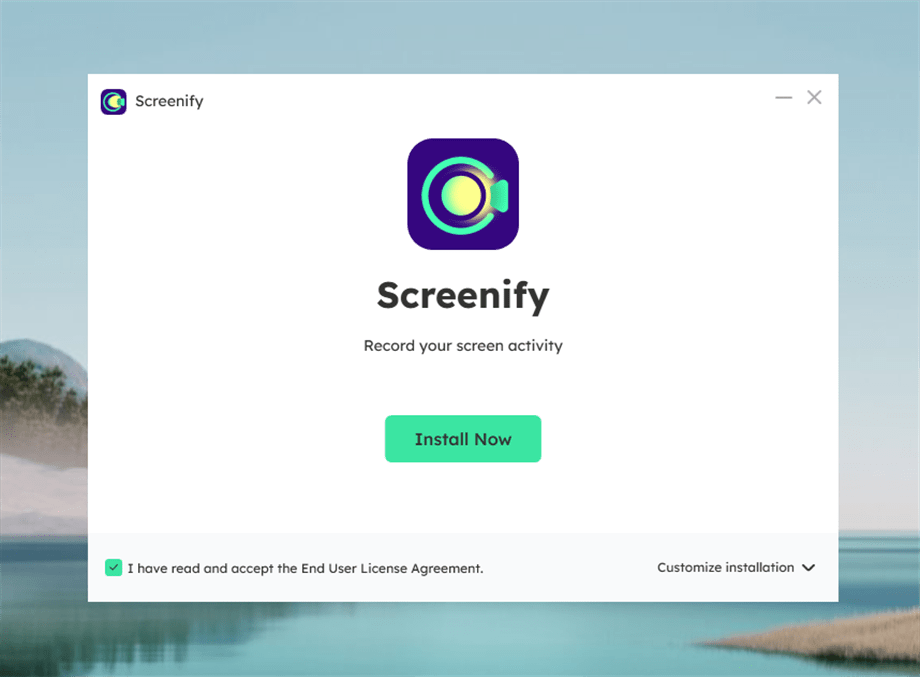
Click the Install Now
After you click the Install Now button, the installation process will start automatically.

Installation Process Will Start
Step 3. Complete the Installation Process.
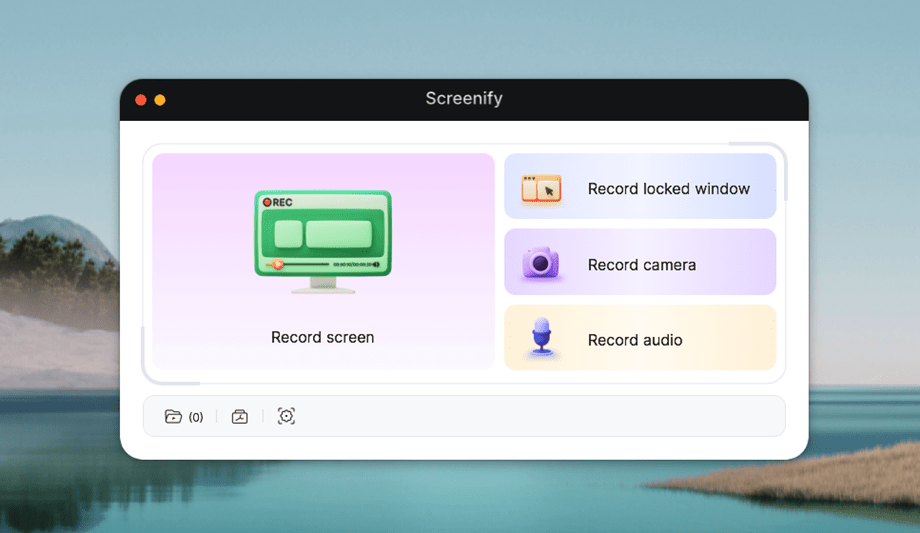
Once the installation process finishes, the interface will be shown as below.
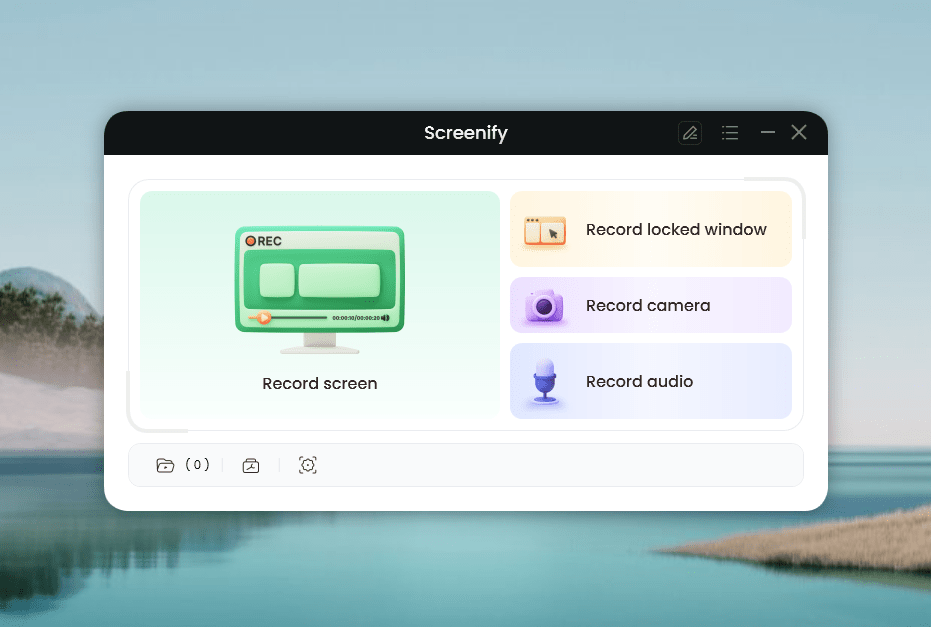
Installation Process Completes
Part 2. Download and Install Screenify on Mac Computer
Step 1. Download Screenify on Your Mac Computer.
Click the download link of Screenify on your Mac computer. After downloading it successfully, find “screenify-en-mac.dmg” in the browser and open it.

Click the Download link of Screenify
Step 2. Install Screenify on Your Mac Computer.
Double-click the Screenify icon. Read the End User License Agreement and accept it. Then, please click the Install Now button to start Screenify installation process.
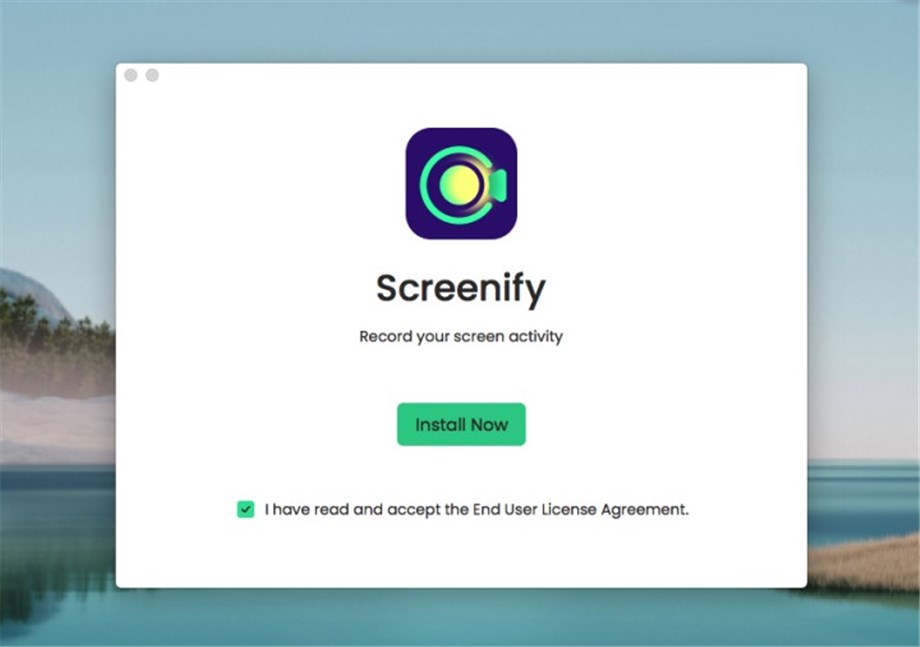
Read the End User License Agreement
After that, the installation process will be initiated automatically.
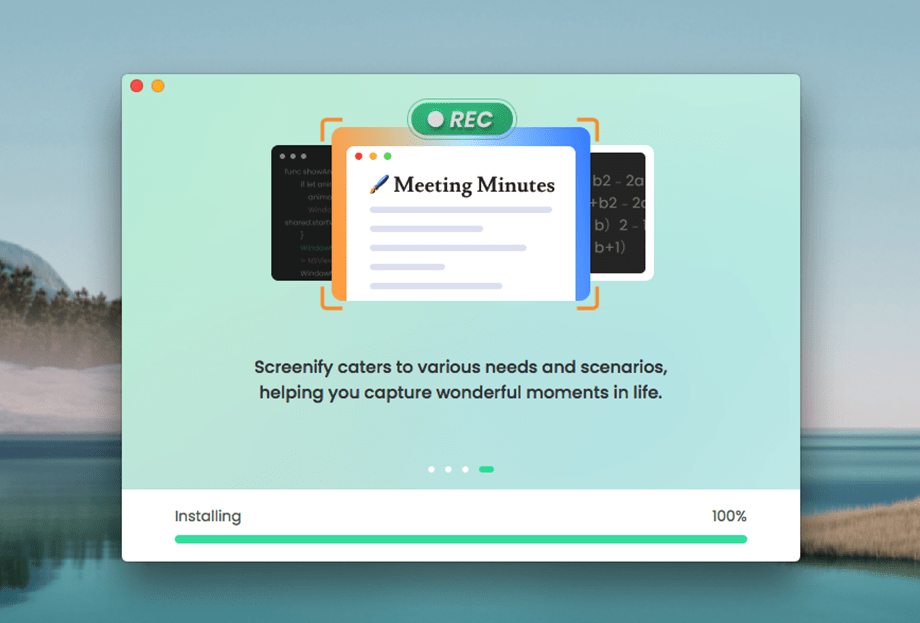
the Installation Process Will Be Initiated
Step 3. Complete the Installation Process.
Once the installation process is completed, the interface will be shown as below.
the Installation Process Completes
Part 3. How to Update Screenify to the Newest Version
Updating not only brings new functionalities and improvements, enabling you to make the most out of Screenify's capabilities but also helps maintain the application's reliability and performance, ensuring you have a smooth user experience.
Step 1. Launch Screenify and Unfold the Menu Bar.
Please launch Screenify and unfold the menu bar.
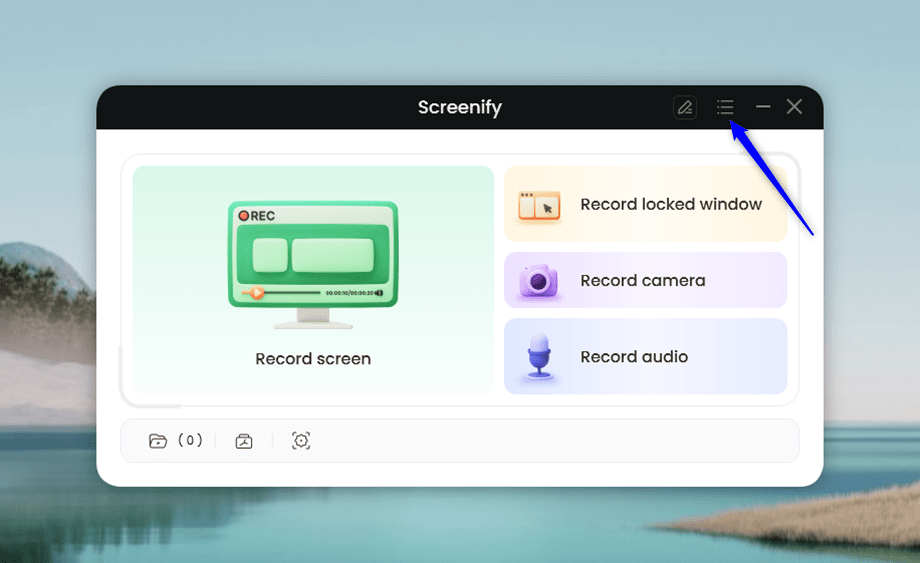
Unfold the Menu Bar
Step 2. Choose Check Updates Option.
Please choose the Check Updates option on the menu to check whether you have the latest version of Screenify or not. If Screenify is not the newest version, please click the Update Now button to update it.
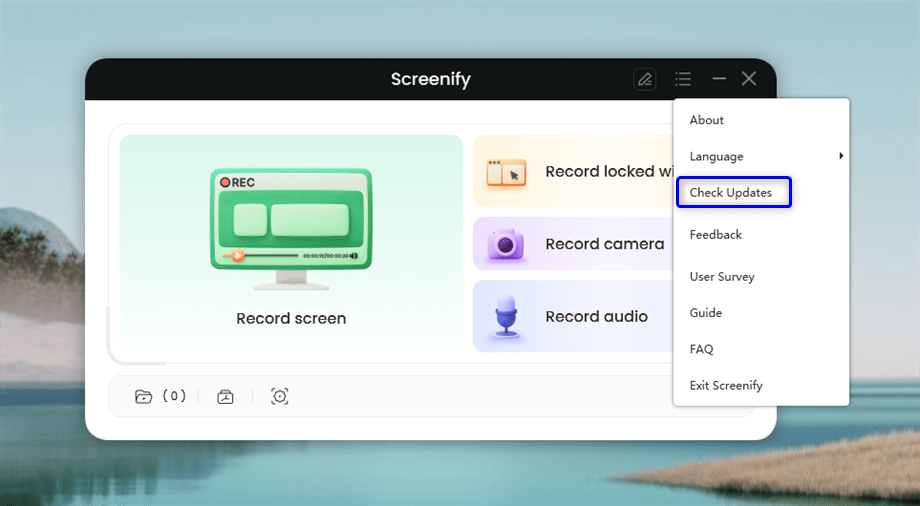
Choose Check Updates
If Screenify is already the newest version, the interface will be displayed as below.
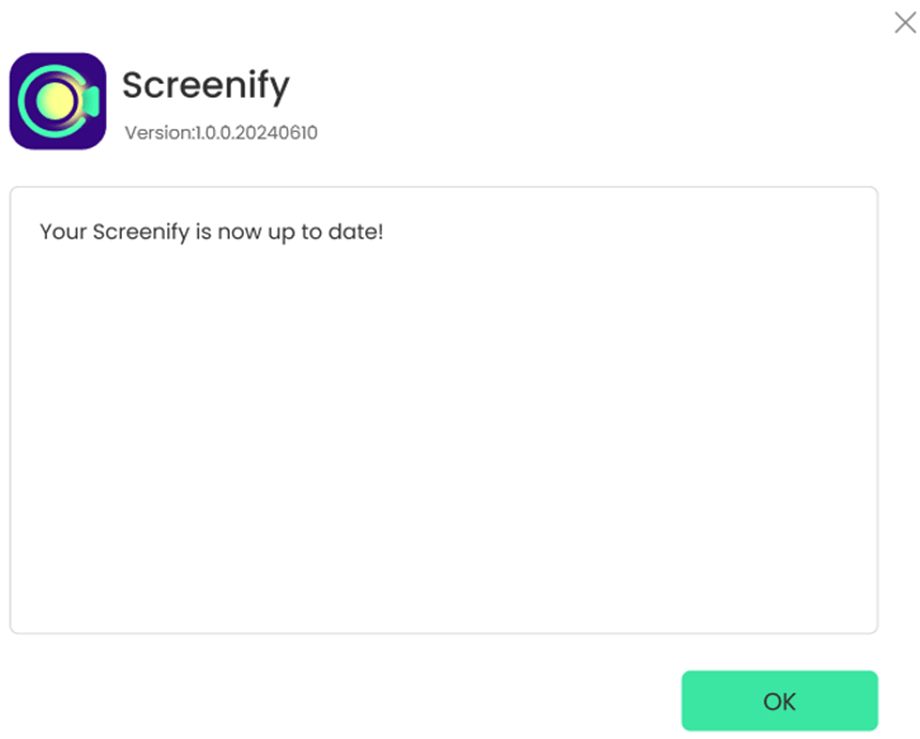
Screenify Is already the Newest Version
You can also visit this link directly to download the latest version of Screenify.
Part 4. Uninstall Screenify from Windows Computer
Step 1. Open the Control Panel.
Open the Control Panel on your Windows computer and choose Uninstall a program.
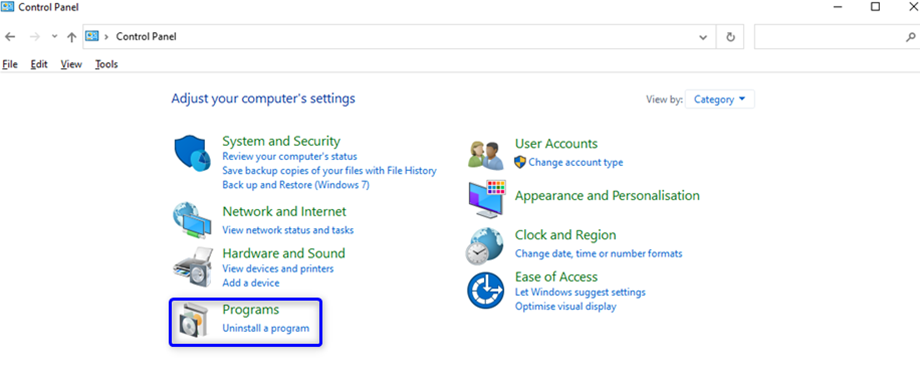
Choose Uninstall A Program
Step 2. Start to Uninstall Screenify.
After that, please choose Screenify and right-click it to uninstall Screenify.
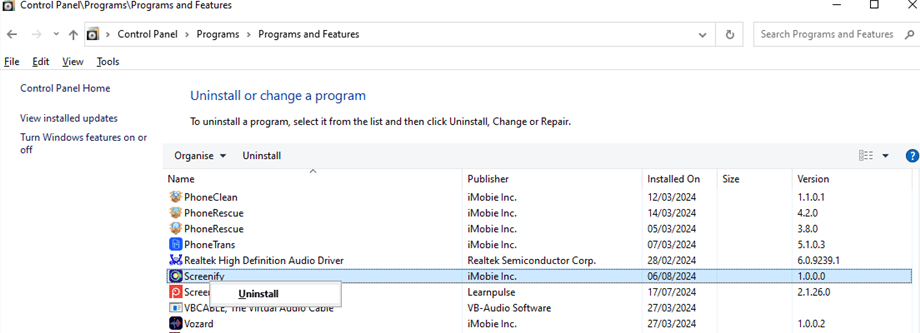
Uninstall Screenify
Step 3. Complete the Uninstallation Process.
Several seconds later, you will uninstall Screenify from your Windows computer completely.
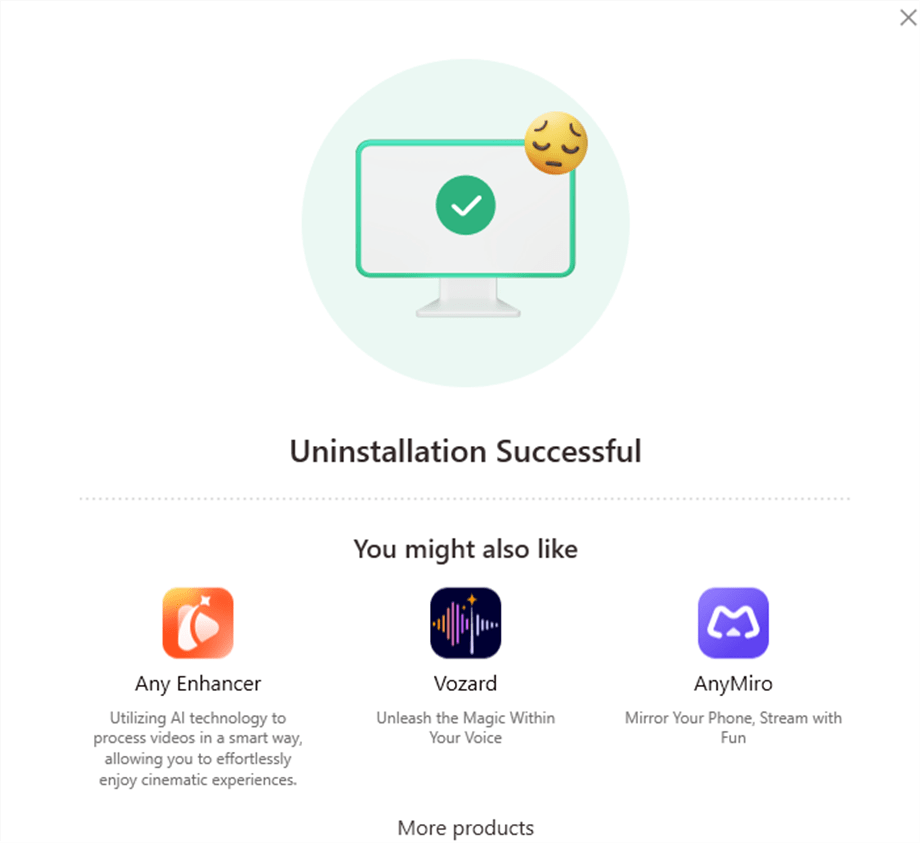
Uninstalling Process Completed
Part 5. Uninstall Screenify from Mac Computer
Step 1. Open Finder on Your Mac Computer.
Open Finder on your Mac computer. Then, please click Applications and locate Screenify.
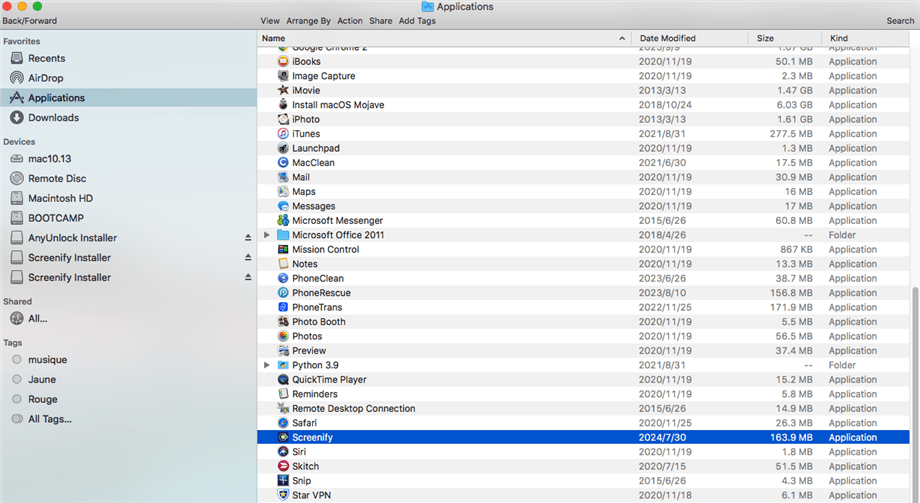
Click Applications
Step 2. Start to Uninstall Screenify.
Please right-click Screenify and choose Move to Trash.
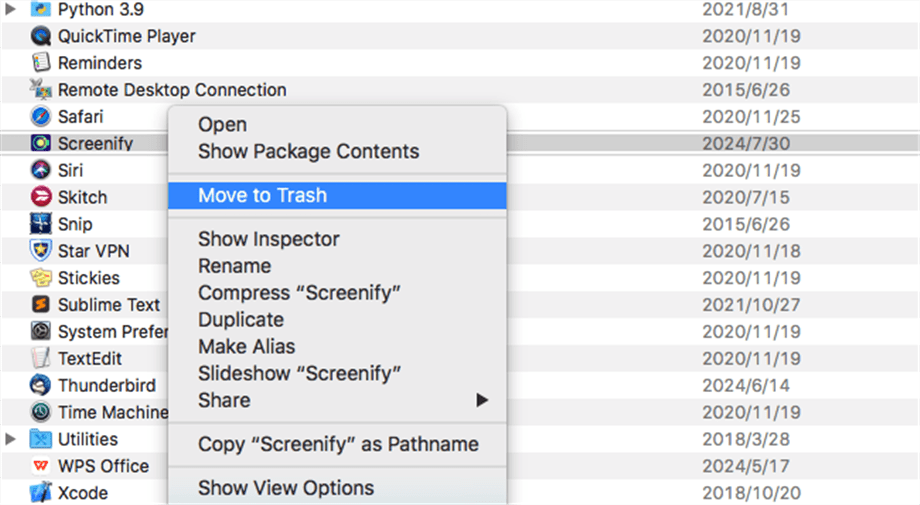
Choose Move to Trash
Step 3. Complete the Uninstallation Process.
Then, please right-click Trash and select Empty Trash.
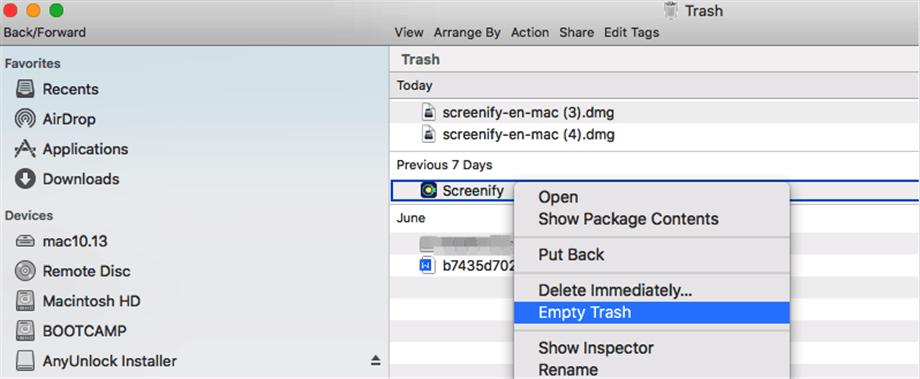
Select Empty Trash
Then, you will uninstall Screenify from your Mac computer completely.
1. We sincerely apologize for any unsatisfactory experiences while using Screenify. We also genuinely hope you will share with us any issues you encounter or features you expect. Your feedback is important to us!
2. If you still have questions after reading this guide, please refer to FAQs page to check more solutions. Or you can contact our Support Team to get further help. We are here to help you!

Try It Out & Share Your Feedback!

We'd love to hear how Screenify is working for you.
Give it a try and share your thoughts—your feedback helps us keep improving.
If you're enjoying Screenify, we'd be so grateful if you could leave us a review on Trustpilot. Your support helps others discover Screenify and motivates our team!
Thank you for being part of the iMobie community — we couldn’t do it without you!
Try It Out & Share Your Feedback!
We'd love to hear how Screenify is working for you.
Give it a try and share your thoughts—your feedback helps us keep improving.
If you're enjoying Screenify, we'd be so grateful if you could leave us a review on Trustpilot. Your support helps others discover Screenify and motivates our team!
Thank you for being part of the iMobie community — we couldn’t do it without you!