Samsung J4 FRP Bypass? Easy 3 Ways Here!
Gain access to the data on your phone by using the Samsung J4 FRP Bypass feature through several methodologies. There are many tools out there that will help you with it. The easiest, and least time-consuming method is through DroidKit. Find out amazing tips and tricks that will solve your problem in a matter of minutes!
Have you ever needed to reset your Samsung Galaxy J4 but don’t remember your Google login credentials? If your Galaxy J4 is lagging and you have to reset it, you might be greeted by a verification screen that says you need to remember your credentials. This accounts for the FRP feature in Google.
This step-by-step guide will help you with the Samsung J4 FRP bypass so you can regain access to your device. The methods stated in this guide are tried and tested. If you follow them with precision, you can gain data access. Let’s dive in!
Part 1. About Samsung J4
Samsung released the budget-friendly Galaxy J series in 2018, which included the Galaxy J4. These phones came with various features, notably Factory Reset Protection (FRP).
FRP is a security feature that helps prevent unauthorized access once you factory reset your phone. It is, no doubt, a great way to keep data protected. The FRP tends to get activated when the Samsung J4is is factory reset while the Google Account is still logged in.
If you accidentally forget your Google credentials, all your data is lost. This is where the Samsung J4 plus FRP bypass comes in. As the name states, it allows you to bypass this security measure.
Part 2. Three Ways to Bypass Samsung J4FRP
The Samsung J4 FRP bypass is relatively easy. You can do this in any one of these three ways.
Method 1. Quick Way to Bypass FRP on Samsung Galaxy J4 DroidKit
Droidkit is the ultimate Android tool to resolve various issues with Android gadgets. It mainly focuses on Samsung phones. Developed by iMobie, it provides multiple great functions for the Samsung J4 FRP bypass. It also works with lost data recovery, system issues solutions, device content management, and more.
The multi-functional features of DroidKit help solve complex problems that Android users often encounter. When you need to retake command of your gadget or try to retrieve crucial data, just turn to DroidKit.
DroidKit – Unlock Phone without Password
- Unlock all types of screen locks on an Android phone in minutes.
- Unlock 20,000+ models of Android phones & tablets.
- No technical knowledge is required; No need to root your device.
- Bypass Samsung FRP lock if forgot Google account password.
Free Download100% Clean & Safe
Free Download100% Clean & Safe
Free Download * 100% Clean & Safe
Steps to Bypass FRP on Samsung Galaxy J4 Using DroidKit
Step 1: First, download DroidKit on your PC or laptop. Then, launch it and select “FRP Bypass” from the homepage.
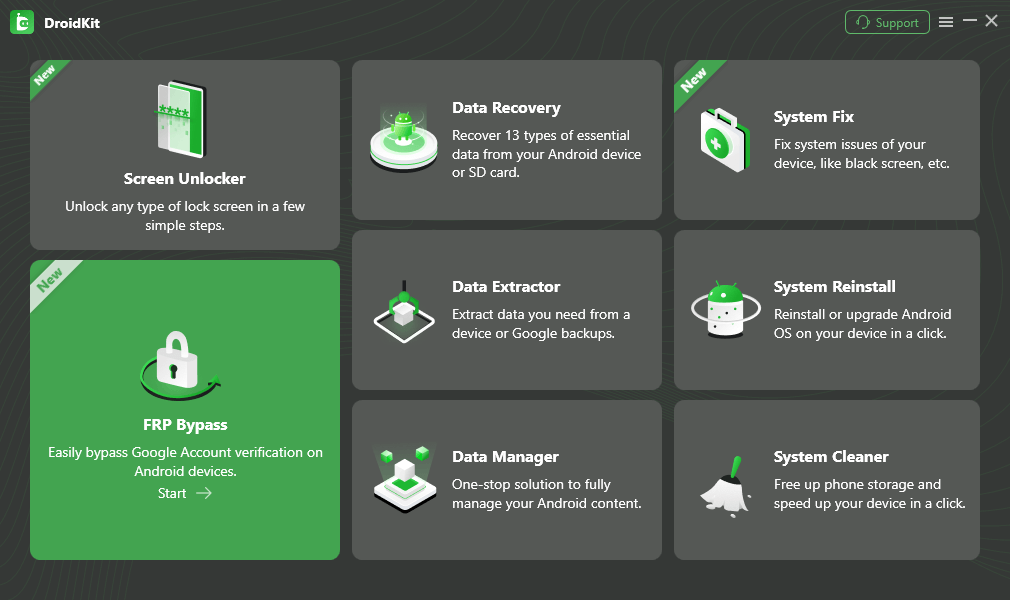
Choose FRP Bypass Mode
Step 2: Next, connect your Samsung J4 to your PC using a USB cable and click the “Start” button. Now, select your device’s brand, Samsung, in our case. DroidKit will prepare a configuration file for your device. Do not disconnect your phone.
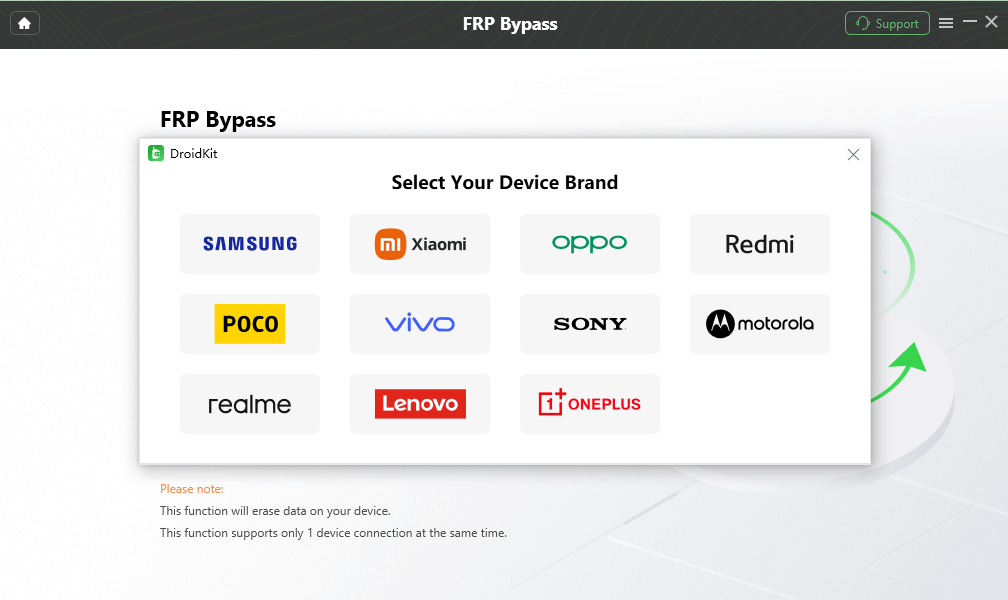
Choose Device Brand
(Note: If your device runs Android 13 and above, you are supposed to choose the “US version.” Otherwise, select “Other” based on your device model.)
Step 4: Once the configuration file is prepared, you will see the below interface. Click “Start to Bypass” to start the FRP bypass process.
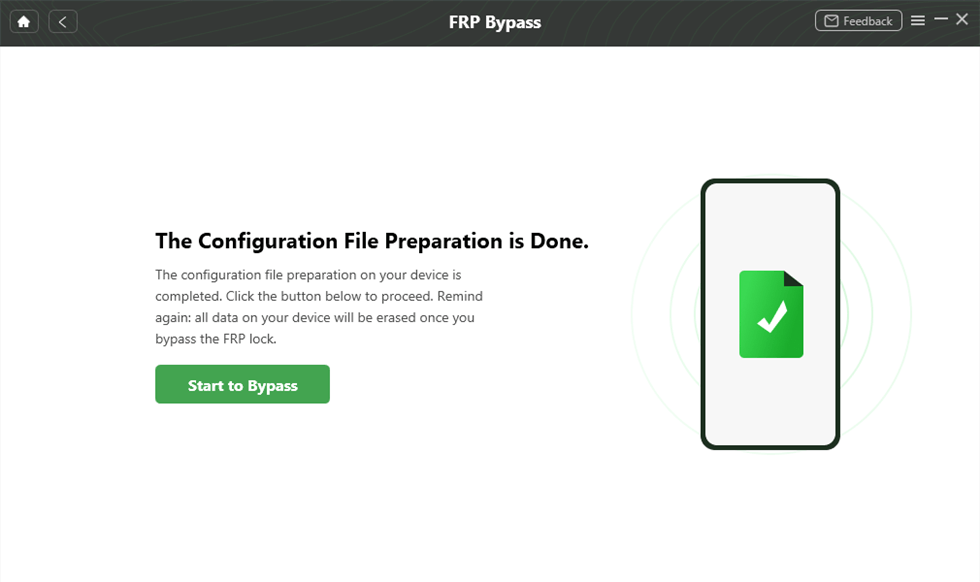
Tap on Start to Bypass
Step 5: After clicking the start to bypass button, select the OS of your device. Then, click the “Next” button and proceed.
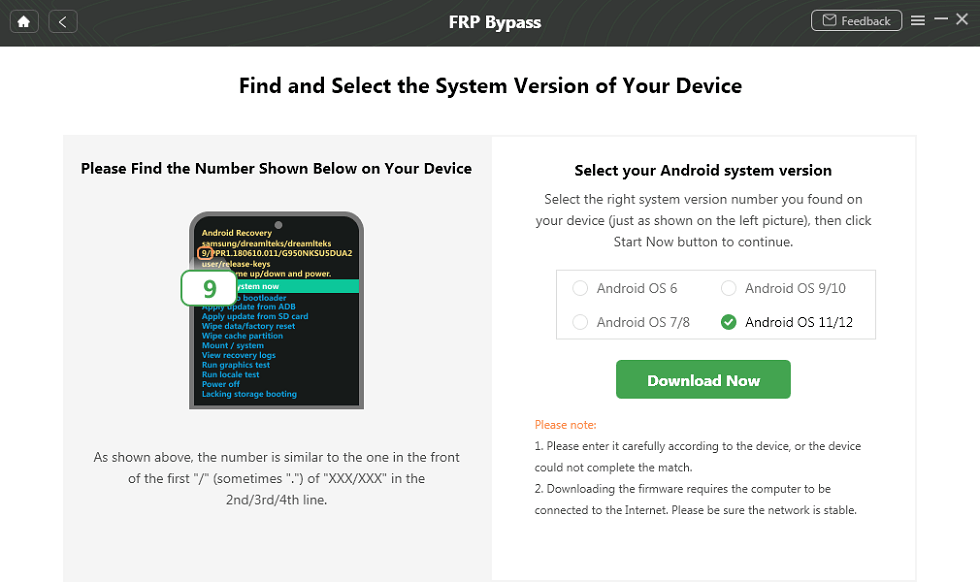
Select Android System Version
Step 6: Now, navigate to the “Enter your current password interface” and follow the on-screen instructions to enter factory mode. Once you have done so, click the “Reset” button.
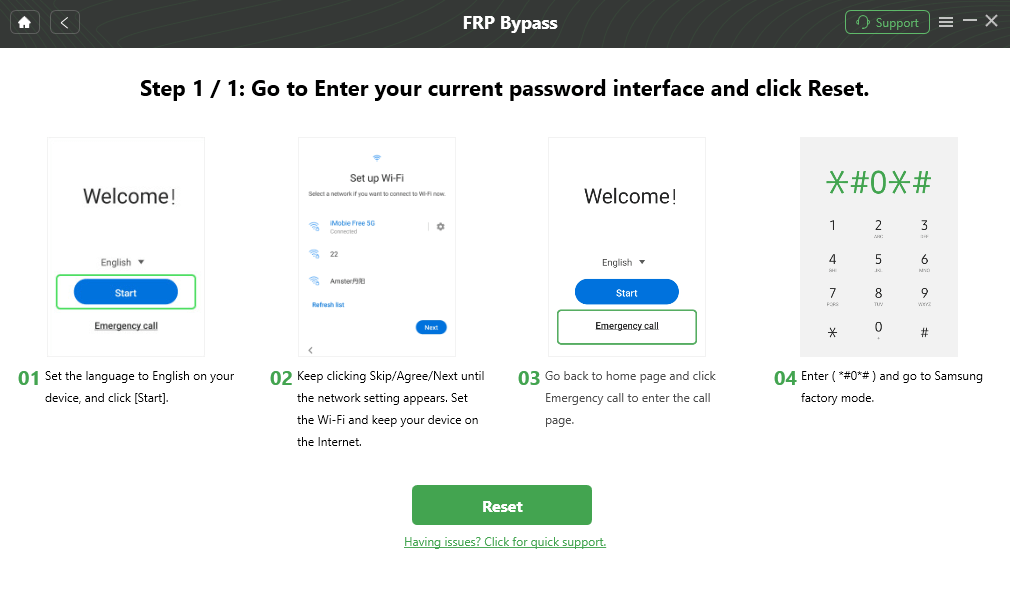
Go to Enter your Current Password Interface and Click Reset
Step 7: After clicking the reset button, DroidKit will start the Samsung J4 FRP bypass process. Once completed, you will see the below interface.
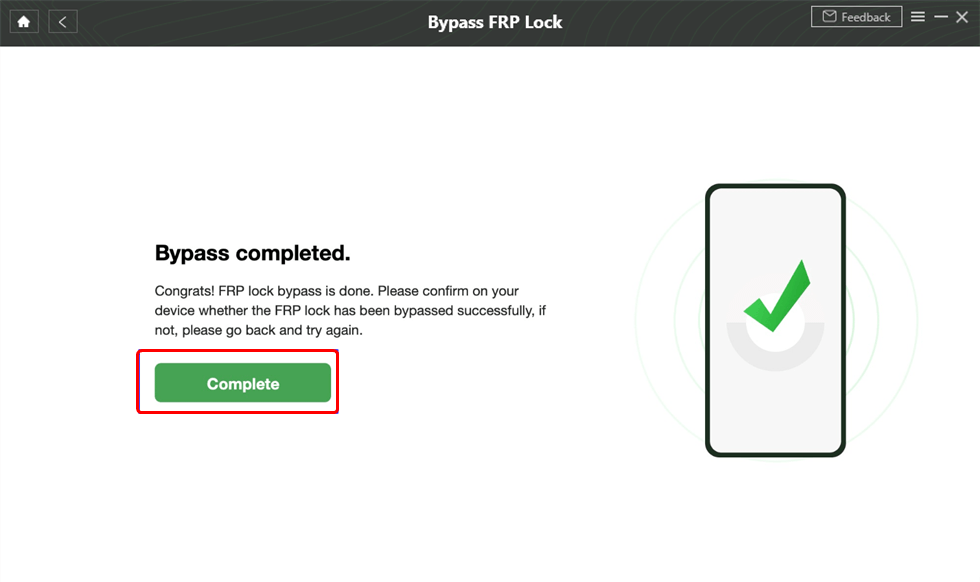
FRP Bypass Successfully
That’s it! This is how you can use DroidKit to remove the FRP lock from your Android device. It is the most reliable and effective method to do the job. However, if you want to explore the manual method, keep reading!
Method 2. Bypass FRP on Samsung J4 Using a SIM Card
There are other possible methods for bypassing Samsung J4 FRP. The second method is accessible to people who have a functioning SIM card.
This technique utilizes the relationship between your device and SIM card to assist you in avoiding the screen that requires verification of your Google account. You can unlock your Samsung J4 in minutes through a working SIM card and Wi-Fi access.
Here is a step-by-step guide to do it:
Step 1: The first thing you need to do is insert an active SIM Card into your Samsung J4 and connect it to a WiFi network.
Step 2: Next, on the phone starting, click the “Emergency Dial” button and dial 112.
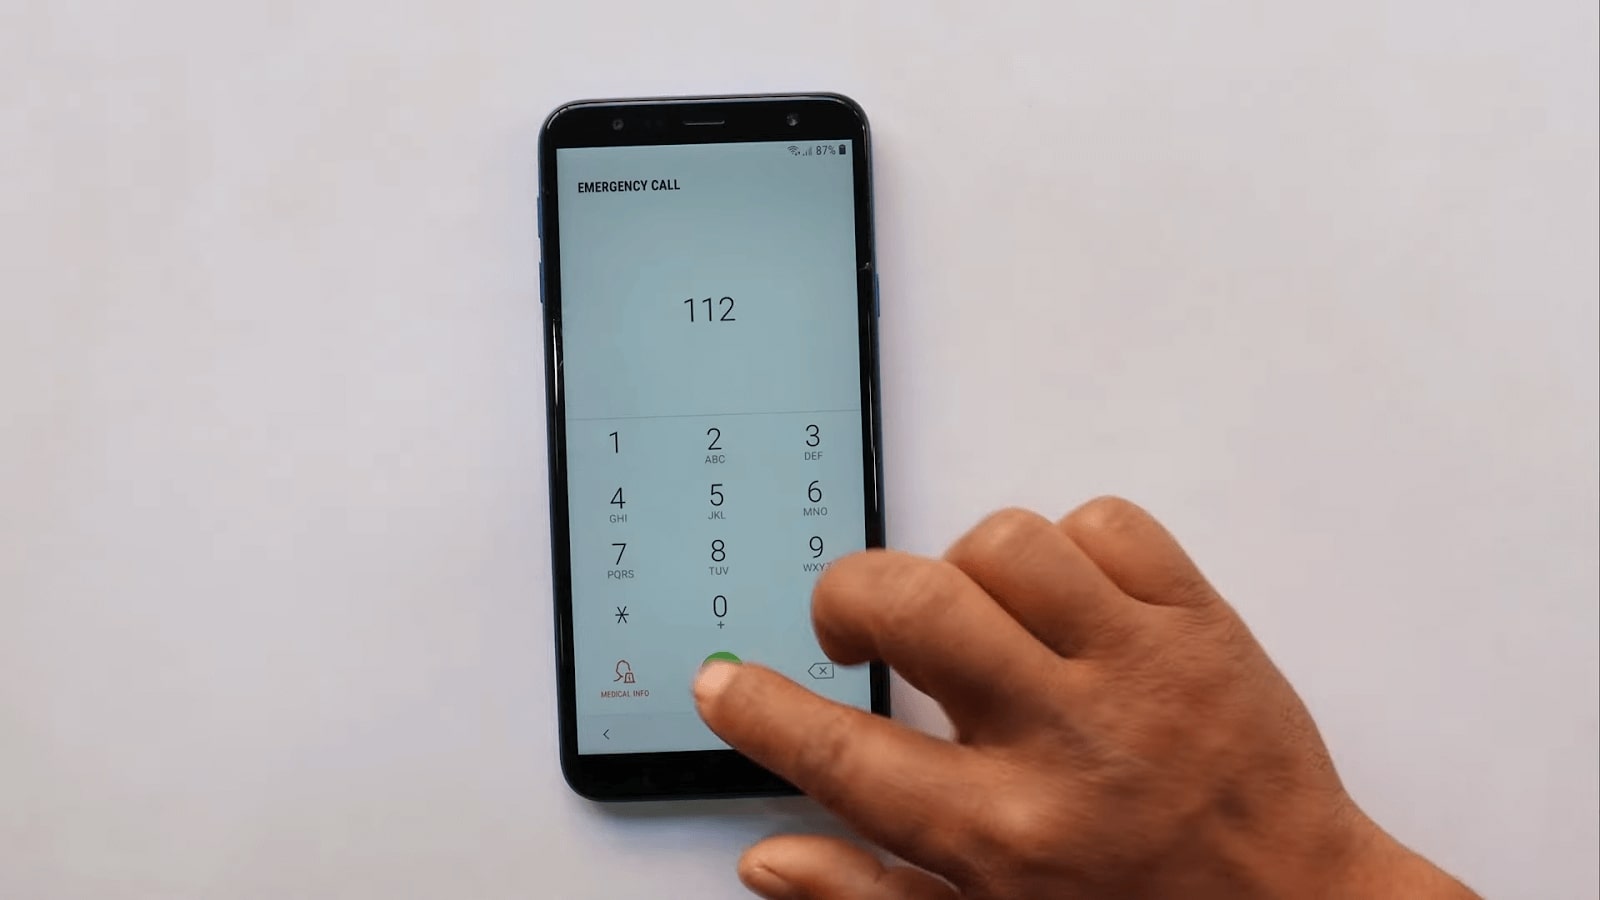
Dial the Emergency Call 112
Step 3: Click three dots on the top left of the call interface and select “Send message.” Then, send any random message to this number.
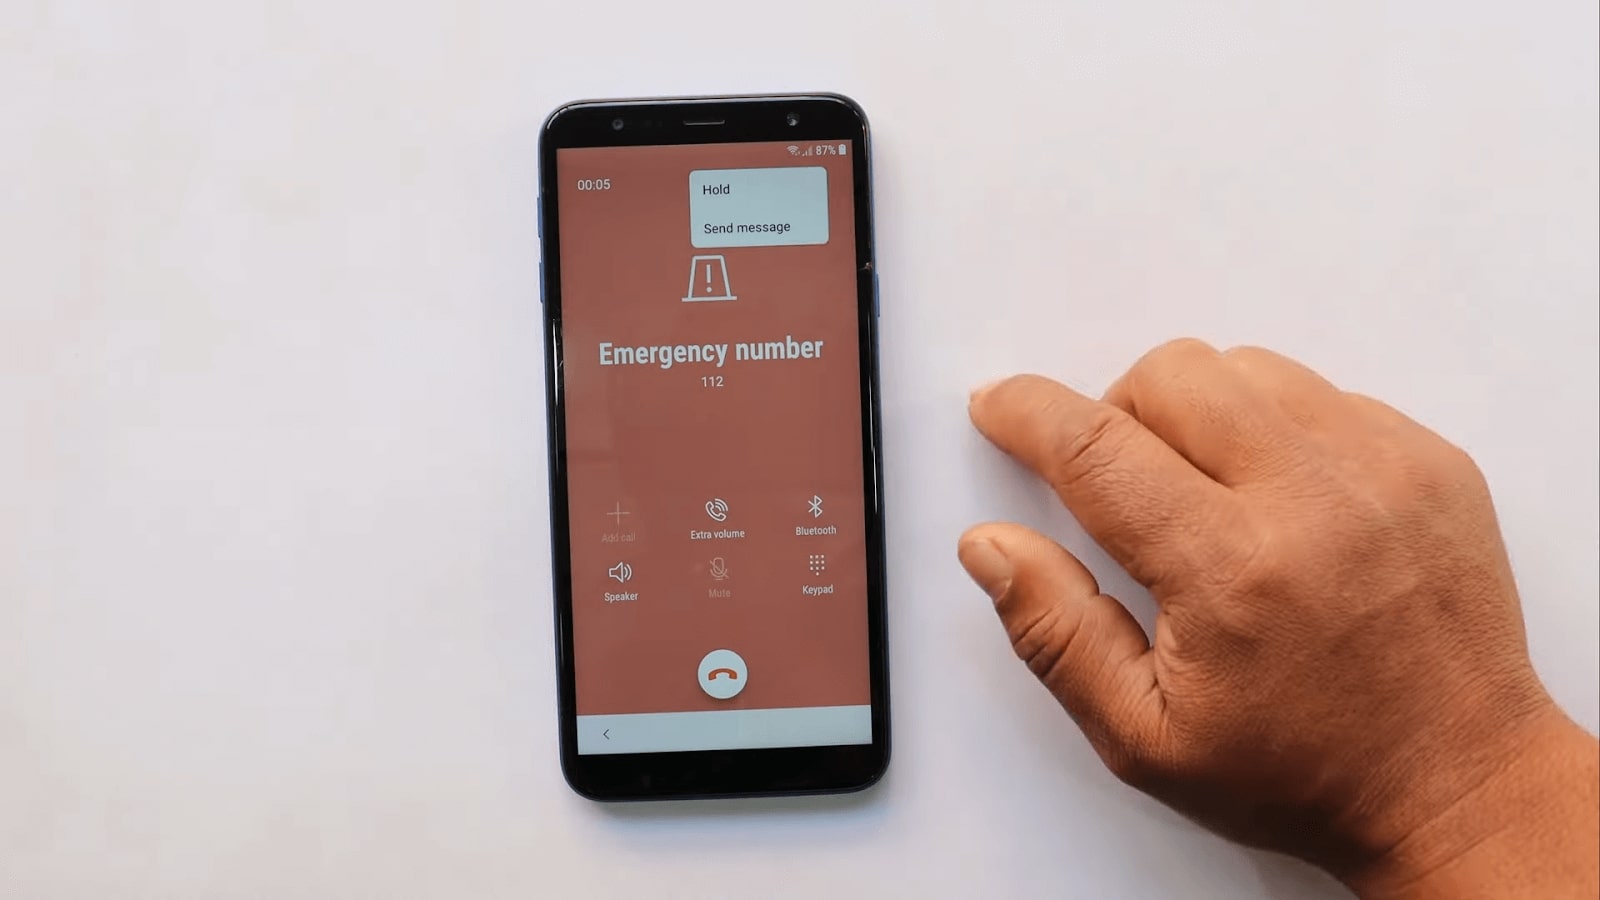
Send a Random Message to the Dialed Number
Step 4: Now, in the message chat interface, click the “Call” icon, Open the recently dialled number, click the “Share” button, and select your browser.
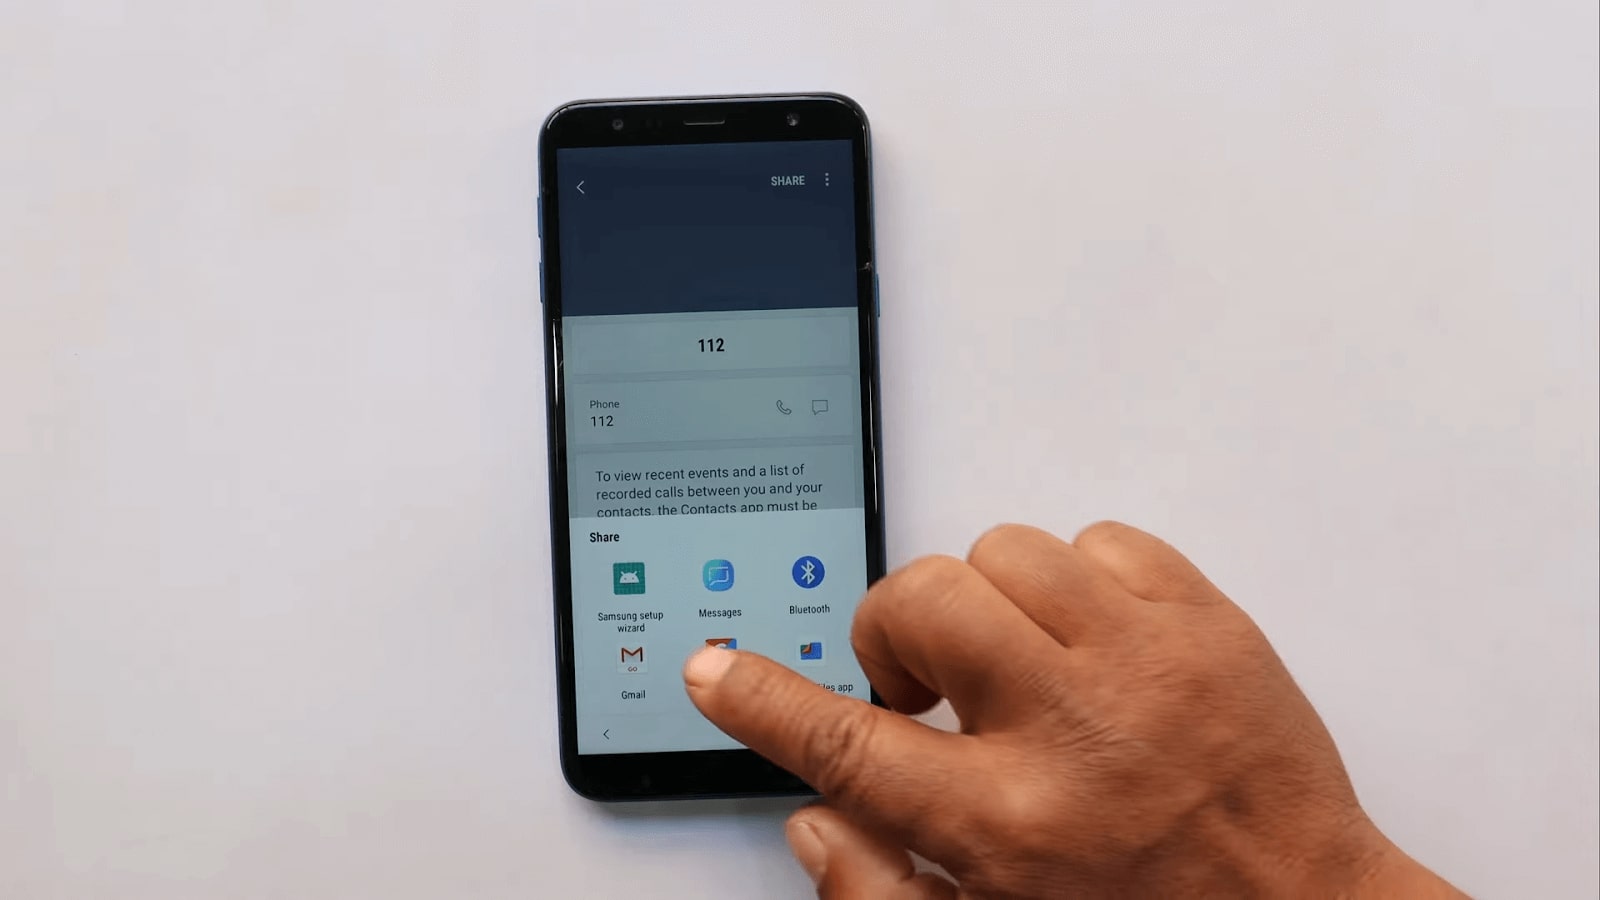
Navigate to Share and Select Your Browser
Step 5: After opening the browser, search for “Mobileteam official” and open its website. Then, open the menu and click “FRP Unlock,” scroll down, and click “Screen Lock.”
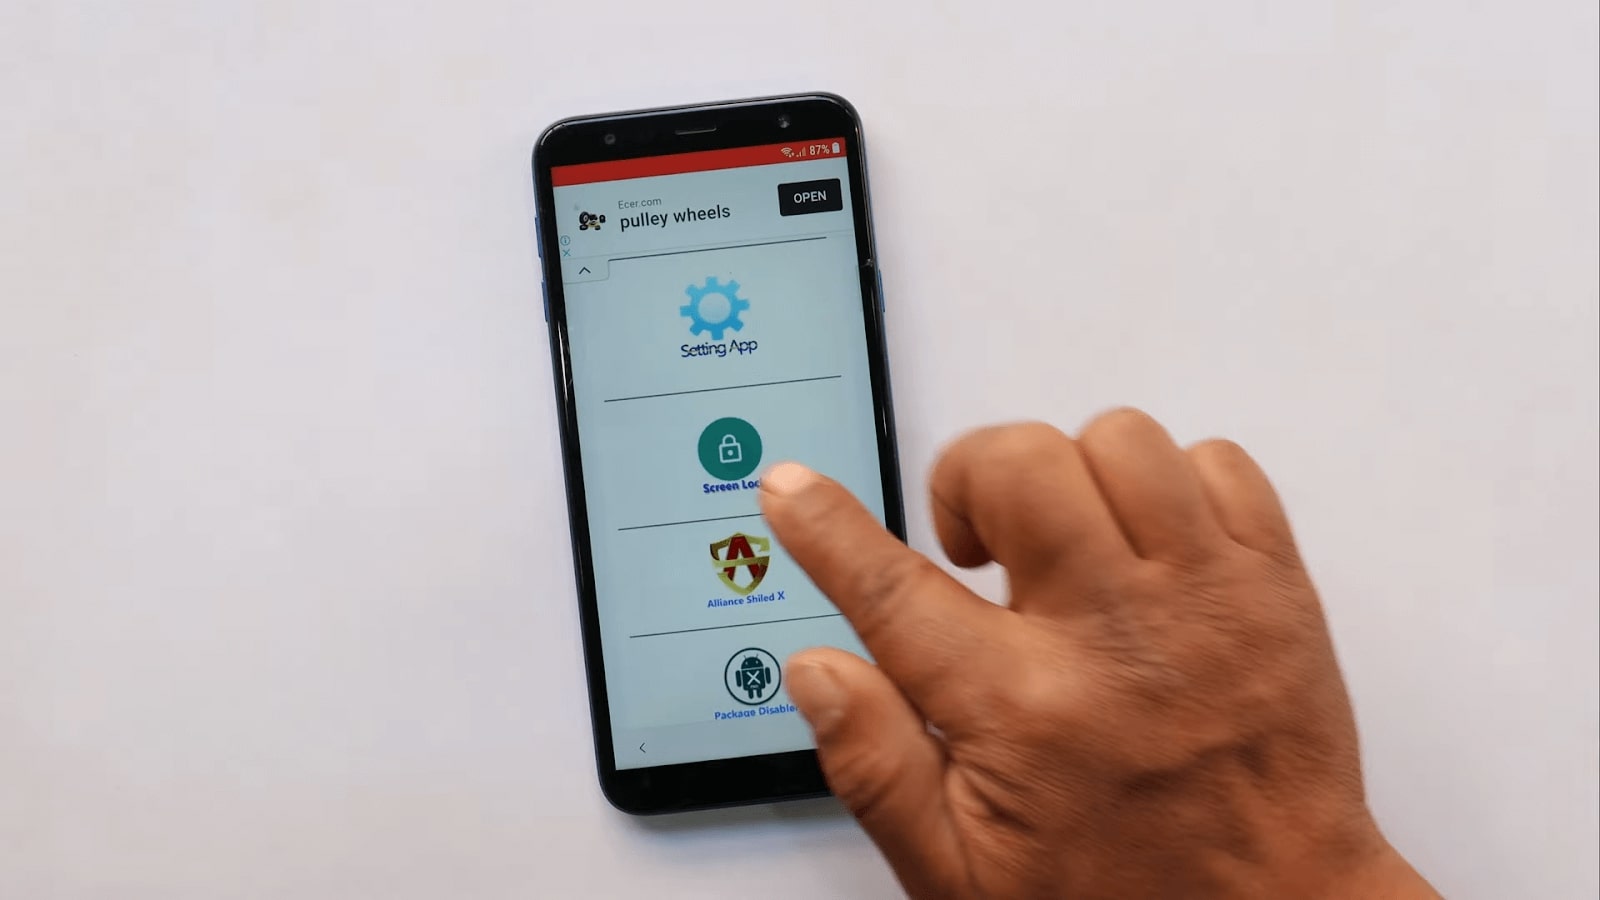
Open the Menu and Navigate to Screen Lock
Step 6: After clicking the screen lock option, follow the on-screen instructions and then go back to the phone startup.
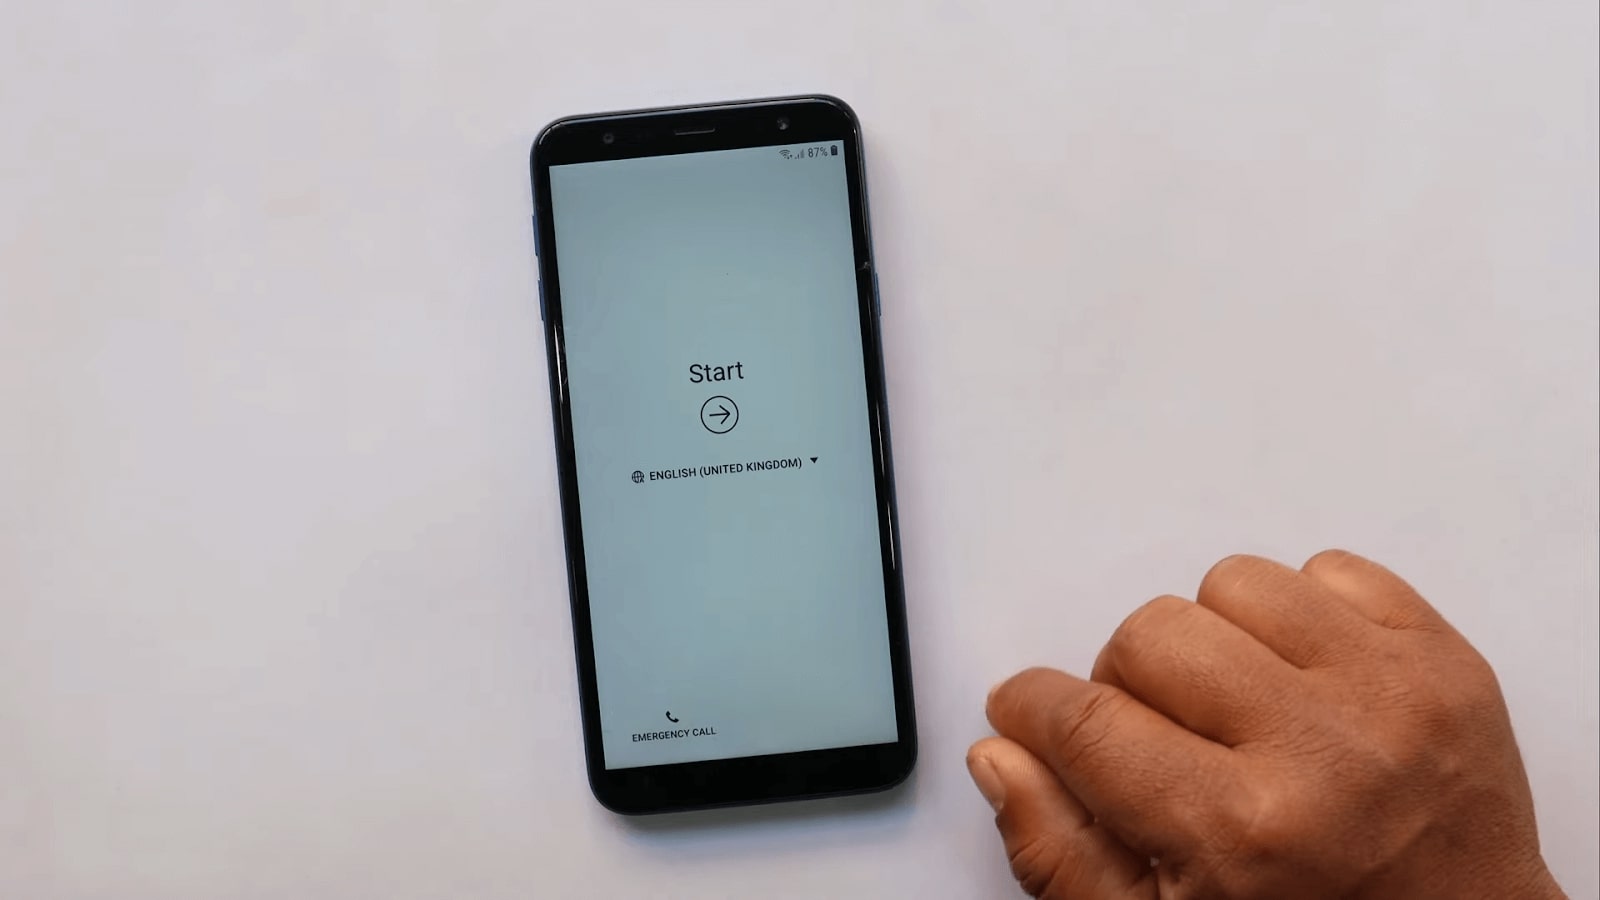
Return to the Phone Startup
Step 7: Go along with all the startup steps. This time, you won’t see the FRP lock screen. Instead, you will be asked to sign in with a Google account or create one.
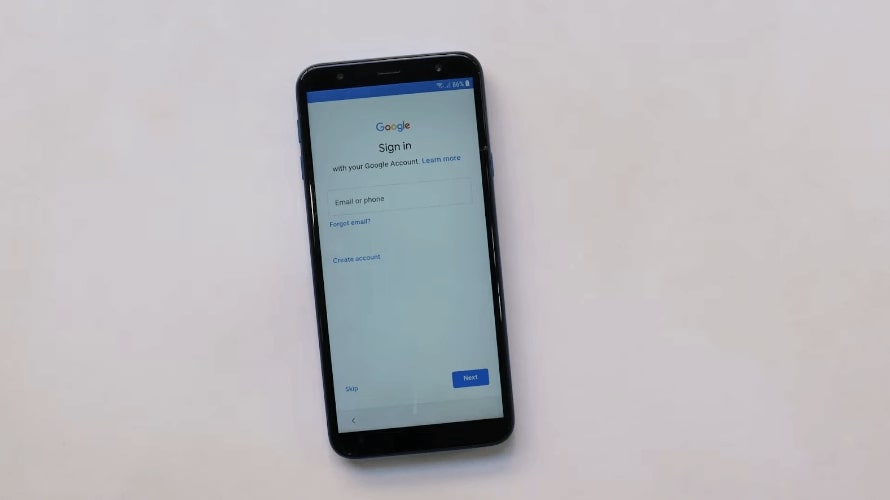
FRP Bypassed Successfully
That’s it! This is how you can perform a Samsung J4 FRP bypass using a SIM card. However, this method may not be successful every time and involves daunting steps. Also, if you do not have an active SIM card, you can try the next method.
Method 3: Bypass FRP on Samsung J4 Without a SIM Card
If you do not have a SIM Card, use this method. Here, the first three steps are the same as in the above method. After that, you can follow the instructions given below:
Step 1: Go back to the WiFi setup; this time, click the “Add Network” button. Once the keyboard is opened, click the “Settings” icon.
Step 2: After opening the keyboard settings, click “Keyboard layout and feedback” > “Key-tap feedback” > “Sounds and vibration” > “Answering and ending calls.” Open the “Answer automatically” option and turn on the toggle.
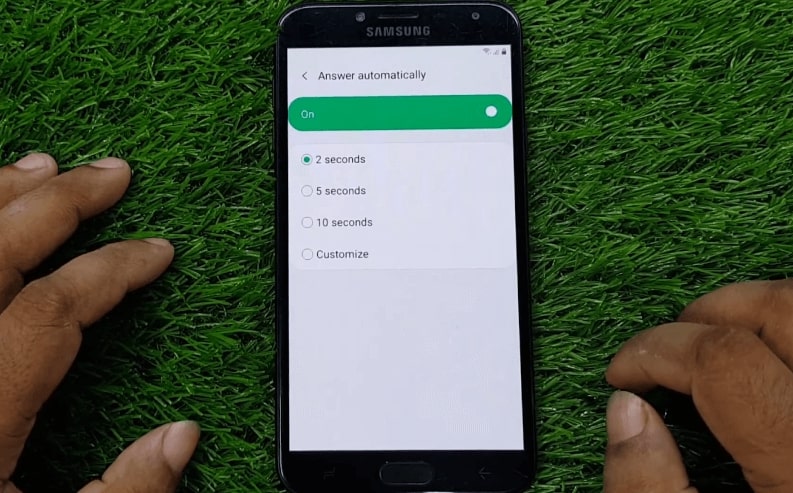
Navigate to Answer Automatically Option
Step 3: Here, click any two options together. You can try different sets until you see a pop-up.
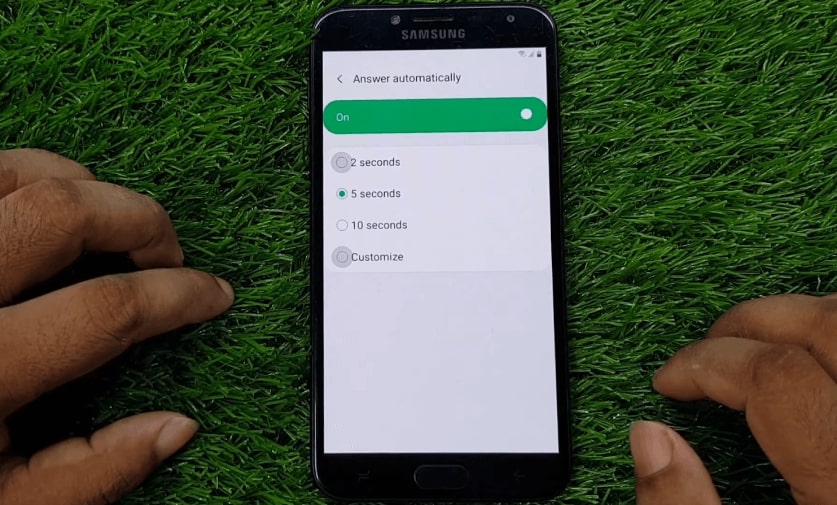
Click the Two Options Together
Step 4: Once the pop appears, click “App info” and then the “Settings” icon on the top left. Here, click “Block numbers.”
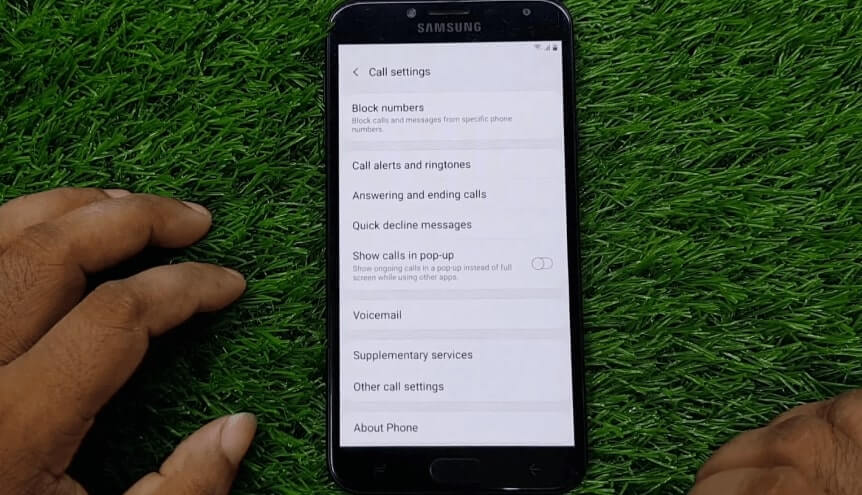
Click Block Numbers
Step 5: In the block numbers menu, click “Recent” and select the emergency number that you dialed before. Then, click the “Add” button and save it as a contact by any name and gmail.
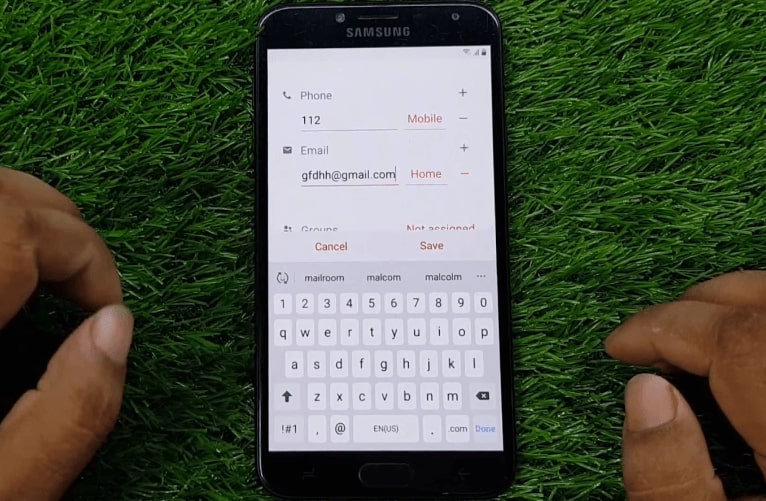
Save the Contact
Step 6: Once the contact is saved, click the email icon, and it will open Gmail on your phone. Here, click “Add an email address” > “Other” > Enter your email and click “Manual Setup.”
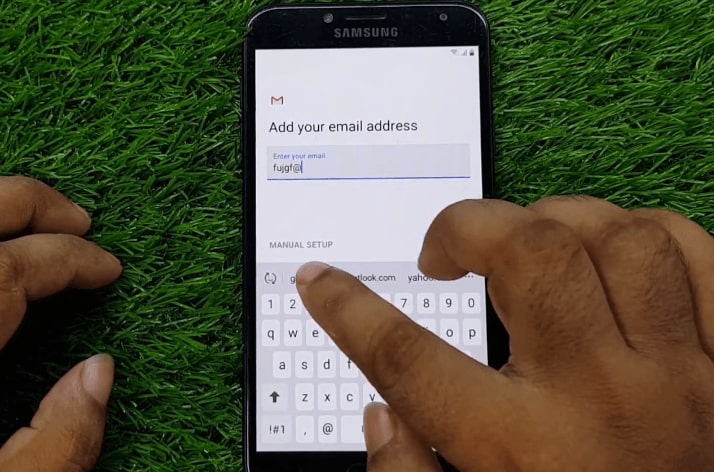
Add an Email and Click Manual Set up
Step 7: Next, click “Exchange” and then click “Select” next to the client certificate option. Create a screen lock and go back. Then restart your phone. Your last Gmail account should have been removed.
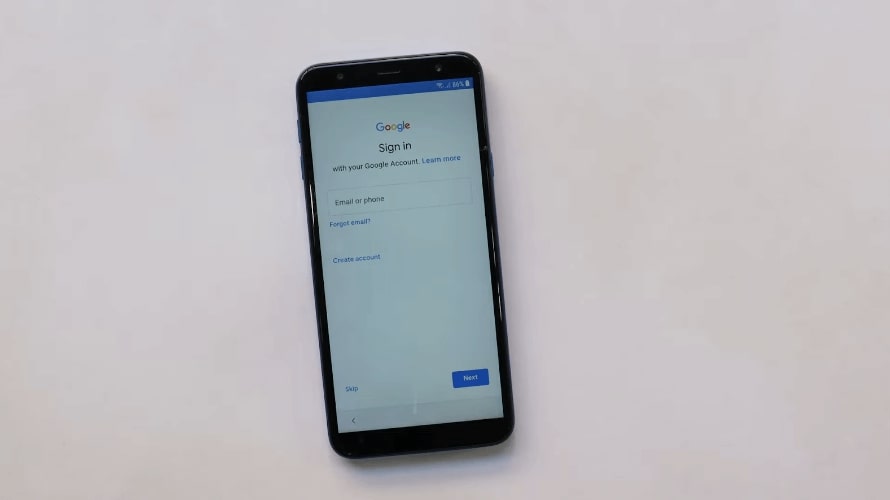
FRP Lock Successfully Removed
This method involves a lot of steps and can be complicated for most users. Therefore, going for reliable, easy, and efficient options like DroidKit is recommended instead of trying the manual methods.
Conclusion
Getting logged out of your Samsung Galaxy J4 may be frustrating because of security protocols. Usually, because of FRP, you need to enter your Google credentials. But if you have forgotten or misplaced them, use Samsung J4 FRP bypass methods.
This guide covered three reliable ways to bypass FRP on the Samsung J4, including DroidKit. This powerful tool simplifies the process compared to manual methods involving a SIM card or without one.
Product-related questions? Contact Our Support Team to Get Quick Solution >

