3 Ways to Bypass FRP on Samsung A40 [High Success Rate]
This article provides detailed instructions on how to bypass Google account on Samsung A40 using three proven methods: DroidKit, Odin, and Google Keyboard. Each method offers a practical solution with step-by-step guidance to unlock your device efficiently.
DroidKit – Easiest Samsung A40 FRP Bypass
DroidKit allows you to bypass the Google account verification on your Samsung A40 with easy steps. No credential information or password is required. Support all Samsung phones and tablets running Android 6 to 15.
Factory Reset Protection is a vital security feature on Android devices, including the Samsung A40, that protects your data from unauthorized access after a factory reset. However, it can become an obstacle if you forget your Google account credentials or your second-hand Samsung A40 has enabled the FRP feature with an unknown account. No worries, we’ll explore 3 reliable ways to bypass FRP on Samsung A40, ensuring you regain access to your device without complications.
Comparison of the 3 Samsung A40 FRP Bypass Methods
Before trying each method to bypass FRP on Samsung A40, you can check their effectiveness in advance and get ready to start.
| Method | Ease of Use | Success Rate | Requires Computer | Risk Level |
| DroidKit | Very Easy | High | Yes | Low |
| Odin | Moderate | Moderate | Yes | Moderate |
| Google Keyboard | Hard | Low | No | Moderate |
Samsung A40 FRP Bypass on Any Android Versions
It’s always essential to use an FRP bypass tool for Samsung A40 FRP bypass, thus we’d like to introduce the ultimate one for most Android devices. DroidKit, as a versatile Android toolkit, is designed to address common device issues, including FRP bypass, Android data recovery, Android lock screen removal, and Android system repair. It is specifically optimized for Samsung devices, making it an excellent choice for bypassing FRP on the Samsung A40.
Key Features:
- FRP Bypass: Simplifies the process without requiring complex configurations.
- User-Friendly Interface: Intuitive steps that guide even beginners through the process.
- Device-Specific: Downloads customized firmware or settings tailored to your device model.
- Supports Various Devices: All Samsung phones and tablets are supported.
Steps to bypass Samsung A40 FRP with DroidKit:
Step 1. Download and install DroidKit on your computer. Both Windows and Mac computers are supported.
Free Download * 100% Clean & Safe
Step 2. Launch DroidKit and use a USB cable to connect your Samsung A40. Then choose FRP bypass from the main screen.
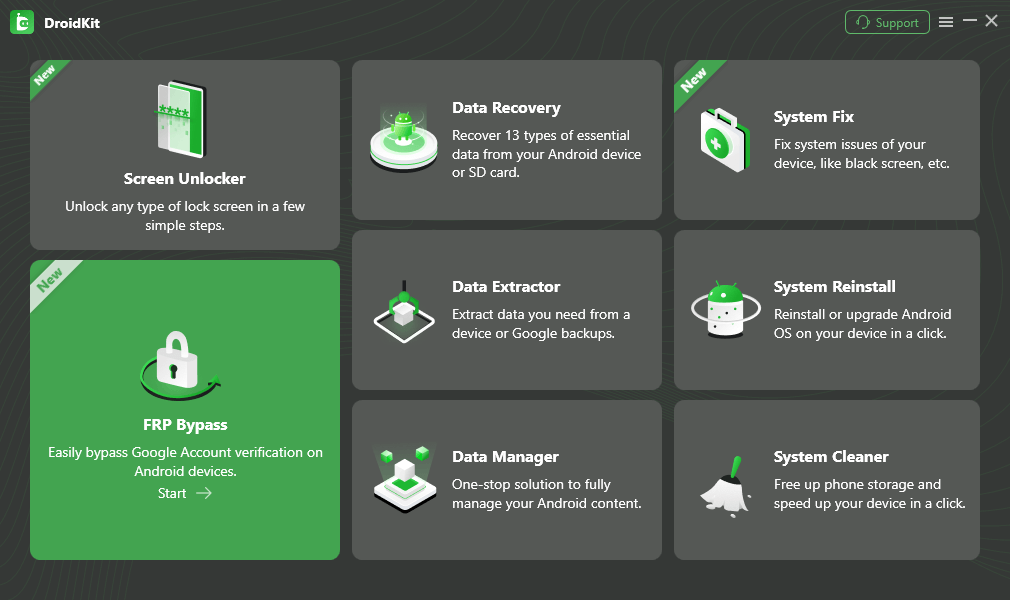
DroidKit FRP Bypass
Step 3. DroidKit will guide you in selecting your device brand. Choose Samsung from the list and confirm its detailed information.
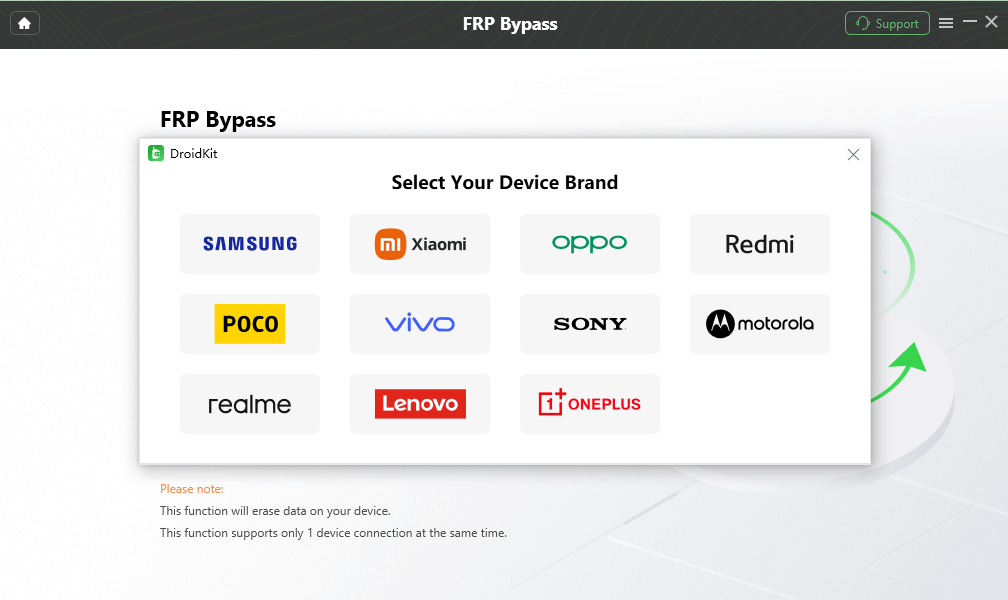
Select Correct Brand
Step 4. DroidKit will download a customized configuration file for your Samsung A40. Make sure your internet connection is stable during the process.
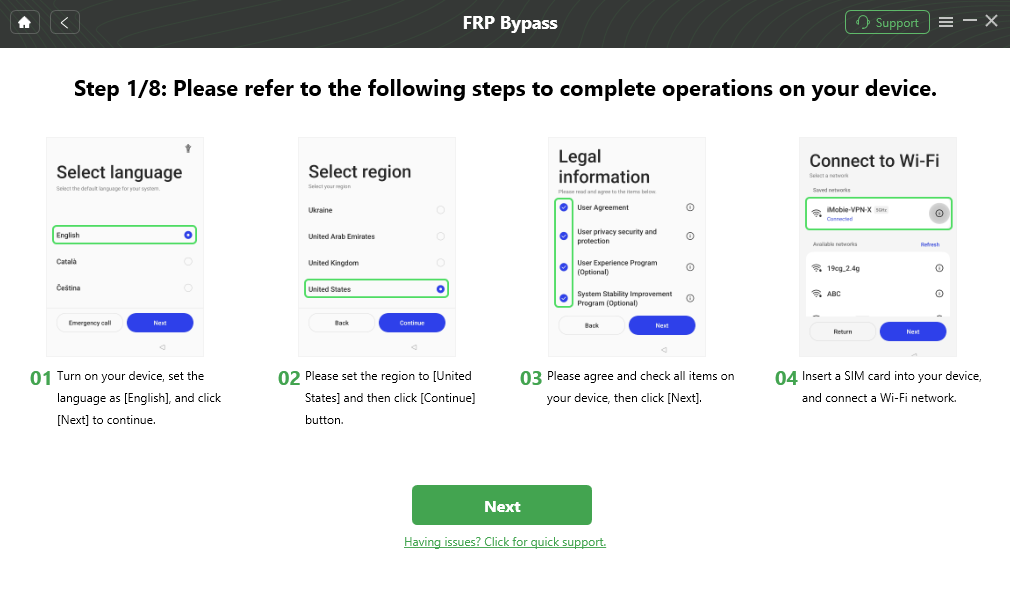
Follow the Bypass Steps
Step 5. Put your Samsung A40 into recovery mode as the instructions displayed. Then follow the guides to finish FRP bypass on your Samsung A40.
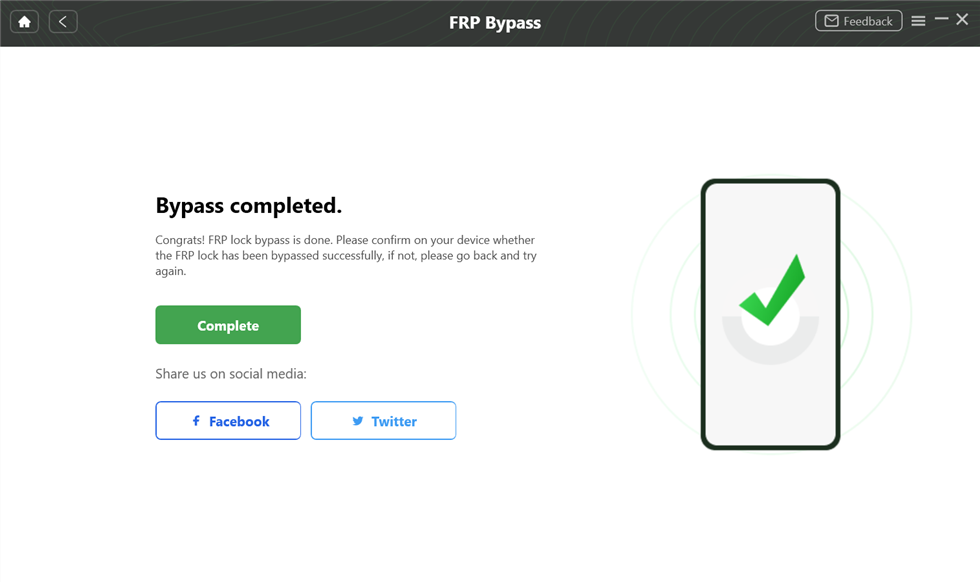
FRP Bypass Complete
DroidKit is pretty easy to use although the FRP bypass is always complicated. It’s the best choice for new beginners. If you are bothered with the Google account verification on your Samsung A40, don’t hesitate to try DroidKit and set you free.
Bypass FRP on Samsung A40 Using Odin
The second way to bypass Google account on Samsung A40 is by using Odin. It is Samsung’s proprietary tool used for flashing firmware on Galaxy devices. By flashing custom or modified firmware, you can bypass FRP and other locks on the Samsung A40. This tool is intended for advanced users.
Key Features:
- Firmware Flashing: Install customized or official firmware to modify the device’s behavior.
- Low-Level Access: Works at the system level to override existing locks.
- Compatibility: Fully compatible with Samsung devices.
Steps to bypass Samsung A40 FRP with Odin:
Step 1. Download Odin, the FRP bypass firmware, and Samsung USB drivers from trusted sources.
Step 2. Install Samsung USB drivers on your computer to ensure a stable connection.
Step 3. Put Samsung A40 in Download Mode:
- Turn off the phone.
- Press and hold the Volume Down + Home + Power buttons simultaneously.
- When the warning screen appears, press Volume Up to enter Download Mode.
Step 4. Open Odin on your computer and connect your Samsung A40 using a USB cable. Wait until Odin detects your device (you’ll see an “Added” message).
Step 5. In Odin, click the AP button and select the FRP bypass firmware file. Ensure only “Auto Reboot” and “F. Reset Time” are checked in the options.
Step 6. Click Start to flash the firmware. Wait for the process to complete. The device will reboot, and the FRP lock will be removed.
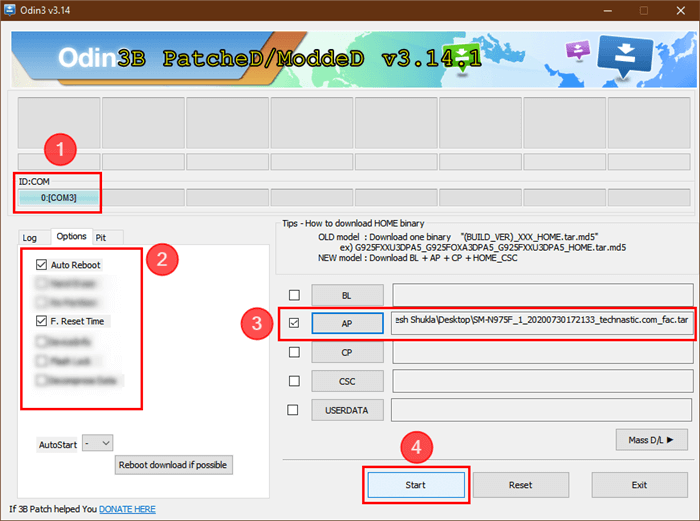
Bypass FRP on PC with Odin
The Odin FRP bypass tool requires some technical skills for the users. If you can’t understand how it works, it’s better to use it with caution.
Samsung A40 FRP Bypass Without Computer
The last method allows you to bypass FRP on Samsung A40 without a computer. This method leverages a vulnerability in older Android versions or Gboard to bypass FRP directly on the device. It’s ideal for users who lack access to a computer or prefer a device-only solution.
Key Features:
- No Software Needed: Works entirely on the device.
- Quick Access to Settings: Uses system apps like YouTube or a browser to navigate to device settings.
Steps to bypass FRP on Samsung A40 using Google Keyboard:
Step 1. On the FRP lock screen, tap the Email or Phone field to activate the keyboard. Tap the gear icon (Settings) on the keyboard.
Step 2. In the settings menu, select Help & Feedback. Search for “Use Morse Code” and select the relevant article.
Step 3. Tap on any link in the article to open YouTube.
Step 4. From YouTube, click on the profile icon in the top-right corner and navigate to Terms & Privacy Policy. This will open a browser. Type Settings in the search bar and access your device settings.
Step 5. In the settings, navigate to Backup & Reset and perform a factory reset.
Step 6. Upon reboot, set up the device as new without needing a Google account.

Go to the Help Page from Google Keyboard Settings
Using Google Keyboard to bypass FRP on Samsung does not require a computer, but it can be less reliable on devices with the latest updates or security patches. Moreover, you may need several attempts to succeed with this method.
FAQs About Samsung A40 FRP Bypass
1. Can I use Talkback to bypass FRP on Samsung A40?
Yes, Talkback can be used for FRP bypass in certain cases. By activating Talkback and using specific gestures, you can access the settings menu and proceed to bypass the FRP lock.
2. How to unlock Samsung A40 FRP before factory reset?
To unlock FRP before a factory reset, ensure you remove the Google account associated with the device from the Settings > Accounts menu. This will disable FRP.
3. Can I use hard reset to bypass Samsung A40 FRP?
No, hard reset Samsung does not bypass FRP. It only erases the data on the device. The FRP lock will remain active unless the Google account is removed beforehand.
Conclusion
Bypassing FRP on the Samsung A40 can be accomplished using DroidKit, Odin, or the Google keyboard method, each catering to different user needs and technical expertise. Whether you prefer a software-driven approach, flashing firmware, or a computer-free solution, these methods are available to use. For an easier Samsung A40 FRP bypass with a high success rate, DroidKit is recommended for its reliability. Download it now and enjoy seamless FRP bypass on Samsung A40.
Free Download * 100% Clean & Safe
Product-related questions? Contact Our Support Team to Get Quick Solution >


