How to Set up SD Card for Android
Need more storage on your Android devices? Learn how to set up an external SD card as internal storage for your Android devices. Compatible with Android 6, or Android 9 and higher.
If you tend to save tons of things on your Android devices and often run out of space, it’s good news that many Android devices support external storage devices to be used as their internal storage. Either you are a big fan of music, or you are obsessed with taking photos, install apps on SD card, you will be able to set up an SD card to increase storage for your Android device.
In this article below, we will introduce to you: the concept of “adoptable storage”, how to use an external SD card as internal storage for your Android device, and how to set it as the default storage.
How to Use SD Card for Android
Now let’s go through these topics below!
What is Adoptable Storage?
Adoptable Storage is the term used by Android to describe the concept of using an external storage device as its internal storage.
When you set up an external storage device as the internal storage, Android will format and encrypt it, and save randomly generated encryption keys in its original internal storage. In this way, your information is safe and secured.
How to Use SD Card as Internal Storage on Android
The first thing you need to do, to use an SD card as internal storage on your Android device, is to make sure you get a nice SD card that has good performance. Choosing the wrong SD card may slow down your device when it’s “adopted”. But don’t worry! When you set it up, Android will do a check and tell you if your SD card lowers the performance of your device.
Next, if you have stored any data in your SD card before, make sure it’s backed up, as Android will erase the content on it before “adopting” it.
Finally, when you are ready with a proper SD card, you can set it up as the internal storage on your Android device. Here are the steps to do so:
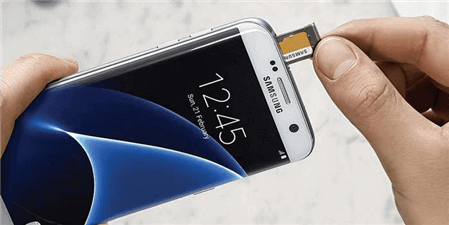
- Insert your SD card into the MicroSD slot on your Android device.
- When it’s detected, a new window will pop up. Tap “SET UP”.
- Tap “Use as Internal Storage” when prompted.
- Now you can choose to move data from the original internal storage of Android to your SD card immediately, or you can do it later.
- Choose “Move now” to start the data migration right away.
- Choose “Move later” to delay the data migration. You can move the data later in Settings: Go to Settings > Go to Storage & USB > Tap the device name and then tap the menu > Select “Migrate data”.
Simple and easy! Now your SD card is set up as the internal storage of your Android device.
Further Reading: How to View Files on SD Card on Android >
How Do I Set My SD Card as Default Storage on Android?
After you set up your SD card with the above steps and move your apps to it, your SD card should already be the default storage for your Android device. But if not, you can check and set it in Settings. Here’s how:
- Go to Settings.
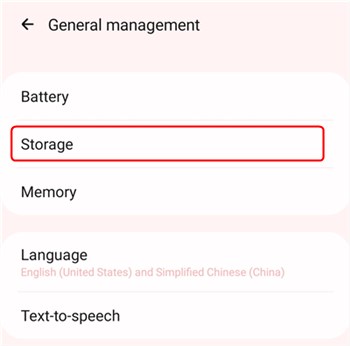
- Scroll down to find Storage and tap it.
- Under DEFAULT WRITE DISK, select External SD card.
Set Up SD Card on Android Phone
Some Android devices don’t have the option to choose an external SD card as default. This is due to system version differences and is to protect your information security.
Done! Now your items should be automatically saved to your SD card.
Bonus Tip. How to Recover Deleted Files from SD Card
It is sad for you to lose precious documents and important files on your Android phone. Don’t worry anymore; if you want a quick and effective way to recover deleted files from sd cards, then DroidKit is the best solution that you can rely on. It is a professional tool that will easily get your lost files back to your Android device.
When it comes to the issue of recovering deleted files or formatted files, such as pictures from sd card android devices, DroidKit will give you the best results. You don’t need to have skills to use this tool. Within few minutes, you will be able to retrieve your files. Now you can follow the steps listed below to recover the deleted pictures from your SD card:
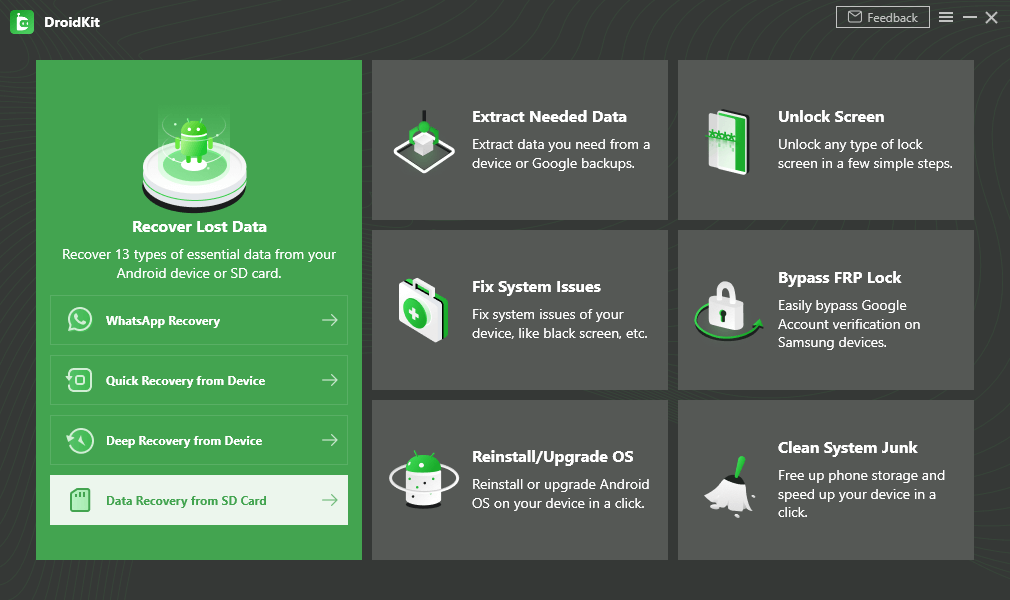
Step 1. Download and launch the DroidKit on your PC or laptop. Connect the SD card through a card reader. Now, select the “Data Recovery from SD Card” mode.
Data Recovery from SD Card
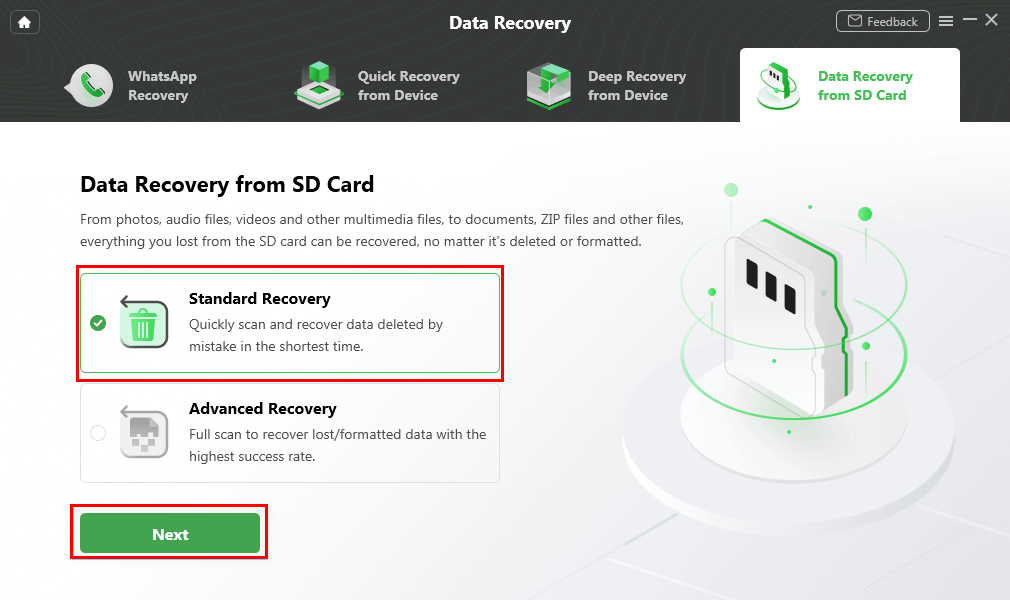
Step 2. Choose “Standard Recovery” to start the scanning process of the SD card > Tap on the “Next” option.
Choose Standard Recovery
Step 3. Here, select the SD card and click on the “Next” option.
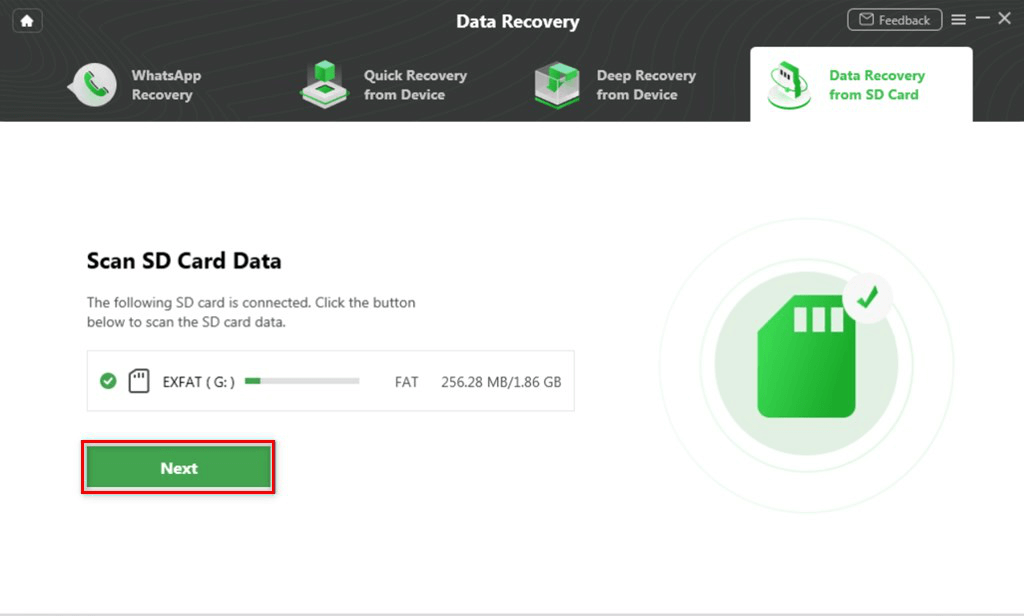
Scan SD Card Data
Step 4. Wait for the SD card scanning > You can preview and recover all data as you need.
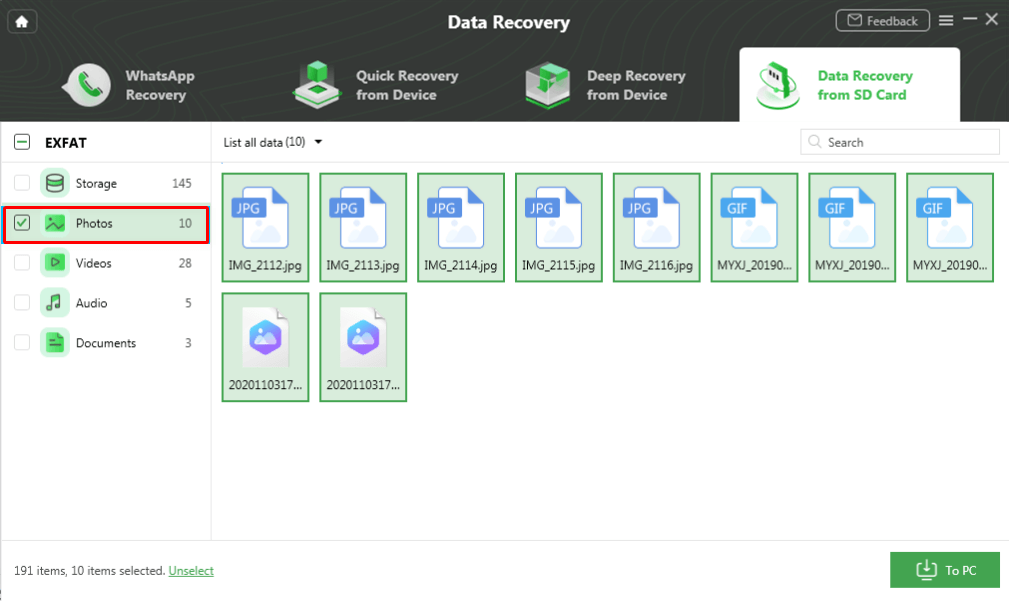
Recovery All Data from SD Card
Finally, after a few minutes, you will be able to recover deleted pictures from your SD card.
Conclusion
Have you successfully set up your SD card as the internal storage on your Android device? Please feel free to contact us if you still have any questions relevant to this issue. We’re happy to help!

Joy Taylor


Member of iMobie team as well as an Apple fan, love to help more users solve various types of iOS & Android related issues.
Screenify
AnyEnhancer
FocuSee
Vozard
AnyMiro
AnyMirror


