How to Flash Samsung Phone with Easy Methods [2025]
Do you also encounter the error or bugs on your Samsung device and want to fix this error? If that’s the case, keep reading to know how to flash Samsung phone in no time!
Flashing a phone will update your phone to a different operating system version, and it is one of the ways to fix many system issues like a Samsung black screen with a broken system, a bricked Android phone, massive application crashes, etc.
A full flash means that all of the data, components, and files are erased, and a new OS version is installed. Therefore, it removes any errors or flaws that may be present on your device. It even gets to the bottom of impediments that are impeding the device’s usual operation. Flashing a custom ROM to your device is also a way that allows you to enjoy a different look and more features compared with the earlier OS. But also, you need to notice that flashing a phone may invalidate your phone’s warranty.
Read this guide to learn the efficient ways to flash Samsung devices.
What Should We Prepare for Flashing Samsung Phone?
Why do we need to flash a Samsung phone? People usually Flash Samsung Phones so they can change the firmware and interface to their Samsung Android Phone. However, flashing Samsung smartphones is not easy; various prerequisites must be met. This will ensure that the flashing goes smoothly. Here are a few things to think about:
Prepare 1. Check Battery Charging
When flashing your phone, you must maintain your device fully charged before starting. This is because it quickly depletes your phone’s battery. After all, it has to go through so many steps of booting, recovery, and resuming, all of which have a negative influence on your phone’s battery. Furthermore, if your smartphone is turned off during flashing, you may end up with nothing but a bricked device.
Prepare 2. Back-Up your Data
It is critical to have a backup of every component available on your phone because flashing will erase everything. So, whether it’s your photo streak, saved papers, text messages, phone logs, notes, or anything else, it should all be saved to your cloud storage or your PC.
Prepare 3. Basics of Flashing
Even if you are a rookie, you must understand the fundamentals of flashing. Similarly, we observed that it might delete any form of data and redirect to its previous state. As a result, every wrong move will brick your smartphone.
Prepare 4. Install Samsung USB Drivers
To ensure a proper connection, the correct Samsung USB drivers must be installed on your computer when you flash your device.
Now we know why people flash Samsung mobiles and things to keep in mind. Let’s jump to the next part on how to flash Samsung phone in no time.
How to Install and Flash Samsung Phone with Computer
Flashing is a time-consuming operation that can waste your time and effort. However, a method that can handle flashing with a single click, and is Samsung phone update software from DroidKit. With Reinstall/Update OS feature on DroidKit, you can reinstall or update your Samsung phone with a click. DroidKit is an easier and safer solution for Android firmware updates:
- No need to download ROM, find a flash tool, and then go through complicated operations as usual.
- DroidKit can match a secure official ROM for your device automatically, and install it with a click.
- No device root is required.
- No risk of being infected with viruses or malware.
- Aside from flashing your Samsung phone, DroidKit also provides you with Fix System Issues feature to solve app crashing, black screen of death, system download failure, etc.
Here’s How to Flash a Samsung Phone with Computer:
Step 1. Open DroidKit on Computer.
First, download and launch DroidKit on your computer, and select the Reinstall/Upgrade OS option.
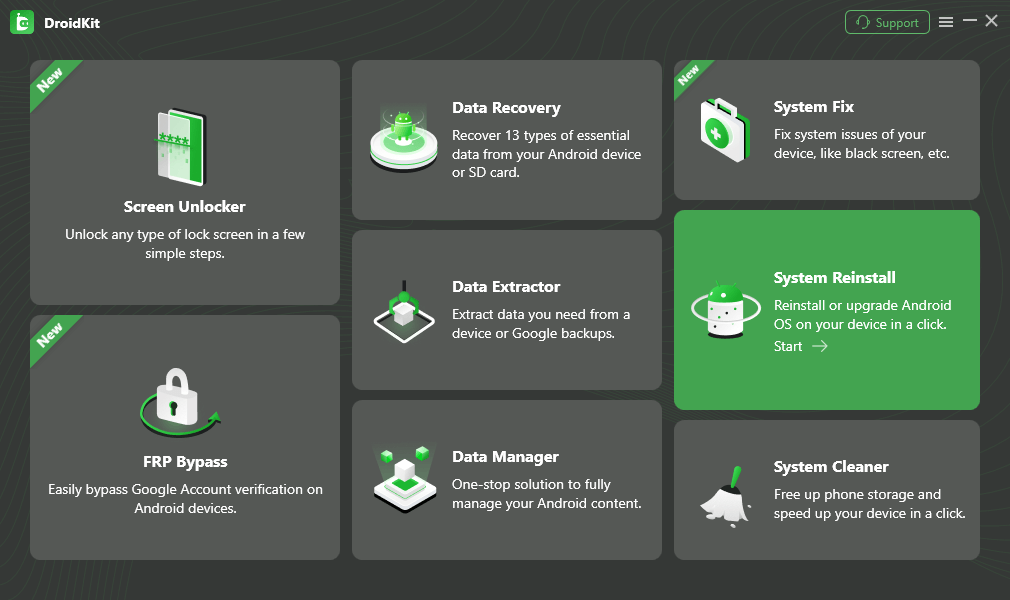
Choose System Reinstall
Step 2. Connect your Samsung Phone.
Connect your phone using a USB cable, and tap on the Start button.
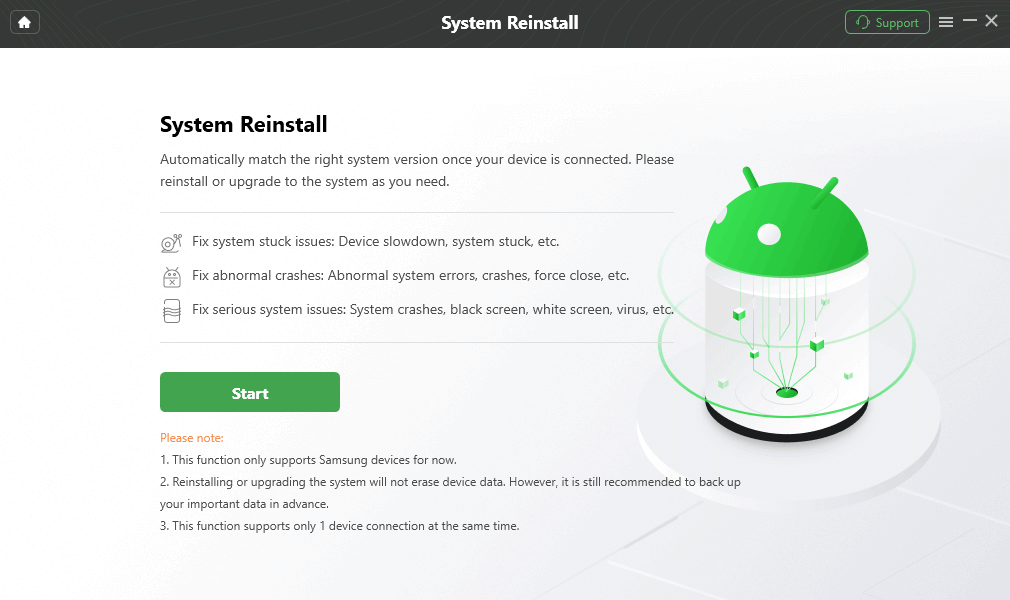
Click Start Button
Confirm your Samsung phone is connected, then click on the Next button.
Step 3. Start to Upgrade.
Now select the Samsung Android Version to download. After the Downloading is accomplished, tap on the Start to Reinstall button.
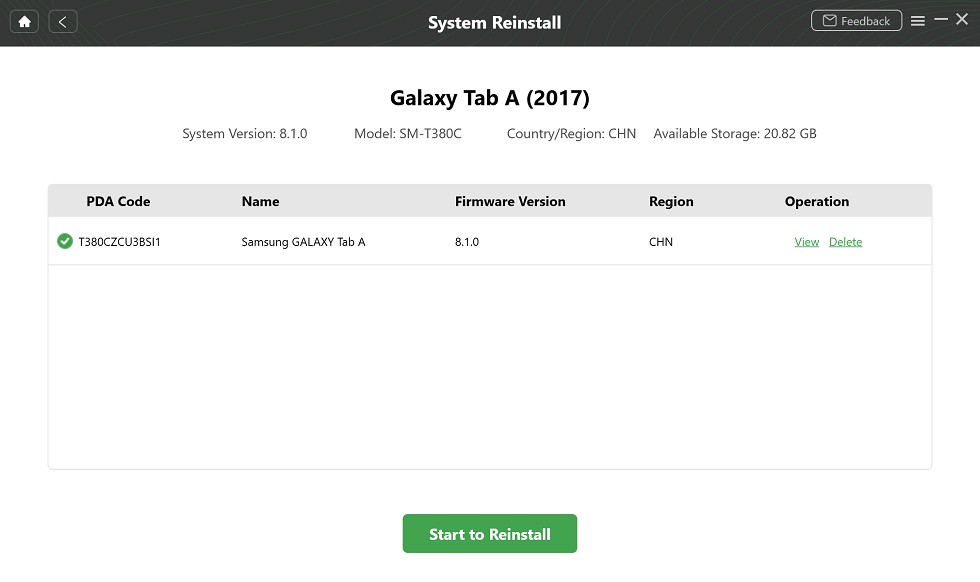
Start to Reinstall Android OS
Step 4. Put in Download Mode.
Now put your Android device in Download Mode and click on the Next button. After that, disconnect your device and reconnect it again to put it in Download Mode.
Step 5. Flashing Samsung Successfully and System Fixed.
Wait the upgrading process is finished and you are done!
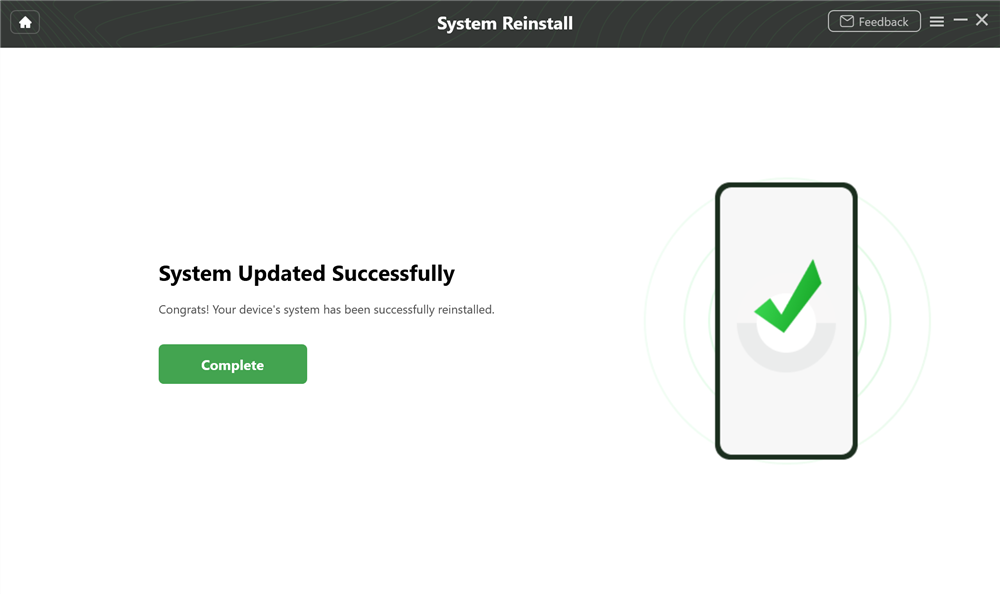
System Updated Successfully
How to Flash Samsung Phone with Odin
First, we’ll manually flash your mobile firmware with the Odin program, also known as the Odin Multi Downloader. Odin can be used to unroot, unbrick, restore factory settings, downgrade or upgrade the system, and so on.
Let’s jump right into the steps to flash custom ROM with Odin:
Step 1. Download and install “Samsung USB Driver” and “Stock ROM” on the computer.
Step 2. Now “Switch Off” your Samsung device in the download mode.
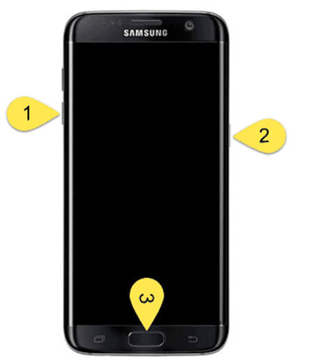
How to Put Device in Download Mode
Step 3. Once you enter the “Download Mode,” you will see a “Warning Yellow Triangle” screen and then press the “Volume Up” key to proceed ahead.
Step 4. Next, “Download” the “Odin” and connect your device with the computer via USB cable.
Step 5. Allow Odin to recognize the device automatically and display the “Added” message in the bottom left panel.
Step 6. Once the device is attached with Odin, click on the “AP” or “PDA” option followed by importing the “.md5” file.
Step 7. After that, tap on the “Start” button to flash your device.
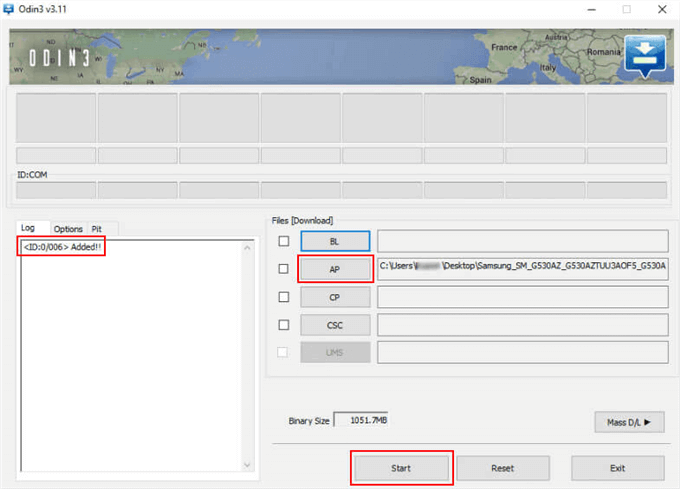
Tap on Start Button
Step 8. If you see a “Pass” message, then remove the USB cable and wait until your device “Restarts.”
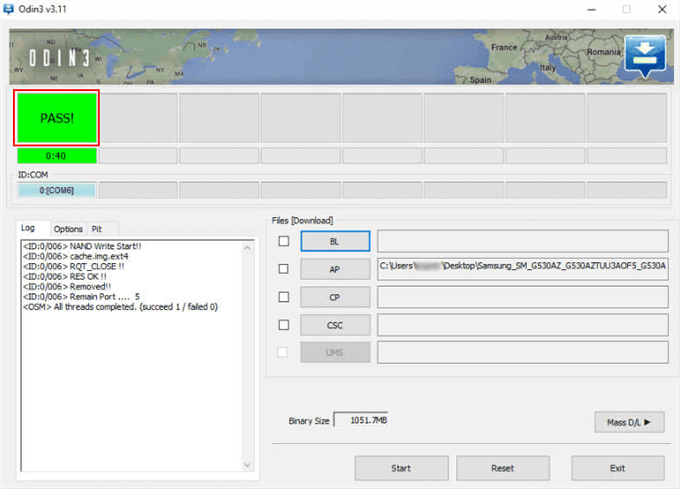
Odin Application Pass
The Bottom Line
Hopefully, now you can use the techniques provided above to flash custom ROM on your Samsung smartphone. You can flash a Samsung phone with Odin and a Samsung phone update software on your computer. Download DroidKit to update your Samsung right now. If you have any troubles with the process or if your device has any issues during the flashing process, please let us know in the comments section below, and we will do our best to assist you.

Roger Smith


Work for iMobie team for 5 years as well as an Apple fan, love to help more users solve various types of iOS or Android related issues.
Screenify
AnyEnhancer
FocuSee
Vozard
AnyMiro
AnyMirror


