How to Fix There Was A Problem Communicating with Google Servers
What if you got an error “there was a problem communicating with Google server” or “No connection: Couldn’t connect to Google server”? Read on this guide to get 9 easy ways to fix cannot connect to google server problem.
Google Account is used to sign in and connect with all the Google services, which provides a collection of Google apps and APIs with a great user experience. However, some users found that There was a problem communicating with Google servers after factory reset phone, when adding Google account, launching a Google app, etc. It means that you just could not sign in and can’t establish a reliable connection to the server.
Finding yourself cannot connect to Google servers means you can’t use any of the Google Apps, are unable to access your Google Drive to back up or restore Google backup, send an email to your super important client, or even find a Starbucks by Google Maps is unavailable, etc. Now, this article can help you to fix the problem of communicating with Google servers and successfully connecting to a Google server.
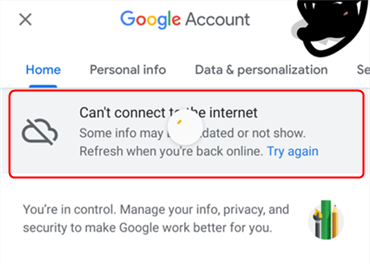
Phone Keep Saying Can’t Connect to Server
Why my Android Say Cannot Connect to Server?
There was a problem communicating with Google Servers usually because of internet problems, you can first simply restart your phone. And, there are some other reasons that can cause Google server issues:
- Google Two-step Verification: sometimes it not only prevents other phones and Apps from using your account but makes trouble while connecting to your account. How to remove Google account after factory reset >
- WiFi is connected, but no internet access can cause the server connection to fail.
- Besides, corrupted cached data, the contents of the Host file, and other unknown factors can also play a part.
Whatever it is, it can be hard to pinpoint the extracted error that underlies the problem, so here we offer you 9 efficient but non-tech-friendly solutions to root out the possibilities.
You can follow the troubleshooting steps below and fix there was a problem communicating with the Google server:
1. Fix Internet Connection Problems on Android
First, please make sure you have a strong internet connection. If your Google account can’t connect to the internet, It’s best to fix a bad WiFi network, or Android WiFi is connected but no internet. And, signs of bad connections are: Downloads progress bar remain at 0%, Google Play is stuck on the loading screen, the web page can not be uploaded normally.
And, you can fix cannot connect to Google servers due to the bad internet connection below.
- Restart your phone: Press and hold the Power button until the menu pops up > Hit the Power off or Restart option for your device to turn on again.
- Turn on airplane mode then off: Go to Settings and choose Network & internet or Connections > Airplane Mode > Turn on airplane mode then off.
- Switch WiFi on and off: Settings > Network & internet or Connections > Switch off WiFi and switch on mobile data.
- Reboot WiFi router: Unplug the router > Wait for the seconds and plug the router again till all the lights are on.
2. Remove and Re-add Google Account
Step 1. Open your phone’s Settings app and tap Accounts > Choose the Google account you want to remove then hit the Remove account option.
Step 2. Go back to Settings > Accounts > sign in to your Google account again. You may be asked to enter your phone’s pattern, PIN, or password for security, just follow the pop-out message to re-add your account.
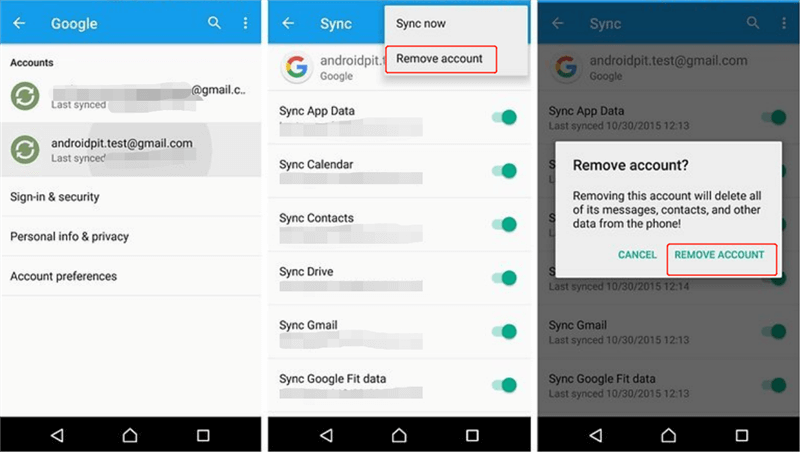
Remove and Re-add the Account
Further Reading:
3. Turn Off Two-factor Authentication
Step 1. On your Android phone open your device’s Settings App Tap Google and then Manage your Google Account.
Step 2. In Security find “Signing in to Google,” and then tap 2-Step Verification.
Step 3. You might need to sign in. And just tap Turn off.
4. Clear Cache and Data from Google Services
Step1. Launch the Settings app on your phone > Tap Application > See all apps.
Step 2. Scroll down and tap Google Play Store or Google Play Services > Tap Storage > Choose Clear Cache or Clear Data.
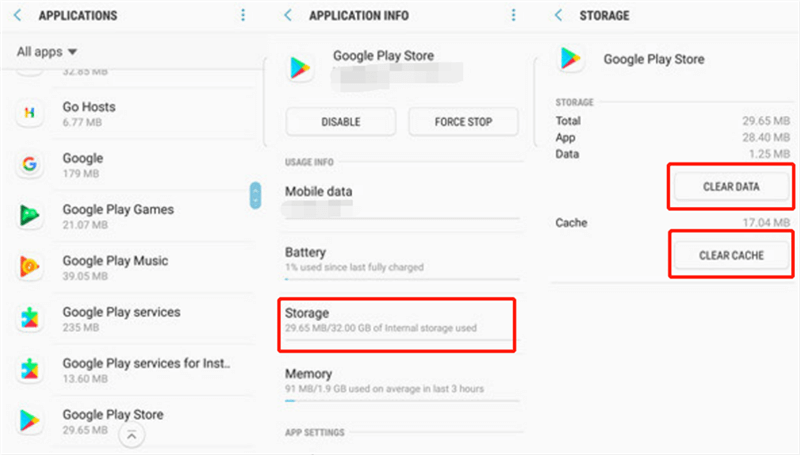
Clear Cache and Data from Google Services
5. Correct Date & Time Android
You can make your device synced with the Google servers by correcting the date and time on your phone.
Step 1. Open Settings and click the System option.
Step 2. Find Date & Time.
Step 3. Tap Change date & time and Set time zone automatically.
Step 4. Choose Use location to set time zone.
6. Repair Android System Problems
iMobie DroidKit provides you an Android system repair tool to fix the system issues like firmware upgrade encountered an issue, downloading…do not turn off target error, Samsung black screen, etc. If you couldn’t sign in there was a problem communicating with Google servers, maybe you can try to fix system glitches with iMobie DroidKit. The ROM downloaded and installed on your device when fixing the problem is definitely official from Samsung. No need to root your phone. Here are the steps:
Step 1. Get iMobie DroidKit installed on your computer > Click Fix System Issues.
Free Download * 100% Clean & Safe
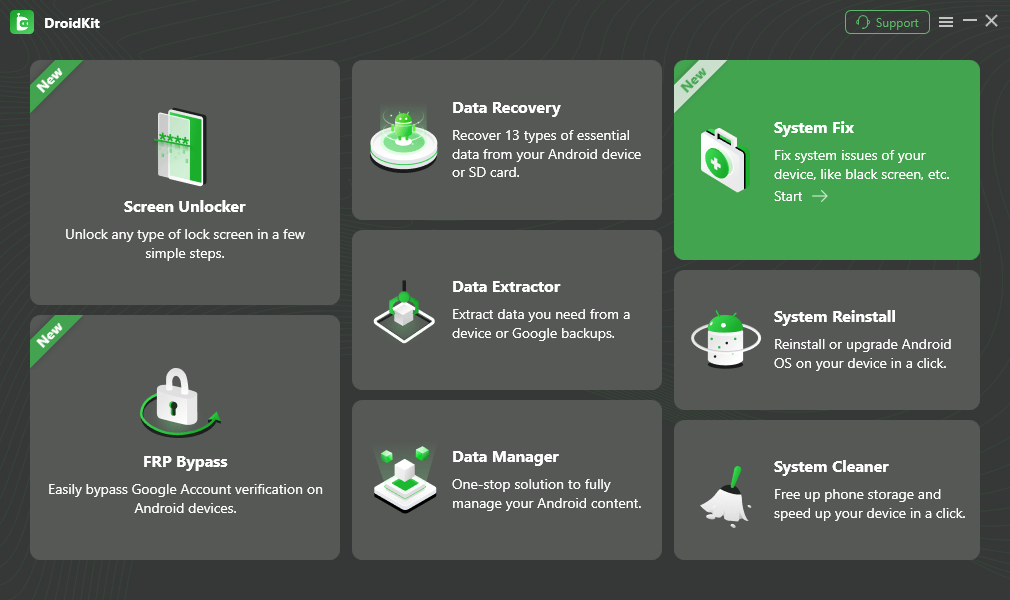
Click System Fix Function
Step 2. Connect your Android and Start.
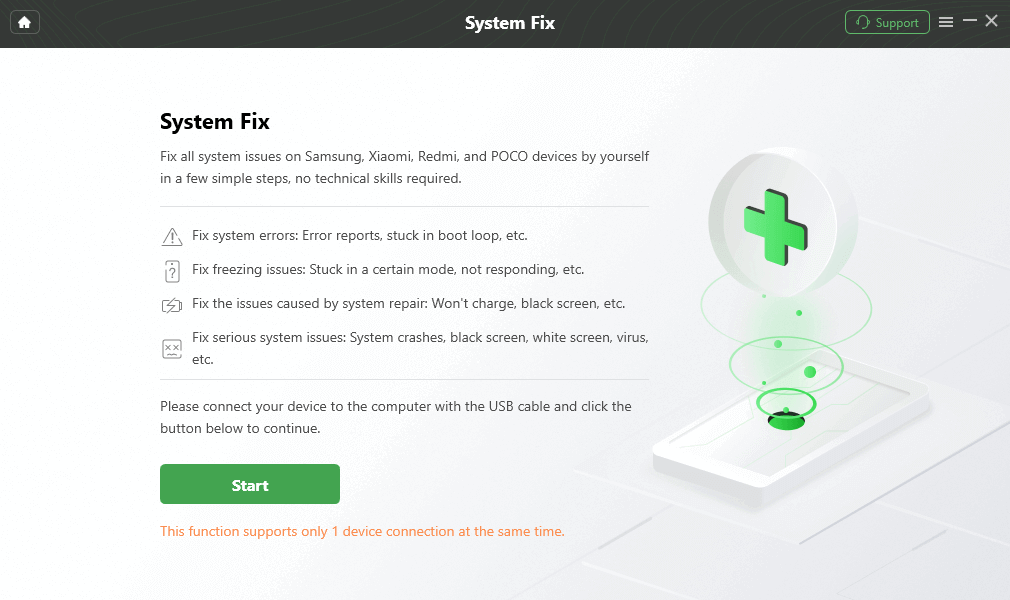
Start to Repair Samsung Phone
Step 3. A matching PDA code will be entered automatically > Click Download Now to get the firmware > Click Fix Now.
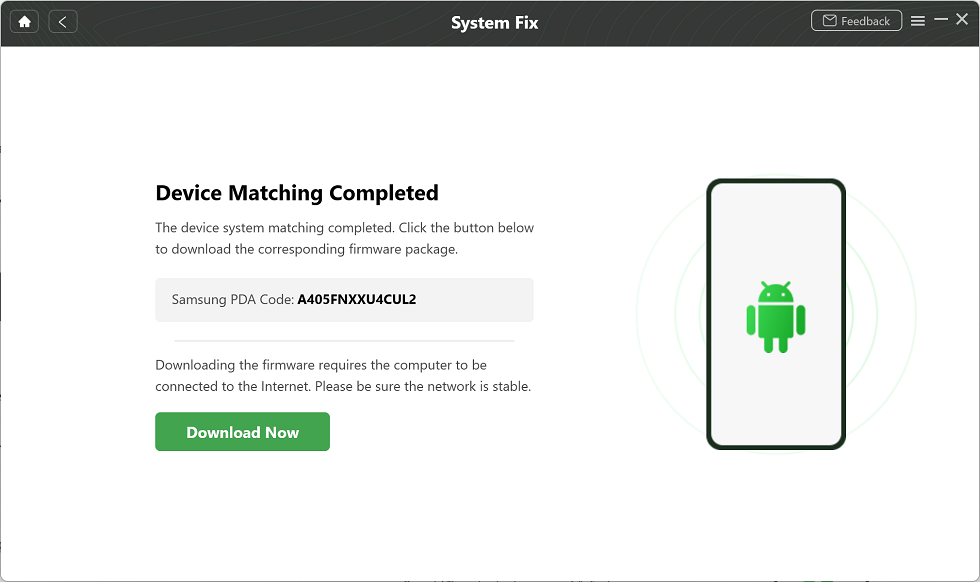
PDA Code Matched
Step 4. Follows the on-screen instructions to put your device into download mode > Repairing process will start. Later, you will get the System Fixed Successfully page.
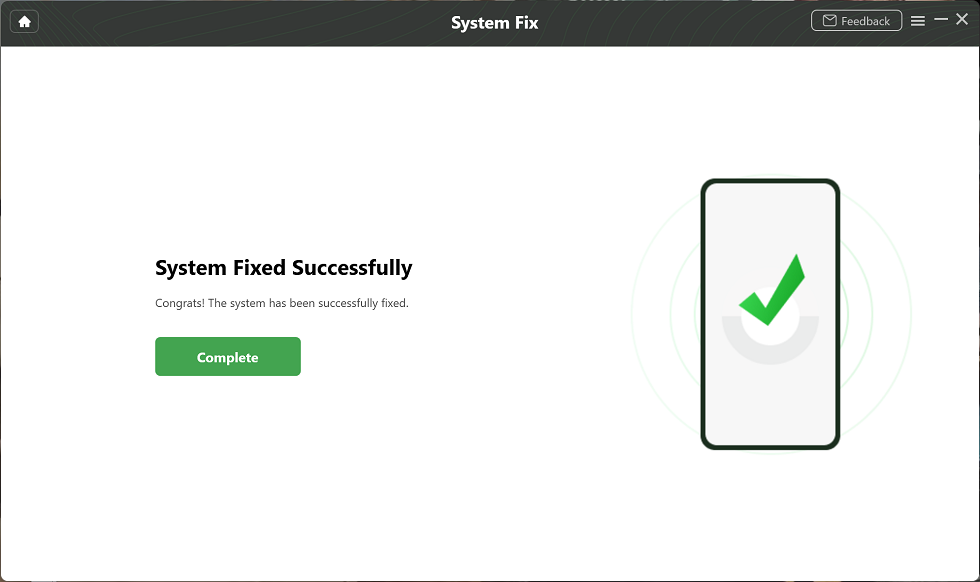
Completing the Repair Process
7. Make Sure Google Services is Up to Date
The latest Google services should be updated and bugs fixed. To check if your Google services are up to date:
- Open the Settings App then tap Apps & notifications to see all apps.
- Scroll down and tap App Details.
- Check if there is any app that needs an Update.
And, you can Reinstall Google Play Services by:
- In Settings find Apps > Select Google Play Services. You may need to tap the drop-down menu on the top to see All Apps.
- In Google Play Services tap Menu > Choose Disable > Tap OK.
- Back to Setting and Apps > scroll to find google services then click on it.
- Click on the Enable button and wait for the downloading process to complete.
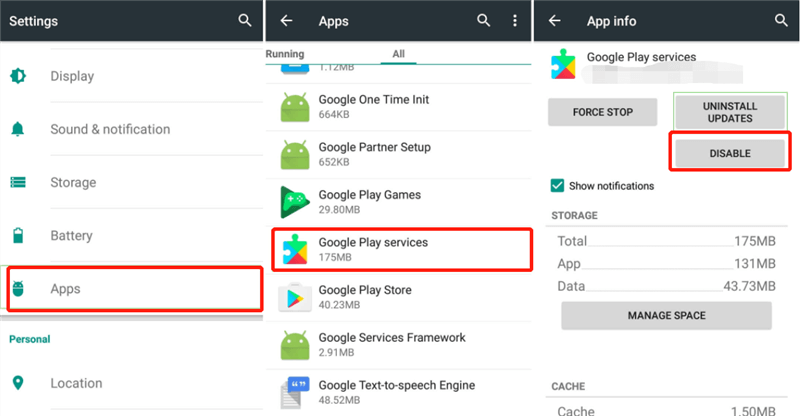
Reinstall Google Play Services
8. Update Host Files
This solution works on a rooted phone, if you aren’t sure whether your phone is rooted or not, or if you are not a techie, this may be a bit hard for you. But you might as well get a basic understanding of this method.
To update host files, you need to enable Unknown sources from Security to allow for the downloaded apk from a website. Then visit apkmirror.com to download the latest version of the ES File Explorer and install it. Launch ES File Explorer and toggle on Root Explorer. After that, you need to find the Hosts file from multiple folders and then open it in a text file form. The last step is to edit the host file and save the change. In this way, Google Server should be in a good condition on your device when adding the account.
9. Factory Reset
Step 1. From Settings, search for Factory data reset. Tap on it, and review the information. When you’re ready, tap Reset.
Step 2. If you have a security lockset on the phone, you will be asked to enter the credentials.
Step 3. To continue with the reset and delete all information stored on your phone, tap Delete all.
Step 4. Wait for your phone to reset. When it turns back on, it will start from the initial setup screen.
This feature will completely wipe your phone’s information and data, so make it your last option, and don’t forget to back up your data before performing a factory reset.
How Do I Connect to a Google Server?
When you are trying to use a Google product but can not connect to a Google server, you can try the method below:
- Open the Settings app on your phone.
- Tap the option for the app that you are trying to use.
- Choose the app information.
- Click the Menu option in the top right corner.
- Tap on show system.
- Find Google Services XXX and toggle it on.
The Bottom Line
That’s all for How to Fix Cannot Connect to Google Server with 9 useful ways. For this guide, if you have any questions or you have worked out other solutions, feel free to send us an email or leave comments in the below section. We will reply to you ASAP.
Product-related questions? Contact Our Support Team to Get Quick Solution >

