5 Proven Methods to Transfer Photos from PC to Android
In this article, we’ve explored 5 proven methods to transfer photos from PC to Android. Every method has its unique benefits. And they offer flexibility for every user’s unique needs. So utilize these strategies to manage your photos effectively across devices.
“How do I transfer photos from PC to Android phone?” This is a question that everyone encounters at least once in a lifetime. And if you are having this trouble right now, take a breath and put your worries to rest. Because we’re here to turn your photo transfer quest into a walk in the park!
This guide will explore five proven methods to transfer photos from PC to Android. From Bluetooth magic to handy apps, we’ve rounded up all the best ways here. So let’s start this photo-sharing journey together!
Further Reading: Here are some other guides to help you transfer Android data.
Transfer Photos from PC to Android in Simple Clicks
Getting your beloved photos from your PC to your Android shouldn’t be arduous. And with the help of some professional tools, it certainly isn’t. Moving forward, DroidKit – Android Phone Toolkit is the only tool that comes to mind when we talk about Android handling matters. It is a versatile and user-friendly Android management tool, specially designed to make your life easier. With this tool, you can transfer all your precious photos from PC to Android in simple clicks and you can also take care of all your Android data. Moreover, all the photos will be kept in the original quality. Most importantly, DroidKit uses the most advanced encryption technology to ensure that your photos will not be leaked to anyone and ensure your privacy. The following are some of the main features of DroidKit in data transfer and management.
- Manage and transfer all – All your photos, videos, contacts, music, WhatsApp data, etc., can be transferred from computer to phone and vice versa with this tool.
- As simple and fast as possible – no technical requirements. You can easily transfer photos and other data with the click of a button. The entire transfer only takes a few minutes.
- Allow selection – DroidKit allows you to view all photos or other data and select the really important ones to transfer. Avoid letting junk files take up device memory.
- Compatible with all Android devices – It supports all Android devices and brands, such as Samsung, LG, Google Pixel, Huawei, Xiaomi, Redmi, etc.
Besides, with DroidKit, you can also unlock your Google account and screen lock if you forget the password, fix system issues like black screen, recover your lost important data, and more.
Now just free download DroidKit and let’s see how you can transfer photos from PC to Android in simple clicks.
Step 1. Launch DroidKit on your computer. Then select the Data Manager mode from the opening interface. Then connect your device to the computer.
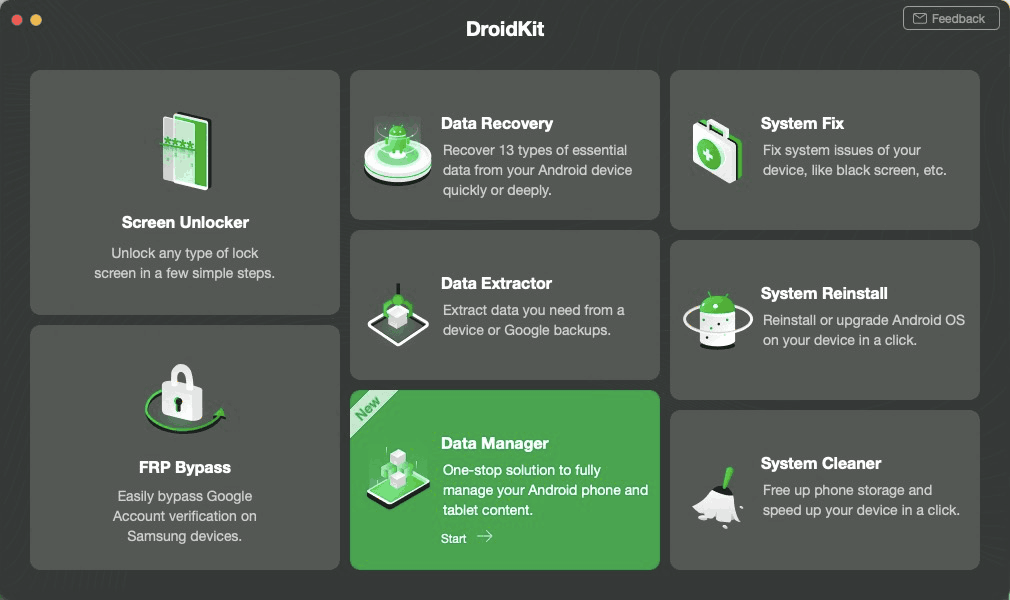
Choose Data Manager Function
Step 2. When DroidKit recognizes your device, click on the Add Content option.
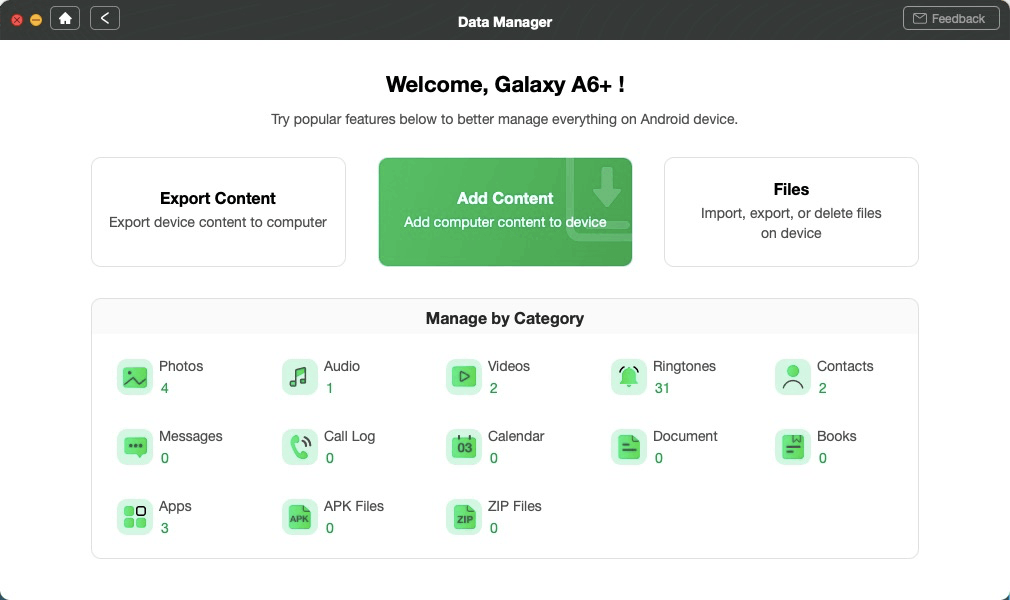
Click Add Content Button
Step 3. A browse screen will be opened. Select the photos you want to transfer from PC to Android and then click Start.

Choose Any Photos You Like to Transfer
Step 4. Now wait until DroidKit transfers the selected photos to your Android device.
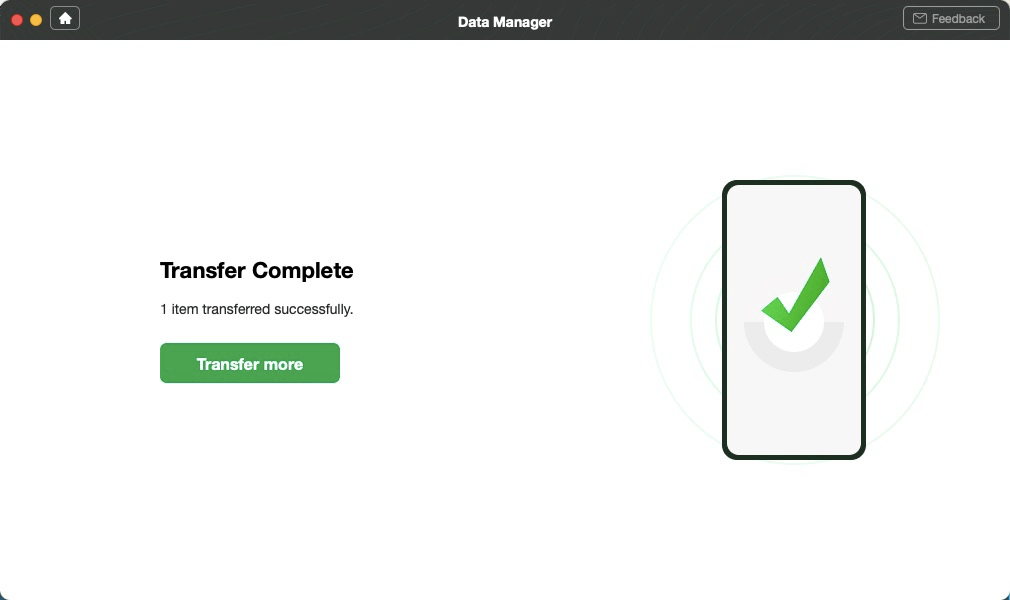
Photo Transferred Successfully
Transfer Photos from PC to Android Wirelessly
In an increasingly wireless world, why should transferring photos stay behind? Our second method uses time-tested Bluetooth technology. It’s a universally available, reliable, and cost-free method to transfer your photos quickly!
Here’s a step-by-step guide on transferring photos from PC to Android wirelessly.
Step 1. Ensure Bluetooth is “turned on” on your PC and Android device.
Step 2. Pair the two devices. Go to your PC’s Bluetooth settings. Click on “Add Bluetooth or other devices.” Now select your Android device from the list of available devices.
Step 3. Once paired, go to the location of your photos on your PC. Select the ones you wish to transfer. Then right-click, and choose “Send to > Bluetooth device.”
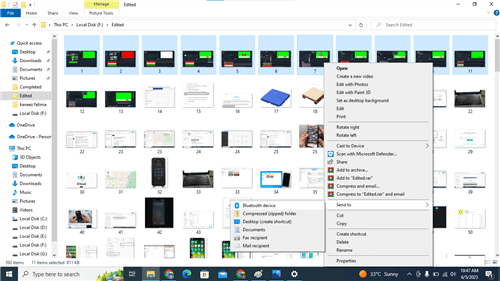
Choose Send to Bluetooth Device
Step 4. Select your Android device from the list. Now hit “Send.”
Step 5. You’ll receive a file transfer request on your Android device. Accept the request to start the photo transfer.
Voila! You have successfully transferred your photos from your PC to your Android device. While a bit slower, Bluetooth transfer offers a wire-free convenience that can’t be matched.
However, if you’re looking for a faster & more direct method, we still have a trick for that. Let’s see it.
Transfer Photos from PC to Android via USB Cable
There’s a certain simplicity and dependability in using physical cables. And wireless methods cannot match it. In the case of transferring photos, the good old USB cable can be a reliable ally. It is a method that requires no internet connection. Moreover, it works regardless of your operating system. And the transfer rate is generally quite fast.
Let’s explore how you can do this. Follow this step-by-step guide to understand how this process works.
Step 1. Use a USB cable to establish a link between your Android device and your PC.
Step 2. On your Android device, tap on the “Charging this device via USB” notification.
Step 3. Select “File Transfer” under the “USB Preferences” prompt.
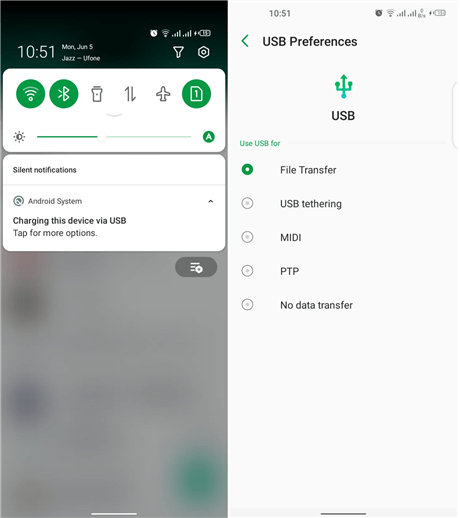
Select File Transfer
Step 4. The storage of your Android device will now appear on your PC. Open it, and locate the “DCIM” folder. Your photos are usually stored here.
Step 5. Simply drag and drop your photos into your Android device’s “DCIM” folder. You can also copy/paste all the photos into the DCIM folder.
Easy, right? No fancy software, no internet, just a simple & reliable process. Now, let’s see a method that leverages the power of cloud-based technology.
Transfer Photos from PC to Android with Google Photos
Our fourth method makes use of the brilliant Google Photos. It’s a cloud-based service that serves as a platform to view & organize your photos. But the story doesn’t end here! You can even use Google Photos as a tool to transfer photos between devices. And the best part? You can access your photos from on any device and at any time! Here’s how you can transfer photos via Google Photos.
Step 1. Navigate to Google Photos on your PC through your browser. Ensure you’re logged in to your Google account.
Step 2. Click on the “Upload” button. You’ll find thiis button at the top right corner.
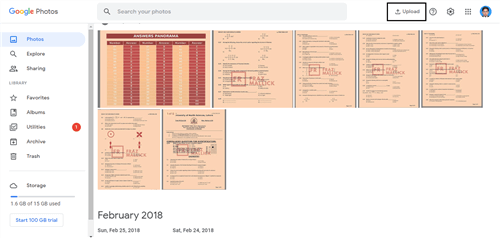
Click on the Upload Icon
Step 3. Now select “Computer” and choose the photos you wish to upload from your PC. You can also drag-n-drop your photos onto this page.
Step 4. Once your photos are uploaded, open the Google Photos app on your Android device. Ensure you’re logged into the same Google account.
Step 5. You’ll find your photos in the “Photos” tab. You can also choose to download them onto your device if needed.
And there you have it! Your photos are now transferred from your PC to your Android device using Google Photos. Now your photos will remain stored in the cloud, freeing up space on your devices.
Transfer Photos from PC to Android with E-mail
Simple approaches can often deliver the most efficient & satisfactory results. And transferring photos from PC to Android via email certainly stands testament to that. Not only is it straightforward, but it’s universally accessible. This process requires nothing more than a working email account, which is something we all possess.
Let’s dive into how to use email for photo transfer. We’ve outlined a step-by-step manual for you to simplify this task.
Step 1. Open your email account on your PC and compose a new email.
Step 2. Attach all the photos you want to transfer to this email. You can do this by clicking the “Attach files” button. And then, select the photos from your computer.
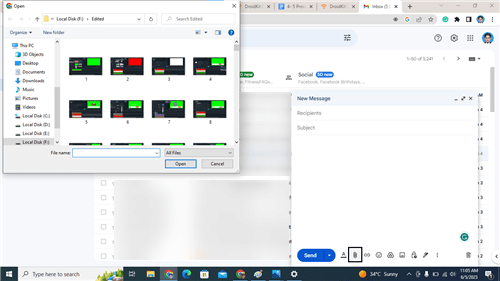
Click Attach Files
Step 3. Enter your own email address at the receiver end and send this email.
Step 4. Go to your Android device and open this email.
Step 5. Now tap on the download button.
This way, you can transfer your photos from PC to Android devices using nothing more than your email account. This method is especially handy when you only have a small number of photos to transfer. And also when you don’t want to bother with cables or additional software.
The Bottom Line
Are you still tangled while transferring photos from PC to Android? Worry no more! With the right tools & guidance, you can easily move your favorite photos from PC to Android. We have discussed 5 different methods to achieve this feat. Whether you prefer DroidKit’s simplicity or the traditional methods like Bluetooth, it’s all about choosing the most comfortable method for you. And remember, if you have too many photos to transfer, DroidKit must be your reliable partner to do that at the highest speed. Just try DroidKit for free and make the digital world a bit easier!

Joy Taylor


Senior writer of the iMobie team as well as an Apple fan, love to help more users solve various types of iOS & Android-related issues.
Screenify
AnyEnhancer
FocuSee
Vozard
AnyMiro
AnyMirror


