Pair Apple Watch to New iPhone (iPhone 13 Included)
Get a new Apple Watch series 4 or get a new iPhone. And don’t know how to pair Apple Watch with iPhone? Read this step-by-step guide to connect Apple Watch to your new iPhone XS (Max)/XR/X/8/7/6s.
No matter you want to replace your old iPhone with a new iPhone, or get a brand new Apple Watch 2/3/4 to eliminate the first generation of Apple Watch when getting the new device, the first thing you need to do is to pair a new Apple watch with iPhone.
About how to pair Apple Watch with iPhone, this is not a tough task, all you need to do is following the screen prompts to set it up step by step. If you are new to iPhone or Apple Watch, it is still necessary to follow a detailed tutorial. In this post, we will show you how to prepare for pairing iWatch, what devices can be paired with iWatch, and how to pair Apple Watch with iPhone.
Part 1: Apple Watch Supported iPhones: Which iPhone can be Paired to iWatch
In this year, Apple released Apple Watch Series 3 with the cellular feature, which tried to work without iPhone. You can make a call or send a message directly with Apple Watch Series 3. Therefore, this means even if you are working with an Android phone, you still can have an Apple Watch. If you are getting an Apple Watch Series 3, you can choose to not connect your Apple Watch to iPhone, absolutely, you still can. Just read on to learn how to repair Apple Watch Series 3 with your iPhone.
If you are working with an old Apple Watch, like the first Apple Watch and Apple Watch Series 2/3. Fortunately, both of them have to work with iPhone and have the same requirement – the iPhone 5 later. In other words, you can connect Apple Watch to your iPhone, if you are using any one of the following models,
- iPhone 5/5s/5c
- iPhone 6/6s (Plus)
- iPhone 7 (Plus)
- iPhone 8 (Plus)
- iPhone X
- iPhone XS/XS Max/XR
- iPhone 11 series
- iPhone 12 series
- iPhone 13 series
If you are working with any iPhone mentioned above, you don’t need to consider compatibility and just follow us to make preparation for connecting iWatch to iPhone.
Part 2: Prepare for Pairing Apple Watch to iPhone
Before starting setting up and pairing iWatch with your iPhone, you need to do several things below firstly. By the way, this preparation is workable for iPhone, and the latest iPhone 13, and all Apple Watch models, like the first Apple Watch and Apple Watch Series.

How to Pair Apple Watch with iPhone
1. Ensure your iPhone is working with the latest iOS version. If your iPhone is not working with iOS 15, perform an upgrade on your iPhone now.
2. On you iPhone, go to Settings > Bluetooth > Tap on it to turn it on if it is off.
3. Make sure your iPhone is connected to Wi-Fi or a cellular network.
4. Turn on your Apple Watch. Press and hold the side button for seconds until the Apple logo appears. Here you can select your language.
5. Make sure both of your Apple Watch and iPhone are fully charged, keep them close together when you are pairing and syncing them.
Important Note: If you plan to pair your Apple Watch with the new iPhone, you’d better follow this guide to set up and activate new iPhone firstly.
Part 3: How to Set Up & Pair Apple Watch with iPhone
Step 1: Launch Apple Watch App on your iPhone.
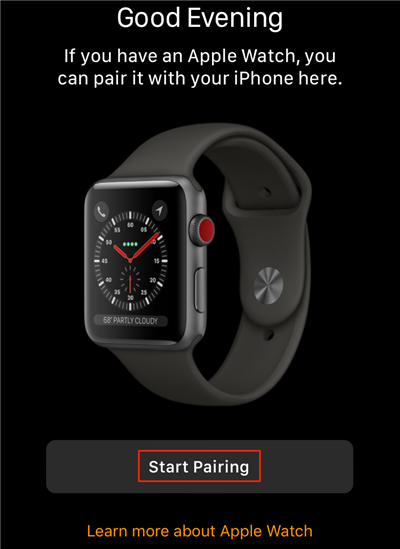
Set Up and Pair Apple Watch with iPhone – Step 1
Step 2: Tap on Start Pairing on your iPhone, and then a yellow box will appear in the center of your iPhone.
Step 3: Follow the instructions to aim the iPhone’s camera at your Apple Watch screen until a message tells Your Apple Watch is Paired.
If you fail to pair your Apple Watch with your iPhone automatically, you can choose to pair manually: Clicking an “i” on your Apple Watch screen > See the device name of your iWatch > Select your Apple Watch device name on your iPhone once it pops up.
Step 4: Set up and pick a wrist.
Set Up as New on your iPhone. If you have set up once before, you can tap Restore from Backup on your iPhone to proceed. And then pick up a wrist by clicking Left or Right on your iPhone, and read and agree to all the terms.
Step 5: Log in with your Apple ID and enter a bunch of buttons to proceed.
After login with your Apple ID, you will be asked to accept Siri, diagnostics, and approve your device via iCloud. You just need to tap on OK, because you have no options, and they are mandatory.
Step 6: Make a passcode for your Apple Watch.
On your iPhone, choose whether to make a password for your Apple Watch. There are three options for you: Create a Password, Add a Long Password, and Don’t Add Password, you can choose any one of them. If you choose to Create a Password or Add a Long Password, you will be asked to make a personal code via your Apple Watch.
Step 7: Decide whether your Apple Watch will unlock your iPhone.
It asks this question via a pop-up on the Apple Watch, says yes. What all means is that as long as your Apple Watch is on your wrist, it will stay unlocked. If you take it off, you will need to enter the passcode before using it. When your Apple Watch is on your wrist, unlocking your iPhone just once will also unlock the watch.
Step 8: Sync your Apps to Apple Watch.
Now you can choose whether or not to sync the watch versions of the Apps that you have already installed on your iPhone. If you choose no, you also can manually install them or other apps you like later with the Apple Watch app.
Step 9: Wait for syncing. When it is done, you can enjoy it.
The process can take 10 minutes or more, so you can leave your iPhone and nearby and plugged in, along with the watch.
The Bottom Line
If you ever unpair the Apple Watch, it will wipe the data and start over like a totally new Apple Watch. And you need to set it up again with the steps above. Absolutely, you also get a backup that is saved by iPhone automatically and contains the Settings, and customized watch faces (for safety, Apple pay data is not included) so that you can restore from it with ease.

Work for iMobie team for 5 years as well as an Apple fan, love to help more users solve various types of iOS or Android related issues.
Product-related questions? Contact Our Support Team to Get Quick Solution >
