How to Capture or Record Video from Website [Tips & Tools]
In today’s post, we will walk you through our comprehensive guide on how to capture a video from your favorite website using one of the best screen recording tools.
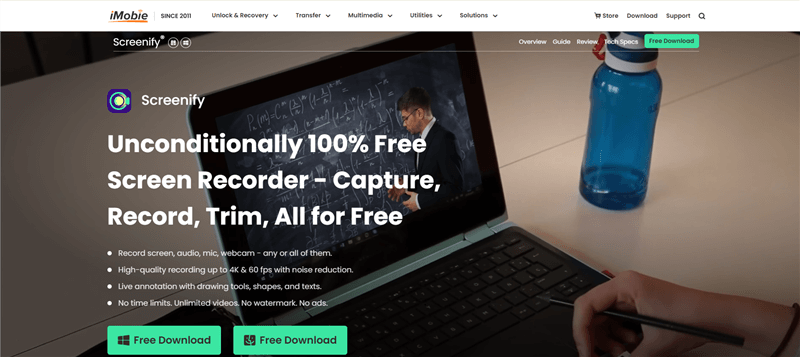
Screenify – Capture or Record Video from Website
Free download Screenify to record your screen on Windows or Mac. Supports recording full screen, specific screen, audio, camera, etc. Just record as you like!
Perhaps you found information, whether still or not, on a website on your computer screen that would be helpful in creating a walkthrough guide for your audience, sharing real-time feedback with clients on a specific product you are testing out, or any related activity, recording your screen is a cool thing to do. But what if you don’t have an idea on how it’s done? Then that’s where this post comes in handy. Here, we’ve compiled a detailed guide covering the various ways to capture compelling videos from a website using one of the best tools. Keep reading as we delve in!
Part 1. How to Record Video from Website
Below, we have the 3 ways to record videos from a website on your computer. Select any one of them that’s easiest for you:
Method 1: How to Use Xbox Game Bar to Record Video from Website
Designed specifically for Windows PC gamers, Xbox Game Bar is a pre-installed screen recording program capable of recording video from a website to your local file. It allows you to create a screencast of any content you find on a website together with the audio file. PC Gamers find this program helpful as it allows them to capture their gaming screen effortlessly. Besides video recording, you can also trust the Xbox Game Bar to help you create screen snapshots.
Steps to Record Video from Website Using Xbox Game Bar:
Step 1: Launch Game Bar on your computer by holding down the Windows + G icon. Alternatively, you can navigate to Settings, select Gaming > Game Bar.
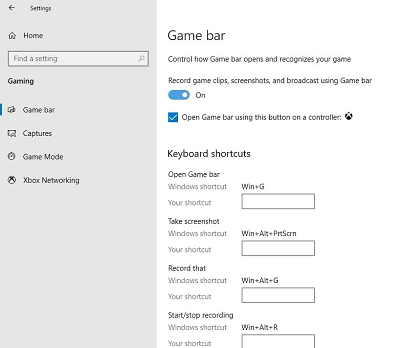
Xbox Game Bar
Step 2: Initiate screen recording by clicking on the Start Recording icon. If needed, reconfigure the device to include audio from a microphone or internally.
Step 3: Wait until the video recording is finished, then hit the Stop Recording icon to terminate the process and save the corresponding file to your local file.
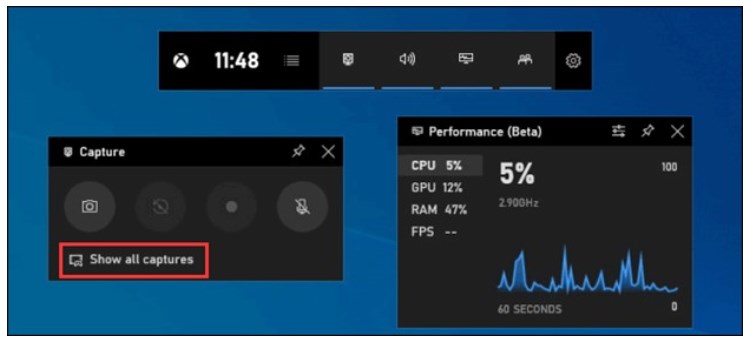
record video from website using xbox game bar
To preview your recording, go to the screen recording folder and start streaming without stress.
Method 2: How to Use QuickTime Player to Record Video from Website
QuickTime Player is the native music streaming app for macOS. It lets you playback your favorite music and playlist with minimal hassles. This system-based program also offers video recording. It lets you record your screen plus sound at the same time with lossless quality. User interface on this screen recording utility is easy, thanks to the simple interface and the straightforward tools and controls. Asides video recording, QuickTime Player allows you to perform editing on your recordings. Thanks to the built-in video editor.
Steps to Record Video from Website Using QuickTime:
Step 1: Head to the Application panel on your macOS and launch QuickTime Player from there.
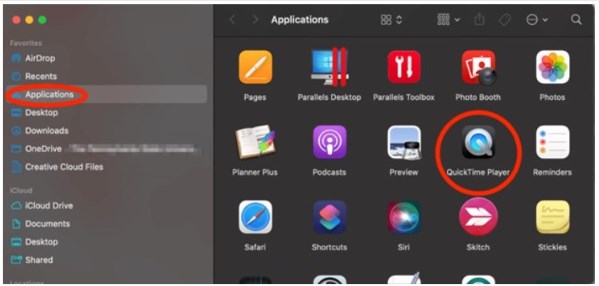
Quick Time
Step 2: Once the screen recording utility comes up, click on File and select New Screen Recording from the drop-down menu options.
Step 3: Next, hit the drop-down icon beside the Start/Stop Recording icon to customize your screen recording settings.
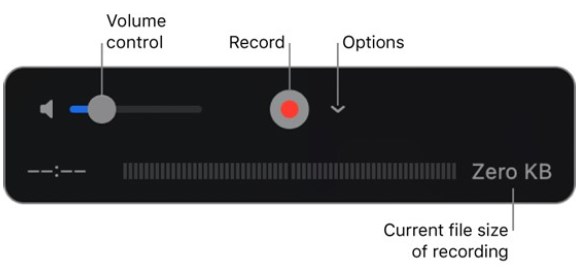
customize your screen recording settings
Step 4: Click on the appropriate icon to commence screen recording and wait until you are satisfied with the recording results. After that click on Stop Recording to end the video recording.
Method 3: How to Use Screenify to Record Video from Website
Most built-in video recorders are designed with limited functionalities such as support for specific output format, poor recording interface, and many others. In fact, the recording quality is sometimes shabby. To avoid all of these, it’s best to install a professional screen recorder like Screenify on your computer. This multipurpose software is dedicated to recording videos and audio simultaneously from your Windows or Mac screen with lossless quality. You can also include your webcam too.
Screenify Website Interface
It supports a series of recording options so you can record or capture your screen in any dimension you like. For instance, Screenify can record or capture your entire screen, specific portion of it or window. With the noise reduction function, Screenify can eliminate all background noise while recording your screen. It doesn’t end there, as the software integrates with nearly all third-party tools from video collaboration tools like Zoom to video/music streaming services like Netflix/Spotify, and many others. Screenify gives you total control of everything you find on your screen.
Free Download * 100% Clean & Safe
Key Features
- Screenify is capture of recording every detail on your screen including the cursor icon.
- Compared with other methods, it is much easier to operate. And it is 100% free.
- It powers one of the best video editing toolkits so you can edit your recordings and screenshots before publishing them.
- Easily export videos in 4K format high resolution format to your favorite website without losing quality.
- Recordings are readily available in your local storage space.
- The software enables you to import call-to-action stamps and customized watermarks on your recordings.
How to Use Screenify to Record Video from Website:
Step 1.Download and Install Screenify on Computer.
Step 2.Launch Screenify on your computer, and select Record screen mode.

Select Record Screen Mode
Step 3.Configure Recording Settings aims to configure settings like system audio before recording.
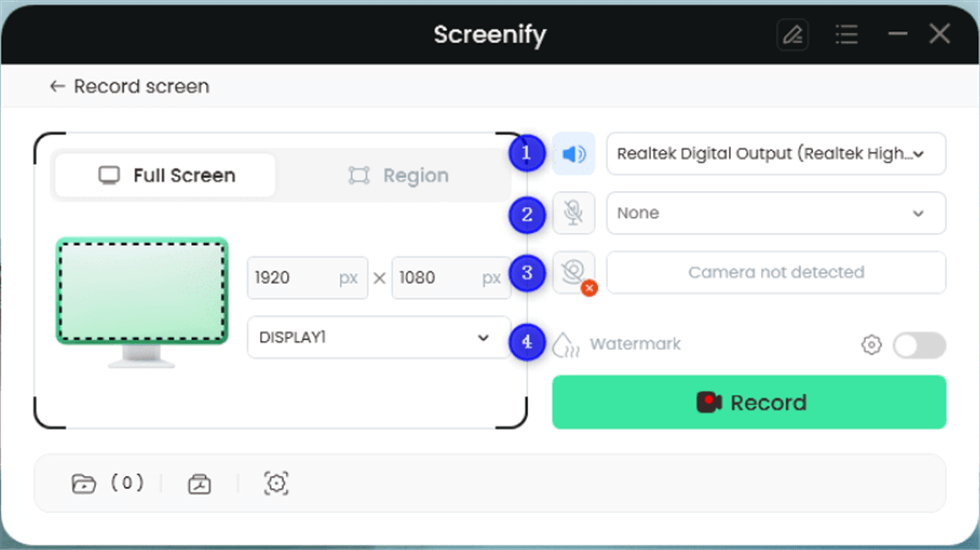
Record Setting
In this setting menu, you can:
1 Choose the System audio.
2 Choose the Microphone you want to record.
3 Choose the Camera you want to use.
4 Choose whether to add a watermark.
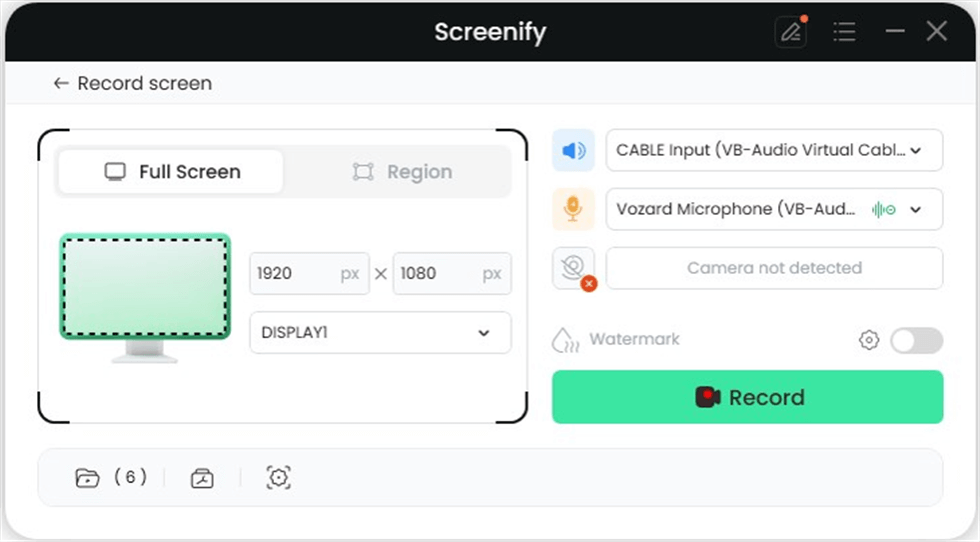
Step 4.Select Recording Screen.
Option 1. Full Screen Record
Please select Full Screen mode and choose the display you need to record. Hit Record button to initiate recording.
Full Screen
Option 2. Region Record
To record region, you need to manually select the recording area. After selection, you can still adjust the selected area. It supports customize selection, full screen, and proportional selection based on common social media dimensions.
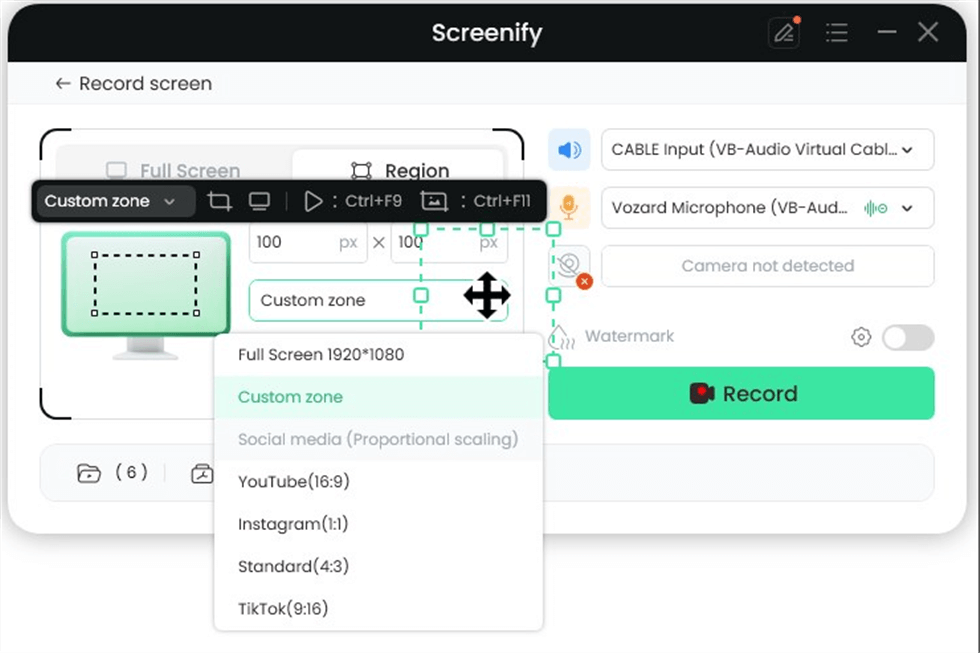
Record Region
Step 5.Wait for the Recording Countdown.
There is a 3-second countdown to help you prepare the recording after you are ready to start recording.
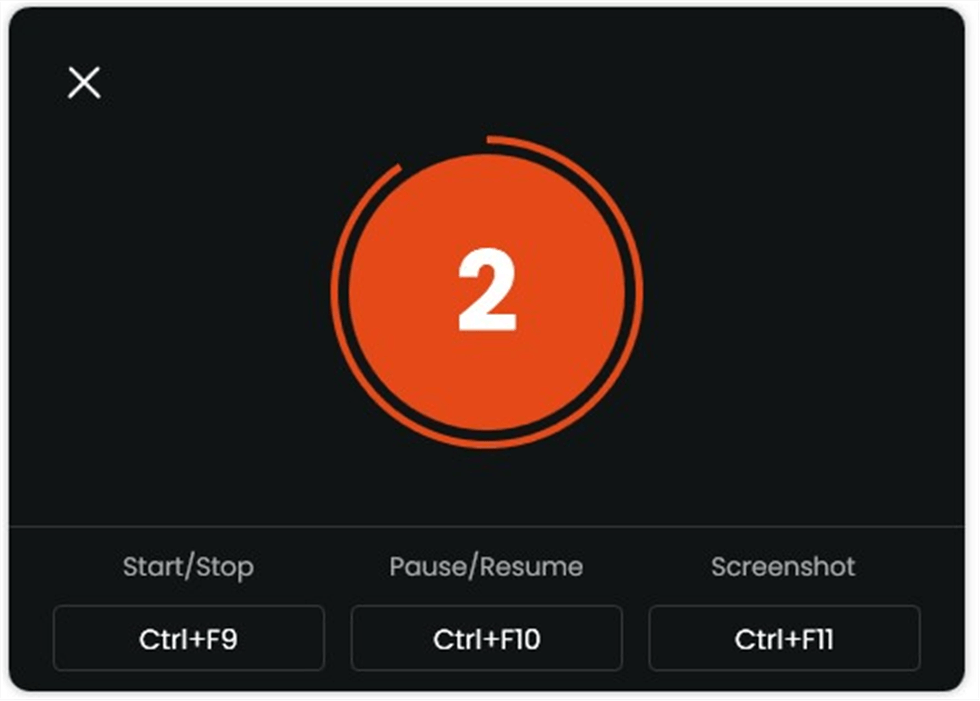
Start recording countdown
If you would like to see a recording countdown before your recording starts, you can enable the countdown option. Or you can tap it off. View this post to know how to set the countdown option.
Step 6.Start Recording.
The recording will begin after a 3-second countdown. You can make annotations on the recording interface during the recording.
Annotate the Screen during Recording
With the toolbar, you can add the annotation in the screen:
1 Brush: Draw freehand on the screen recording interface to highlight or illustrate specific areas during the recording.
2 Rectangle: Draw rectangular shapes on the screen recording interface.
3 Text: Add written notes or labels directly onto the screen recording interface.
4 Arrow: Draw arrows on the screen recording interface to point out and emphasize specific areas.
5 Line: Draw straight lines on the screen recording interface to underline or connect specific points.
Step 7.Record Screen Process Completed.
When the recording is completed, you can click the red Stop button to end the recording. Your recorded files will be displayed. From here, you can preview and manage the recorded content as needed.

Record Screen Process Completed.
Part 2. How to Capture Video from Website
If you are looking to take a screen capture of a particular video you find on a particular website on your screen, screen recording utilities like Screenify can come to your aid. The software lets you take too-notch video captures and works perfectly with popular computer operating systems such as Windows and Mac. It’s very simple to operate- thanks to the comprehensive interface.
Part 3. What’s the Difference Between Video Capturing and Recording from a Website?
Though both video capturing and recording are often used interchangeably, it’s crucial you know that there is a significant difference between them. Video capturing simply means taking a snapshot of a video clip in the form of an image file while video recording on the other hand involves filming a video and other moving images along with the audio simultaneously.
Part 4. Frequently Asked Questions about Record Video from Website
1. Can I capture streaming videos from websites?
Yes, you can. Though such an operation is a tough one to execute due to DRM restrictions on most streaming videos, you can always find your way around by employing the services of a professional screen recording solution like Screenify. This software is well-designed to cater for screen recording purposes. You can also use it to take a snapshot of your screen.
2. How to avoid black screen when recording websites?
Definitely, you would encounter a black screen when recording from a streaming website and that’s because most streaming services have integrated protection software to restrict end-users from copyright infringement. But with recent screen recording technologies like Screenify, such a problem can be avoided. Screenify screen recording utility is a brilliant tool that’s capable of bypassing the DRM restrictions on any streaming website so you can record your screen or take a snapshot of whatever you find noteworthy.
3. What formats can I save recorded files in?
Answering this question can be quite tricky as the type of recording formats you can save your recorded files depends solely on the type of screen recording utility you’re using. Like the QuickTime Player screen recorder introduced in the post above, it mostly captures in MOV format which is least compatible with most portable players. However, Screenify is more flexible when it comes to recording formats. It supports multiple formats so you have a variety of portable players options to stream from.
Conclusion
Taking video recording or capture from a website on your computer has never been easier than ever. With the guide above, you can take video recording and capture within the twinkle of an eye without spending a dime. All the procedures introduced are user-friendly. However, the most popular method is to use Screenify. Screenify is more comprehensive than the other methods and is 100% free. It also captures your screen at high-end resolutions, unlike the other methods presented.
Free Download * 100% Clean & Safe

Senior writer of the iMobie team as well as an Apple fan, love to help more users solve various types of iOS & Android-related issues.
Product-related questions? Contact Our Support Team to Get Quick Solution >
